

Donc, si l'un d'entre vous est SOL où les dates de production de votre véhicule tombe en dehors de SI B61 26 16, alors lisez la suite.
Mon véhicule montrait les symptômes classiques d'un mauvais câble de batterie, a secoué la boîte à fusibles et tout est venu à la vie. Voir mon thread :
http://www.m3post.com/forums/showthread.php?t1356590
Voici un simple DIY, enfin documenté. Je dois dire merci à  dmppdx pour avoir dirigé tout le monde, y compris moi-même, dans la bonne direction.
Commençons (FYI, je ne suis pas sûr des tailles Torx, toutes les corrections que je vais les éditer plus tard):
Ce dont vous avez besoin:
Prise 10MM
3mm ? Hex
Torx en différentes tailles (Ne vous souvenez pas des dimensions exactes)
Tournevis Phillips
sertissage hydraulique
Et, bien sûr, le câble 6112193133
OPTIONNEL: Support de plateau magnétique, facilite la vie.
Étapes:
1) Débranchez la batterie et laissez votre coffre ouvert. Si vous avez des sièges séparés, je vous recommande fortement de les rabattre au cas où. 
2) Retirez les porte-gobelets. Utilisez un outil de trim pour ouvrir doucement les onglets de compression
3) Retirez la boîte à gants. Il y a 6 boulons T25, quatre en haut et deux de chaque côté. Attention, attention aux 3 connexions (USB, lumière et coffre)
4) Retirez le sous-panneau. Il y a 2 boulons T25, un de chaque côté.
Note: Je ne savais pas que j'avais un briquet de cigarette supplémentaire utilisable 
Débranchez les connecteurs fixés au panneau inférieur
5) Déconnectez les connexions JBBF à l'avant pour faire plus d'espace. Appuyez sur la connexion et les choses de retournement blanc devraient glisser automatiquement.
6) Retirez les 4 boulons Torx, deux de chaque côté, de la boîte à fusibles. C'est un défi à relever, surtout ceux de gauche parce qu'ils sont bloqués par l'assemblage du ventilateur. Recommandez un tournevis flexible si vous en avez un. IGNORE les deux petits boulons Torx directement sur la boîte à fusibles. Une fois que tous les 4 boulons torx sont enlevés, la boîte à fusibles devrait facilement déloger
7) À l'arrière, cherchez des attaches zippées et coupez-les. Cela vous permettra d'avoir l'espace de travail nécessaire pour couper et sertir. Notez comment le câble de batterie rouge est acheminé afin que la boîte à fusibles puisse facilement revenir une fois que vous avez terminé.
8) À ce stade, vous devriez être en mesure de tirer la boîte à fusibles vers le bas, exposant l'arrière de celui-ci. Débranchez le câble de la batterie. Prenez votre nouveau que vous venez d'acheter qui a la vis hexagonale et faites une coupe de longueur appropriée. J'ai coupé la tête du vieux fil. J'ai oublié d'attraper une paire de coupe-fils, alors j'ai utilisé un ciseaux tranchant pour couper la veste et les fils de cuivre.
9) Prenez votre sertissage de fil hydraulique (j'ai utilisé 0 adaptateurs AWG) et sertir le câble existant nouvellement coupé avec celui de remplacement. J'ai utilisé un petit briquet BBQ pour chauffer le thermorétractable (soigneusement  ) Insérez le connecteur dans la boîte à fusibles et serrez le boulon hexagonal
10) Remontez tout et assurez-vous que vos fusibles ne se sont pas détachés pendant que vous luttiez contre la boîte. Rebranchez la batterie et prenez un verre.
103,1 kVIEWS
21REPLIES
30APPRECIATES
18/07/2026LAST POST
Can't believe the bmw dealer quoted you $2000 but I guess they would have guided a new cable harness from battery connector to junction box without any cut.
Would have been good to show a picture of your hydraulic crimp tool. To get an idea.
Would have been good to show a picture of your hydraulic crimp tool. To get an idea.
JoeM3SSII wroteYeah they wanted to run an entirely new wire. 11hrs of labor @ $199/hr plus the $120 partCan't believe the bmw dealer quoted you $2000 but I guess they would have guided a new cable harness from battery connector to junction box without any cut.
Would have been good to show a picture of your hydraulic crimp tool. To get an idea.
It's the one from harbor freight
Wow. The screw on the top of the left side of the fuse box is no joke. Anyone who is able to get that out must have some kind of magical powers.
So Glad this post came up. Been trying to piece together how to do this for months now. Could you explain how to remove the B+ wire from the back of the fuse box? It seems to have a plastic cover over it.
MTROUBLE93 wroteMine just popped out with a flat screwdriver. The new kit should come with one so if you have to pry it open and destroy it, the new one should fit right inSo Glad this post came up. Been trying to piece together how to do this for months now. Could you explain how to remove the B+ wire from the back of the fuse box? It seems to have a plastic cover over it.
I had to do this repair yesterday as my cable went bad on Saturday. The write-up is great and very helpful so thank you for posting it.
The top-left screw is difficult to get to and I found that the easiest way to do it was with a 1/4" drive universal, an extender going out to the ratchet and a deep socket with the small Torx T20 adapter in the other end. The screw is surprisingly far behind the blower bracket that is directly in your way of everything that you try to do.
Harbor Freight also sells a cheap cable cutter that worked perfectly in cutting and stripping the cable:
https://www.harborfreight.com/10-in-cable-cutters-61422.html
This was one of those jobs that took me about 2 hours the first time and could be done in significantly less time if I had to do it again.
The top-left screw is difficult to get to and I found that the easiest way to do it was with a 1/4" drive universal, an extender going out to the ratchet and a deep socket with the small Torx T20 adapter in the other end. The screw is surprisingly far behind the blower bracket that is directly in your way of everything that you try to do.
Harbor Freight also sells a cheap cable cutter that worked perfectly in cutting and stripping the cable:
https://www.harborfreight.com/10-in-cable-cutters-61422.html
This was one of those jobs that took me about 2 hours the first time and could be done in significantly less time if I had to do it again.
Thread referenced by eatsleepboost in Engine died while driving, bad battery or altenator? 06/11/2017
Nice DIY. I used this as a guide, thank you. Couple of things I learned:
- For removal of the 4 screws that hold the fuse box in place (step #6), I believe the screws are actually 3mm hex and not T20 Torx (though I can't find official documentation).
- For anyone who doesn't already know this repair is now covered for free under a recall.
- There are also two "snap in" tabs on the two upper screw holes that need to be pried out of place before you can pull the fuse box towards you.
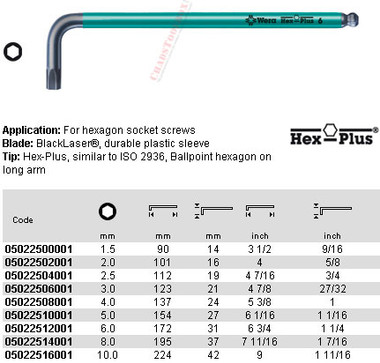
- I used the long side (123mm) with the ball end of the 3mm hex wrench pictured below to just barely reach the furthest screws with a straight shot, no extensions or adapters needed. Magnetize the end to better manage the screws as you uninstall/re-install them.
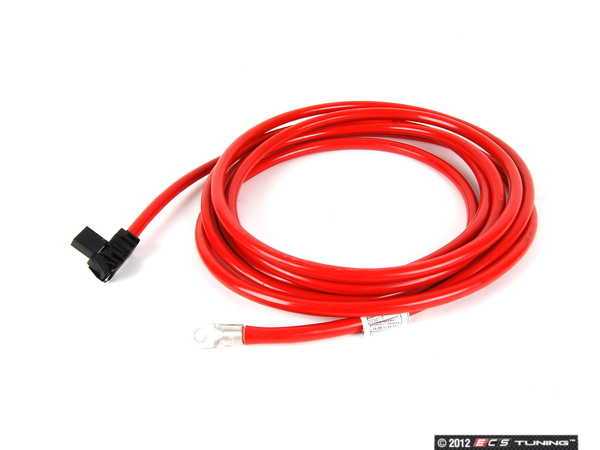
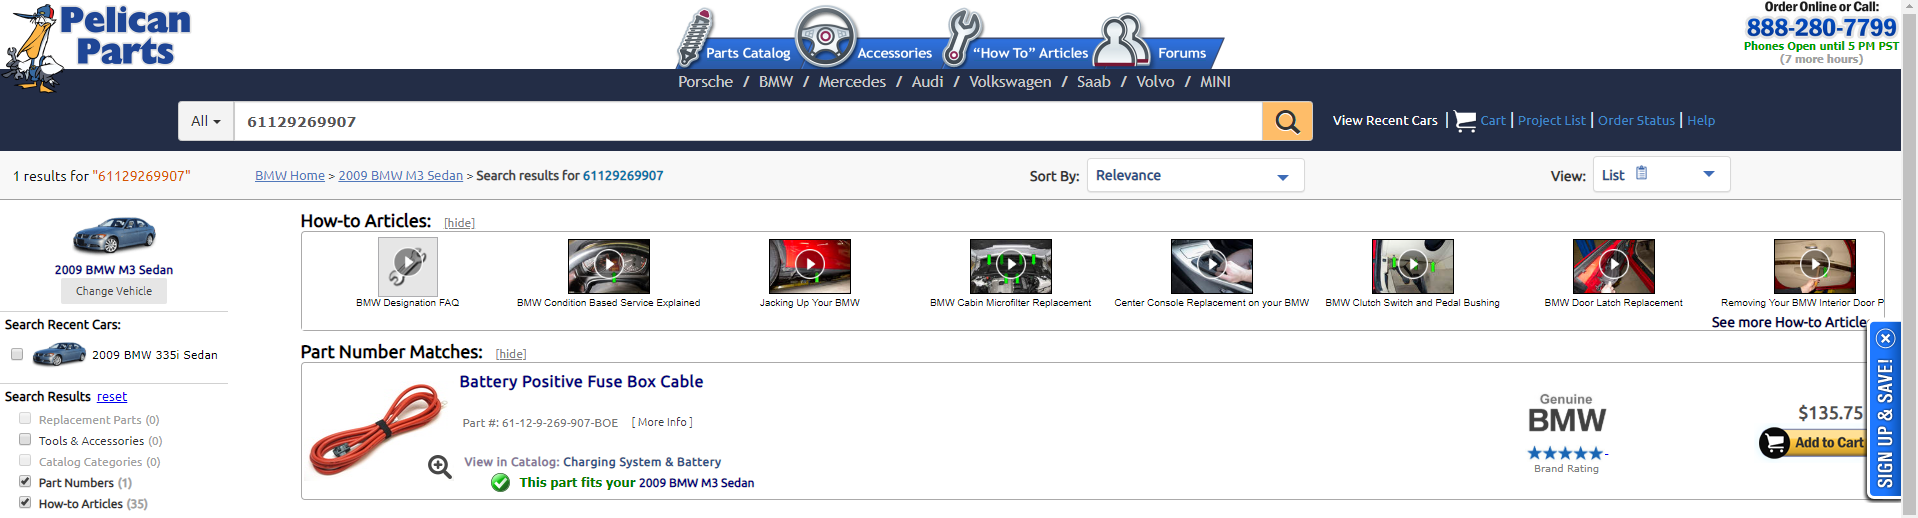
- If you choose to replace the entire cable (BMW Part# 61129269907) from the fuse box to the battery in the trunk, in my E92 coupe, the replacement cable ended up being about 6" longer than the original.
- For removal of the 4 screws that hold the fuse box in place (step #6), I believe the screws are actually 3mm hex and not T20 Torx (though I can't find official documentation).
- For anyone who doesn't already know this repair is now covered for free under a recall.
- There are also two "snap in" tabs on the two upper screw holes that need to be pried out of place before you can pull the fuse box towards you.
- I used the long side (123mm) with the ball end of the 3mm hex wrench pictured below to just barely reach the furthest screws with a straight shot, no extensions or adapters needed. Magnetize the end to better manage the screws as you uninstall/re-install them.
- If you choose to replace the entire cable (BMW Part# 61129269907) from the fuse box to the battery in the trunk, in my E92 coupe, the replacement cable ended up being about 6" longer than the original.
Theodore wroteI am 99.99% sure it is a T20 and not a hex. I did this recently (to correct the horrible recall work done by my local dealer) and looked at all the screws that came out.- For removal of the 4 screws that hold the fuse box in place (step #6), I believe the screws are actually 3mm hex and not T20 Torx (though I can't find official documentation).
The dealer's handiwork:
There were several things the dealer failed to do in accordance with BMW's instructions for the recall. They did not use the zip tie to hold the repair cable to the fuse box, they kinked the battery cable (as seen in the photo), they did not insert the battery-end of the cable sufficiently into the crimp, etc. It was quite appalling.
Recall Redone:
Because the dealer cut the cable too short, I was unable to make a loop as per the instructions. However, straightening out the cable before going into the crimp removes any stress on the crimp. FYI, I bought the BMW crimping tool to make sure the crimp was done correctly. It's a really nice crimper, but very expensive.
Theodore wroteI was going to replace the entire cable as well but...take a look at the date of manufacture of the replacement cable. Both of the "new" cables I inspected (from 2 different dealers) were manufactured in 2012, which precedes the date of the first recall, I believe. Also, if you inspect the fuse box side fitting on the new cables and your old cable, they are the same. Compare them with the fitting provided on the repair kit, and it is very different. It has a bolt that you need to tighten, which moves a wedge against the fuse box connector, making it impossible to work loose.- Replacing the entire cable (BMW Part# 61129269907) from the fuse box to the battery in the trunk, in my E92 coupe, the replacement cable ended up being about 6" longer than the original.
I concluded that the "new" battery cables that dealers are supplying have to have the repair kit installed on them anyway. Because of that and because it was going to be very difficult to remove the old cable and install the new one, I decided to just install a new repair kit.
rantarM3 wroteThat's motivation to DIY.There were several things the dealer failed to do in accordance with BMW's instructions for the recall. They did not use the zip tie to hold the repair cable to the fuse box, they kinked the battery cable (as seen in the photo), they did not insert the battery-end of the cable sufficiently into the crimp, etc. It was quite appalling.
rantarM3 wroteGreat info, I was not aware of the "additional screw" design before purchase. And to think that I thought BMW wouldn't sell me a new battery B+ cable with a connector subject to a safety recall.Also, if you inspect the fuse box side fitting on the new cables and your old cable, they are the same. Compare them with the fitting provided on the repair kit, and it is very different. It has a bolt that you need to tighten, which moves a wedge against the fuse box connector, making it impossible to work loose.

rantarM3 wroteCan you post a photo? None of the vendors have an image online for that tool.I bought the BMW crimping tool to make sure the crimp was done correctly. It's a really nice crimper, but very expensive.
Theodore wroteHere you go:Can you post a photo? None of the vendors have image online for that tool.
The tool itself is separate from the dies (you need a specific size to perform the recall) so you actually have to order two "tools." The crimper is quite clever because you repeatedly press the handle and when the crimp reaches the proper compression, the tool releases automatically.
Thread referenced by inTgr8r in What is this fuse for? Weird problem. does everyone have this? 25/12/2017
Ugh! I tried hard to get this through BMW, but they said "nothing we can do as my VIN doesn't show up..."
But a good read and did some analysis. We share the exact same parts with the 3 series and attached they sent out a recall thing for 2011-2013 BMW M3s, yet what happened to the 2008-2009 lol.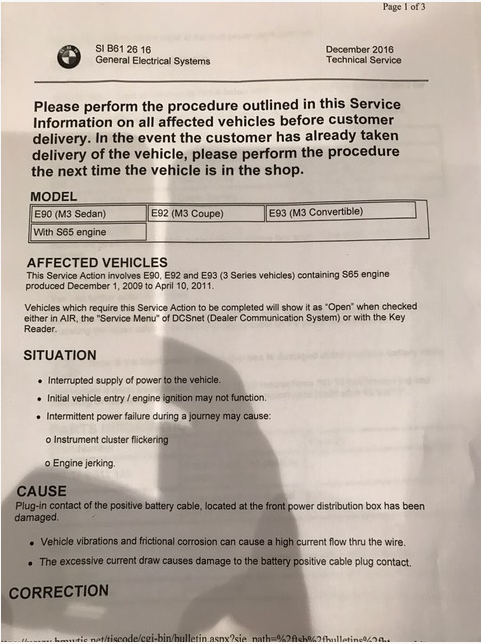
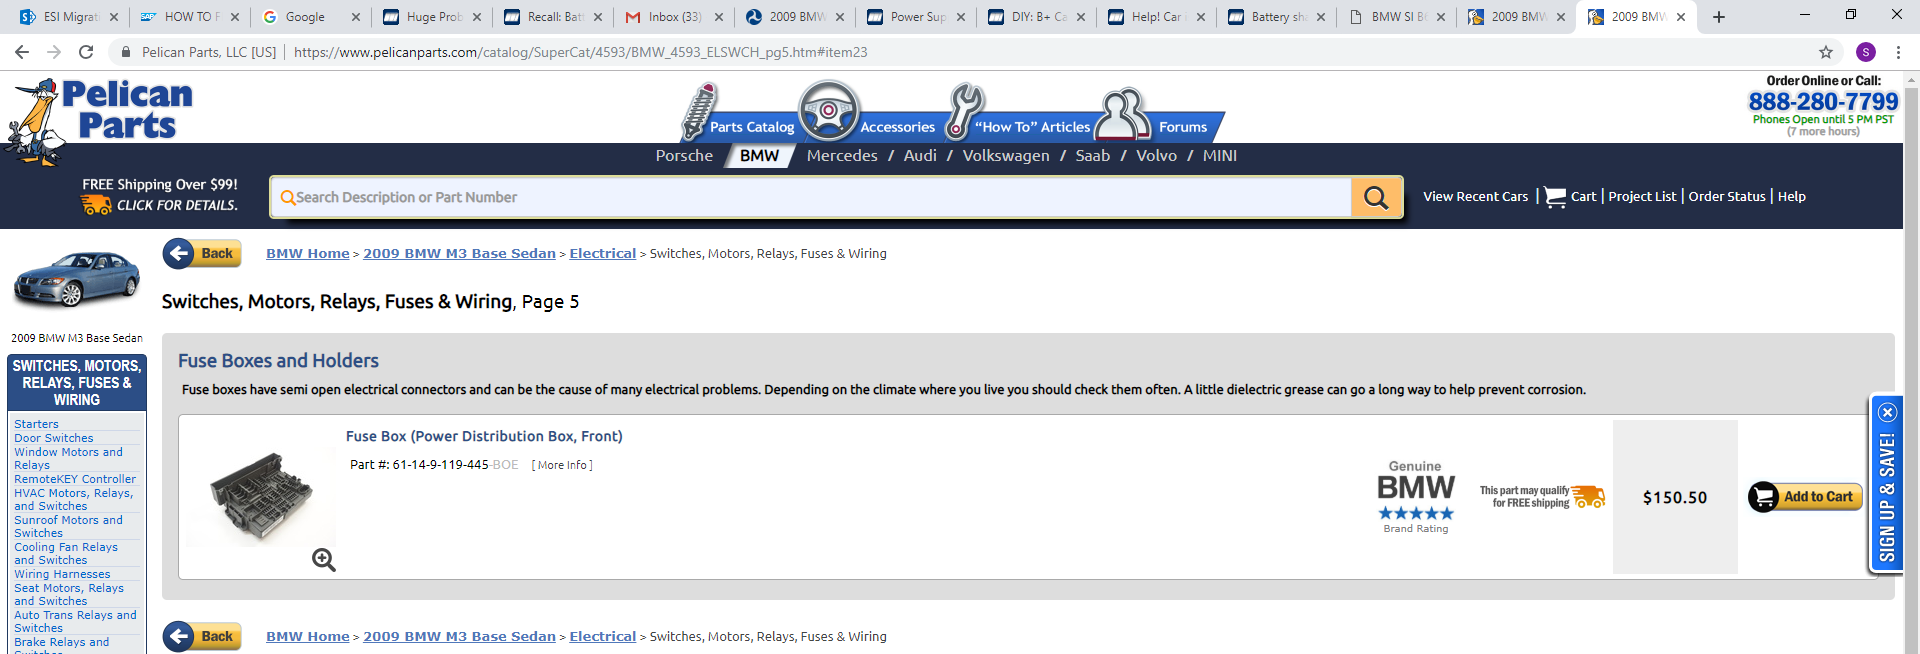
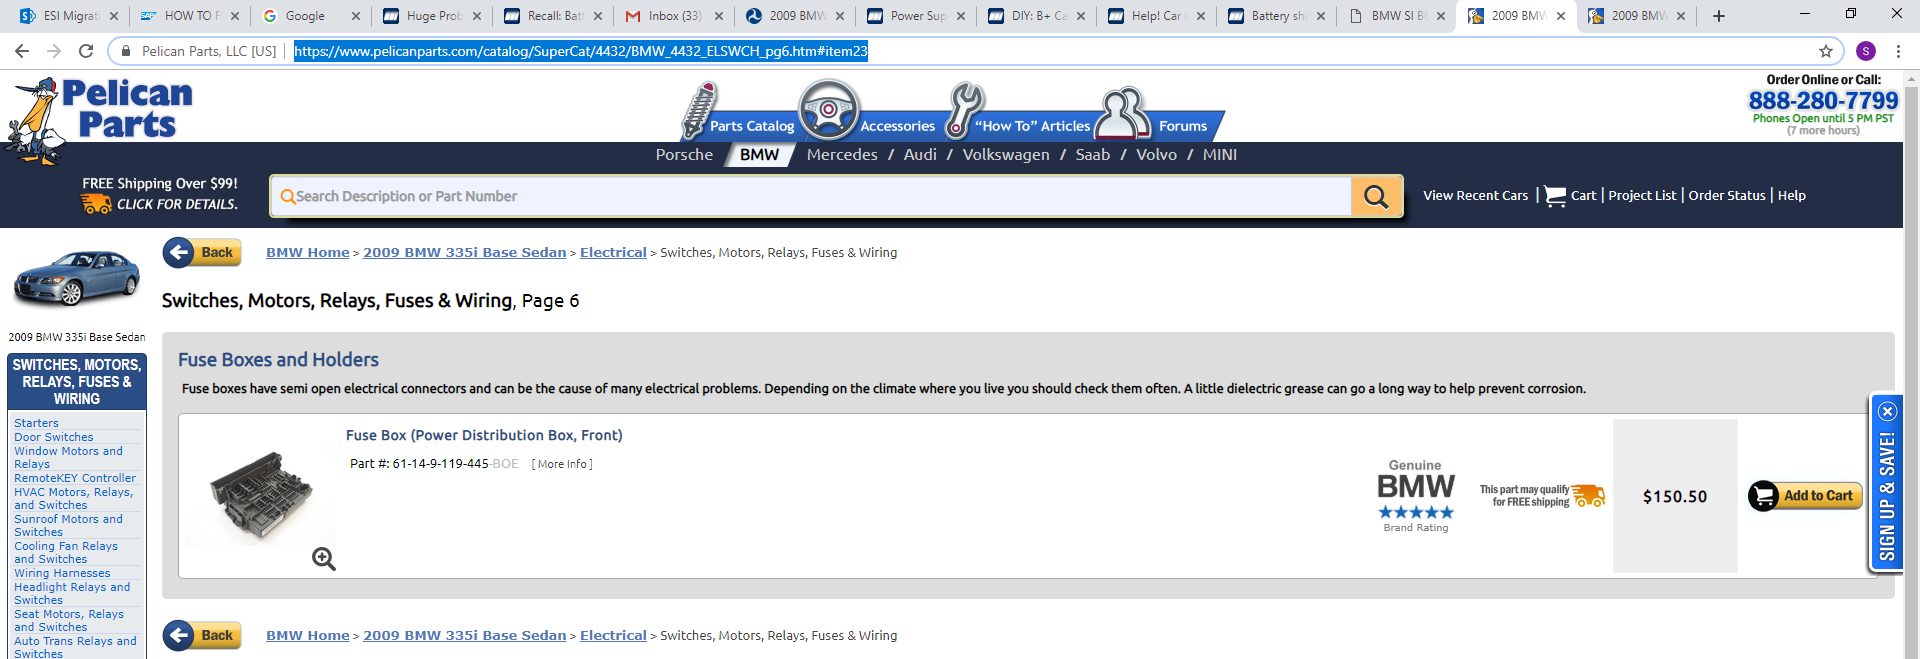

But a good read and did some analysis. We share the exact same parts with the 3 series and attached they sent out a recall thing for 2011-2013 BMW M3s, yet what happened to the 2008-2009 lol.
Sandye90m3 wroteIt's pretty straightforward diy. You only need the $120 cable. The dealership has them and comes with the shrinks, ties, and the appropriate length. All you need is a crimper from HFUgh! I tried hard to get this through BMW, but they said "nothing we can do as my VIN doesn't show up..."
But a good read and did some analysis. We share the exact same parts with the 3 series and attached they sent out a recall thing for 2011-2013 BMW M3s, yet what happened to the 2008-2009 lol.
Edit: don't think that's the right cable in your pic
rantarM3 wroteI have an unrelated electrical issue but found this post looking for info about taking out the fuse box. Are these grounding connections under the fuse box? Or is that in the trunk? I wanted to check centralized ground points like this first. Thanks!I am 99.99% sure it is a T20 and not a hex. I did this recently (to correct the horrible recall work done by my local dealer) and looked at all the screws that came out.
The dealer's handiwork:
There were several things the dealer failed to do in accordance with BMW's instructions for the recall. They did not use the zip tie to hold the repair cable to the fuse box, they kinked the battery cable (as seen in the photo), they did not insert the battery-end of the cable sufficiently into the crimp, etc. It was quite appalling.
Recall Redone:
Because the dealer cut the cable too short, I was unable to make a loop as per the instructions. However, straightening out the cable before going into the crimp removes any stress on the crimp. FYI, I bought the BMW crimping tool to make sure the crimp was done correctly. It's a really nice crimper, but very expensive.
I was going to replace the entire cable as well but...take a look at the date of manufacture of the replacement cable. Both of the "new" cables I inspected (from 2 different dealers) were manufactured in 2012, which precedes the date of the first recall, I believe. Also, if you inspect the fuse box side fitting on the new cables and your old cable, they are the same. Compare them with the fitting provided on the repair kit, and it is very different. It has a bolt that you need to tighten, which moves a wedge against the fuse box connector, making it impossible to work loose.
I concluded that the "new" battery cables that dealers are supplying have to have the repair kit installed on them anyway. Because of that and because it was going to be very difficult to remove the old cable and install the new one, I decided to just install a new repair kit.
Thanks for the DIY bro, i just had this happen to me about a month ago and finally stumbled upon your thread, and it's the exact issue with mine too. I'll be doing the DIY soon, since my car is an early 08 and not covered for the recall.
I just had this recall performed by Budd's BMW Oakville on my 2008 M3 Cabrio. The car's clock resets while I am driving, and iDrive shows power loss. My glove box is now locked also and can only be opened with a key (they did the airbag recall at the same time). Previous owner bought the car in California back in 2009 and never performed a single recall as he was not getting notices since it was a US vehicle. I should have done this darn recall myself, now I have to bring it back to them to further hack my car.
I had this done to my car last year in the US sometime in July. I got the car finally here in Europe last month and last week had some issues with my car having its alarm going off and weird starting issues. Took it to the dealer here and they found out that the 4 screws holding the fusebox to the bracket were missing, the battery cable wasn't even fastened down all the way and found out the previous dealer had used ELECTRICAL TAPE to cover the connection point on the Battery Cable. Unbelievable, I have never seen this sort of work being performed at an official BMW dealer before. It would be safe to assume not even a local Mom and Pop shop would be this sloppy. Be careful with Dealers people! I would ask them to give you photographic evidence of their work. Luckily I found the culprit before anything crazy happened...
See below what the dealer here in Europe found. Crazy a dealer had to fix another dealers poor repair.
Freakin Electrical Tape...there is supposed to be a Plastic Cover that comes with the Recall Repair Kit from BMW.

and as you can see...the cable isn't even tightened down at all. Pretty large fire hazard and safety relevant recall and they decide to do a piss poor job. Ridiculous...

See below what the dealer here in Europe found. Crazy a dealer had to fix another dealers poor repair.
Freakin Electrical Tape...there is supposed to be a Plastic Cover that comes with the Recall Repair Kit from BMW.
and as you can see...the cable isn't even tightened down at all. Pretty large fire hazard and safety relevant recall and they decide to do a piss poor job. Ridiculous...
Hi Col,
I believe I have the same or similar issue. Do you know what type of diagnosis I can do to verify if my car has the same issue.
thanks,
Ruben
I believe I have the same or similar issue. Do you know what type of diagnosis I can do to verify if my car has the same issue.
thanks,
Ruben
Rubenhg wroteshake the fuse boxHi Col,
I believe I have the same or similar issue. Do you know what type of diagnosis I can do to verify if my car has the same issue.
thanks,
Ruben
WingZeroX5 wroteHow do you shake the fuse box? Not only is it deep into the glove box and hard to reach, but it's held tight by screws.shake the fuse box
Bumping this older thread so people can be aware. It's a good DIY thread.  WingZeroX5 Thanks for making this thread.
WingZeroX5 Thanks for making this thread.
DrFerry wroteBumping this older thread so people can be aware. It's a good DIY thread.

For everyone else, when I said shake the fuse box, it obviously does not shake because it's held securely...but the connection is so loose that any movement on the fuse box will likely bridge the connection.
