

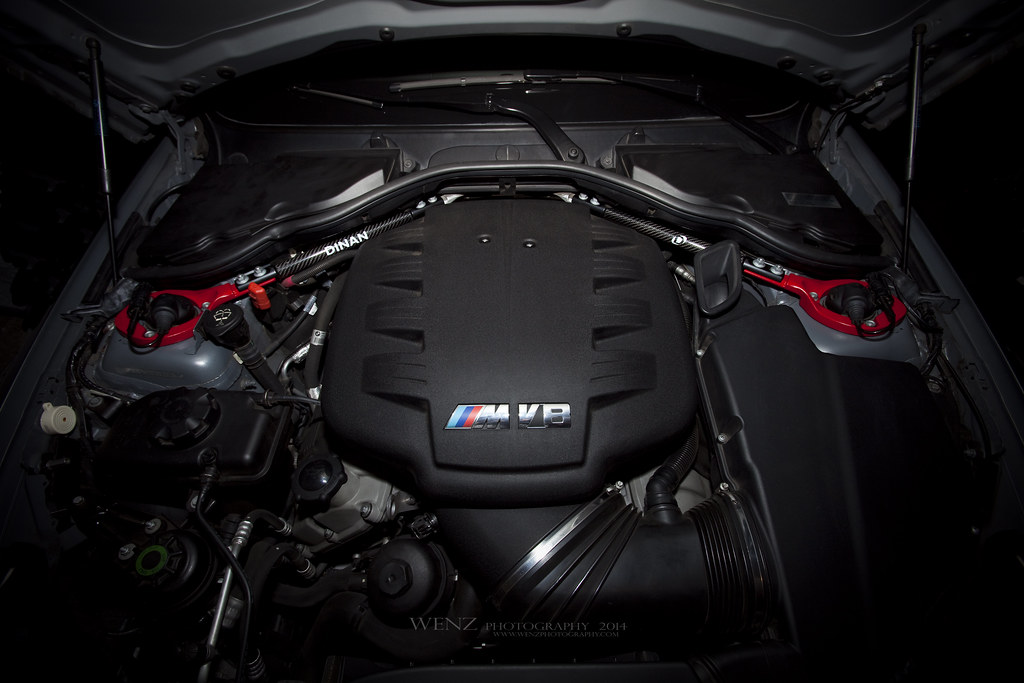
I've always wanted Dinan CF Strut Braces, and recently I was able to pick up a set for a good price from Dinan directly. I couldn't wait to install them, but I wanted to add a little twist, my own personal touch to these. Came up with an idea that I've never seen anyone do in the E9X M3 community.
I've always liked the look of Red Painted Strut Tower Rings…gives that nice Motorsport look to the engine bay.
Well, I picked up a spare set of OEM Strut Tower Rings, painted them Red myself, and completed the install. Very pleased with the outcome…glad I was right. It looks great!
 IMG_5234aa by dj_dub, on Flickr
The install and painting the rings myself was very easy. Total time with painting to complete this install was around 3 hours. Well worth the time and money for the outcome at the end IMO. Enjoy the pics of the guide below!
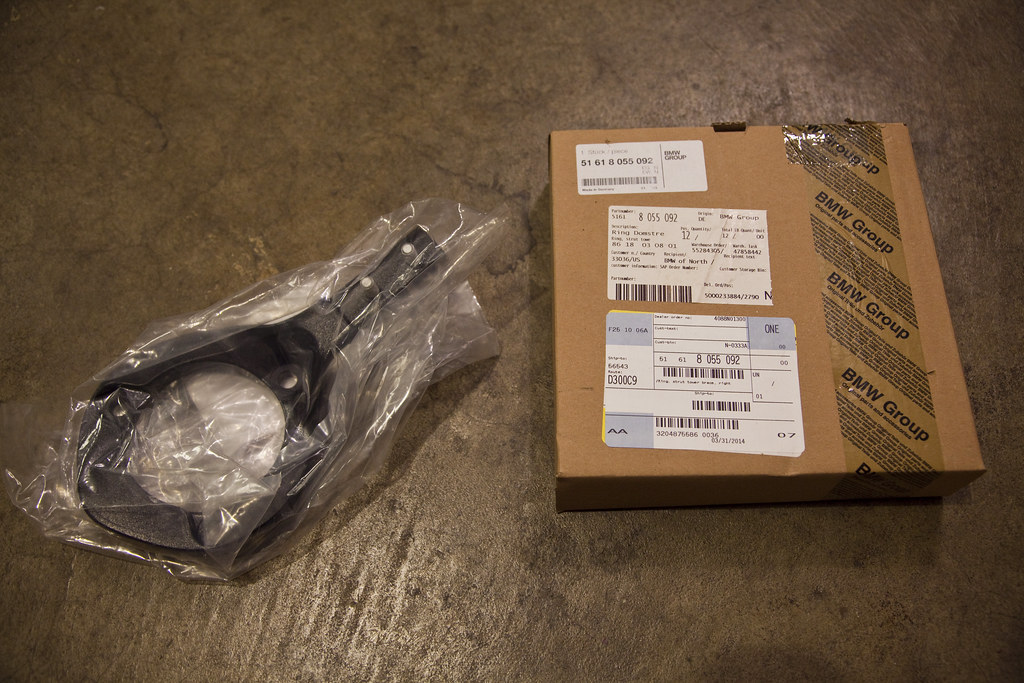
The OEM Strut Tower Rings…one comes in a plastic bag and one comes in a box, weird. lol
The Part Numbers for your reference are:
LEFT: 51618055091
RIGHT: 51618055092
 IMG_5122a by dj_dub, on Flickr
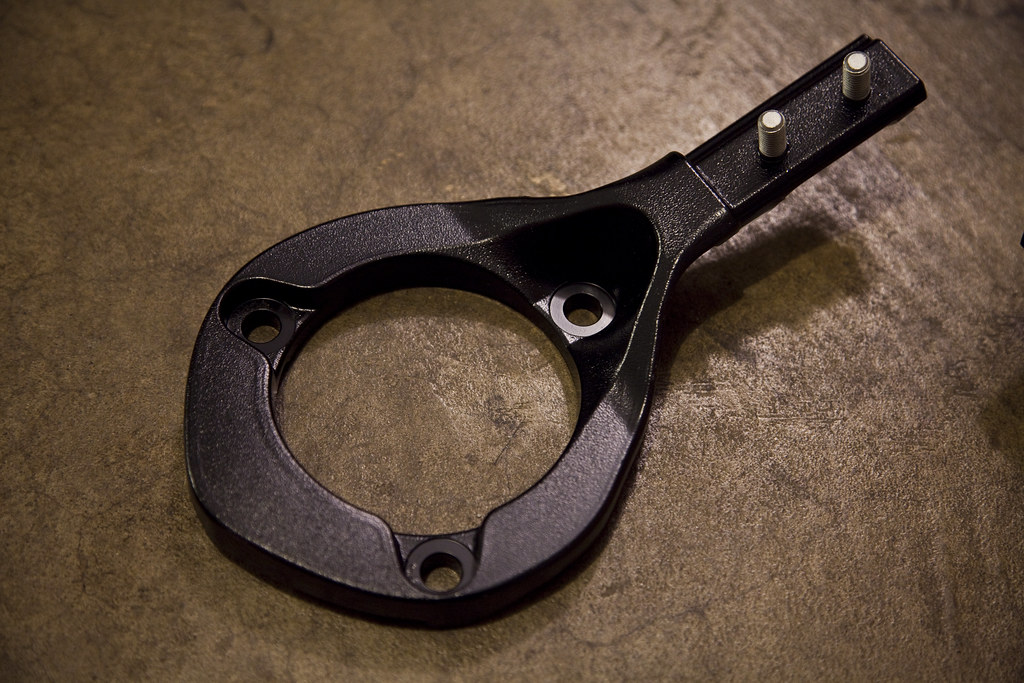
Grabbed a few sheets of different grits of sandpaper and began to prep the rings. Tried to get it as smooth as possible and remove the texture.
 IMG_5126a by dj_dub, on Flickr
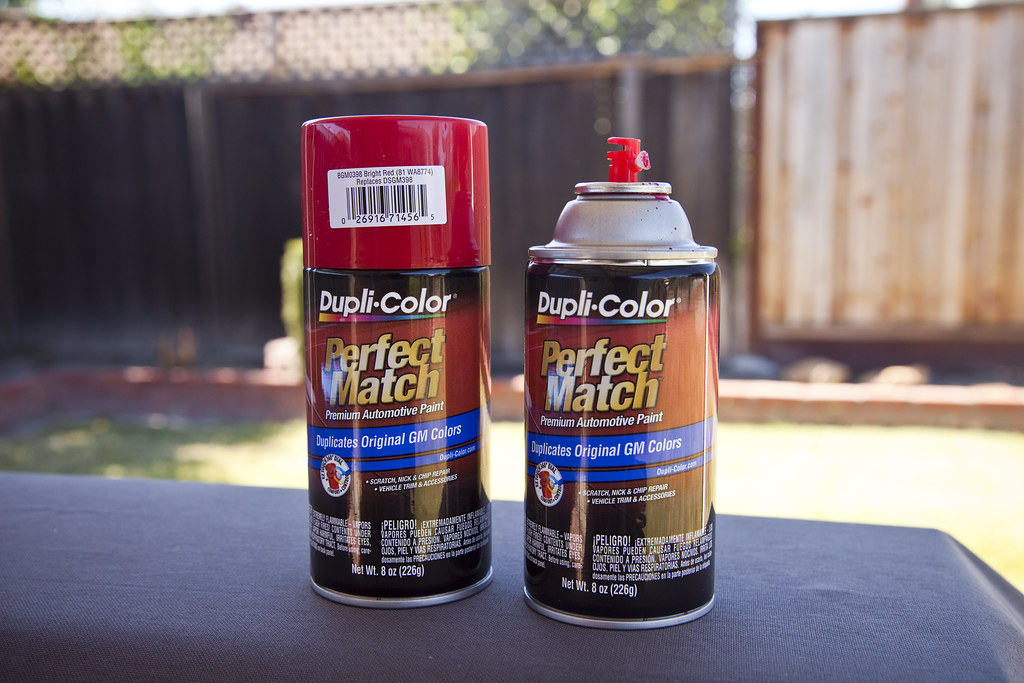
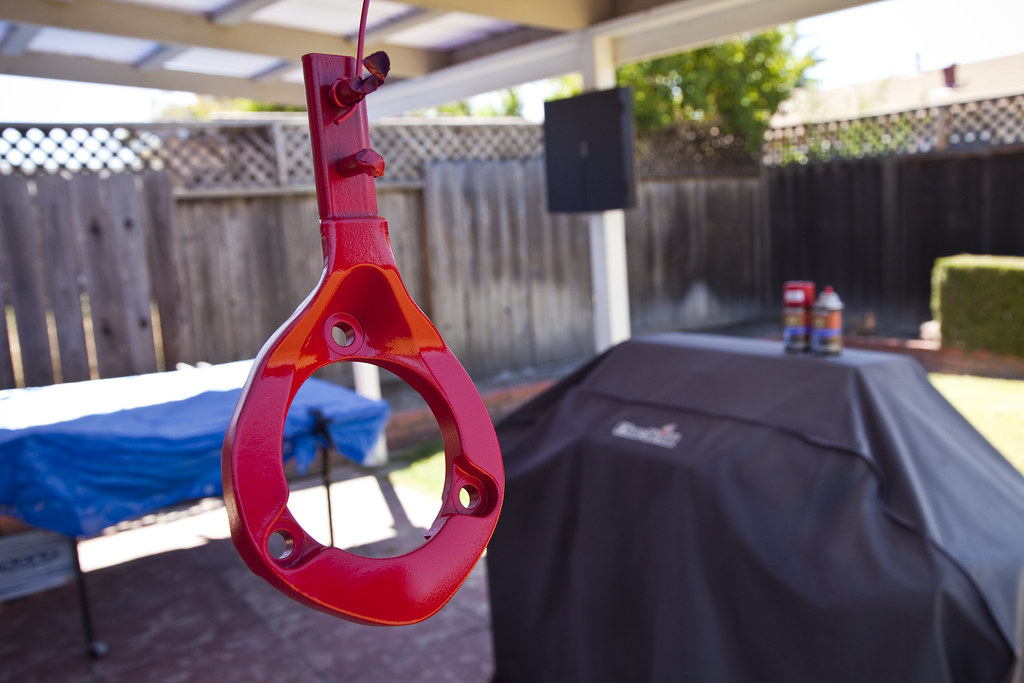
Figured I would paint these myself because I can't justify paying a shop a crazy amount to do the work when I can do this myself. Decided on this color…it's as close as the color red I was looking for.
 IMG_5141a by dj_dub, on Flickr
Painted the rings in my backyard on a non-windy warm afternoon…hey it worked. lol
 IMG_5144a by dj_dub, on Flickr
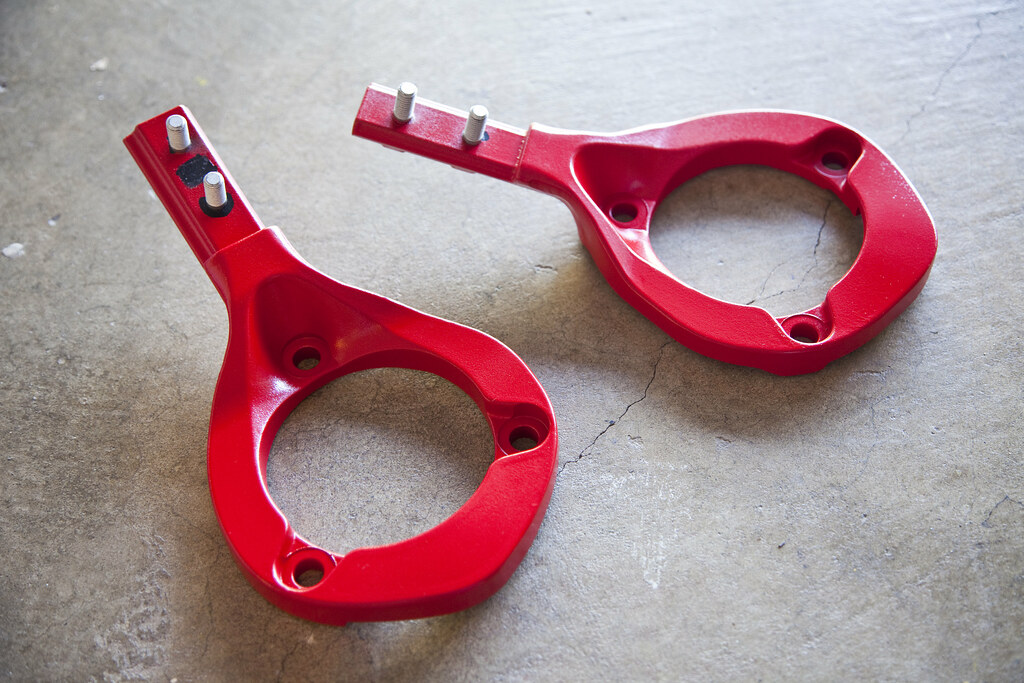
Here's how they came out after 4 coats…not bad for a rattlecan job if I say so myself! (The black parts around the threads are from the tape and the black square lets me know which ring is which. Those black areas won't be seen in the end.)
 IMG_5164a by dj_dub, on Flickr
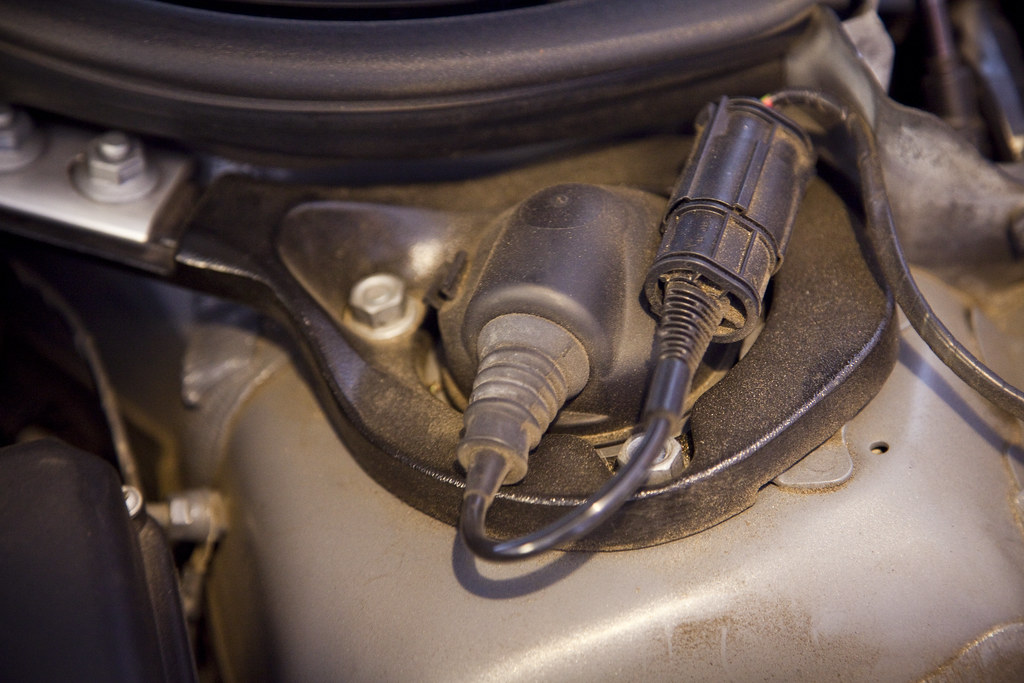
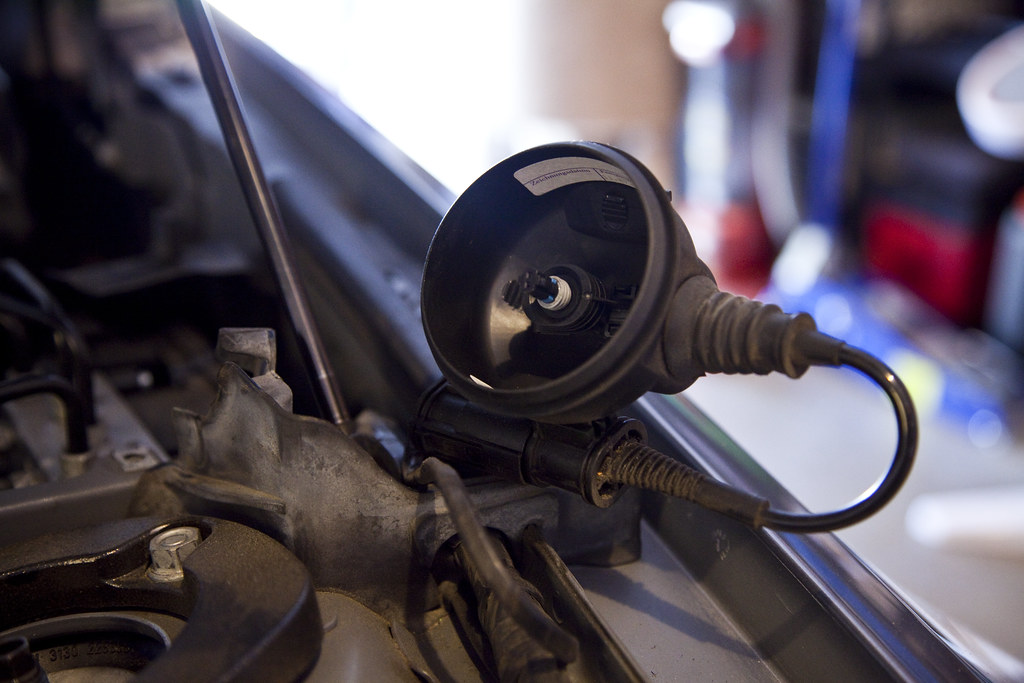
Those with EDC, you'll need to remove this cap and wire. Squeeze the dust cap and pull up gently, then pull the wire inside straight up slowly to unplug it. Be careful with this step not to break the 2 small wire plug…unless you wanna buy a new set. lol
 IMG_5175a by dj_dub, on Flickr
 IMG_5180a by dj_dub, on Flickr
Remove both Microfilter Housings and you can begin removing the strut braces and strut rings.
 IMG_5179a by dj_dub, on Flickr
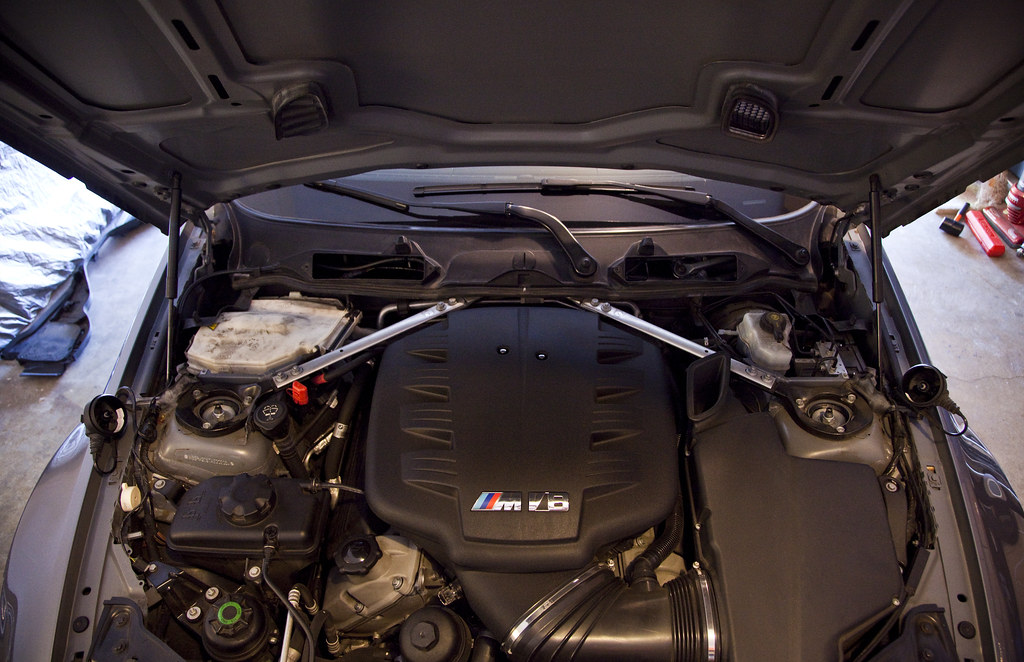
Here's one ring installed…not yet torqued down.
 IMG_5184a by dj_dub, on Flickr
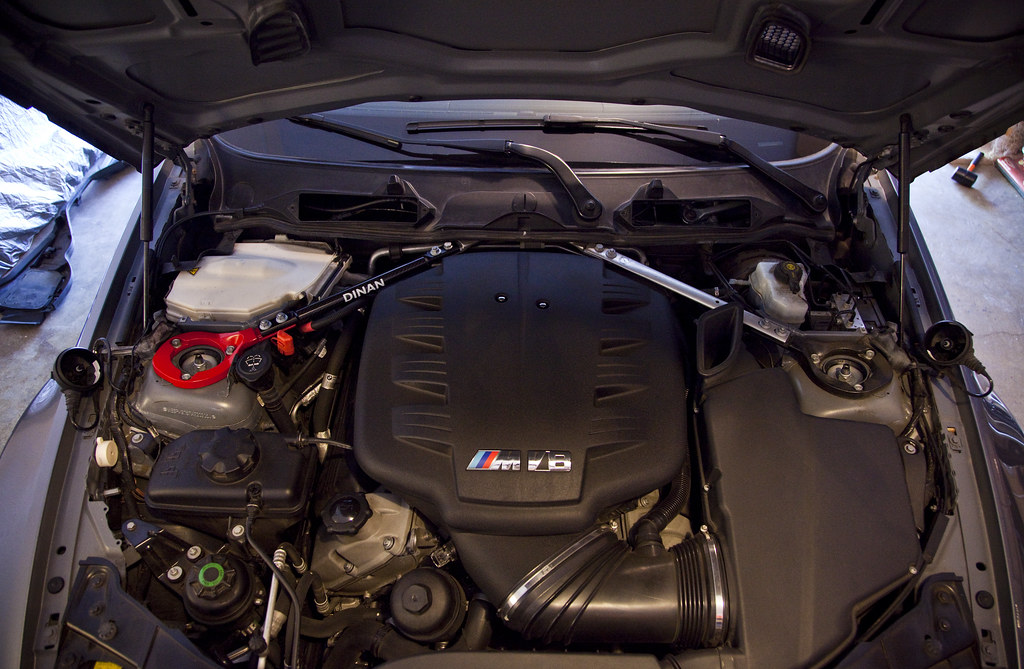
Passenger side completed. A pic for comparison to the stock side…
 IMG_5187a by dj_dub, on Flickr
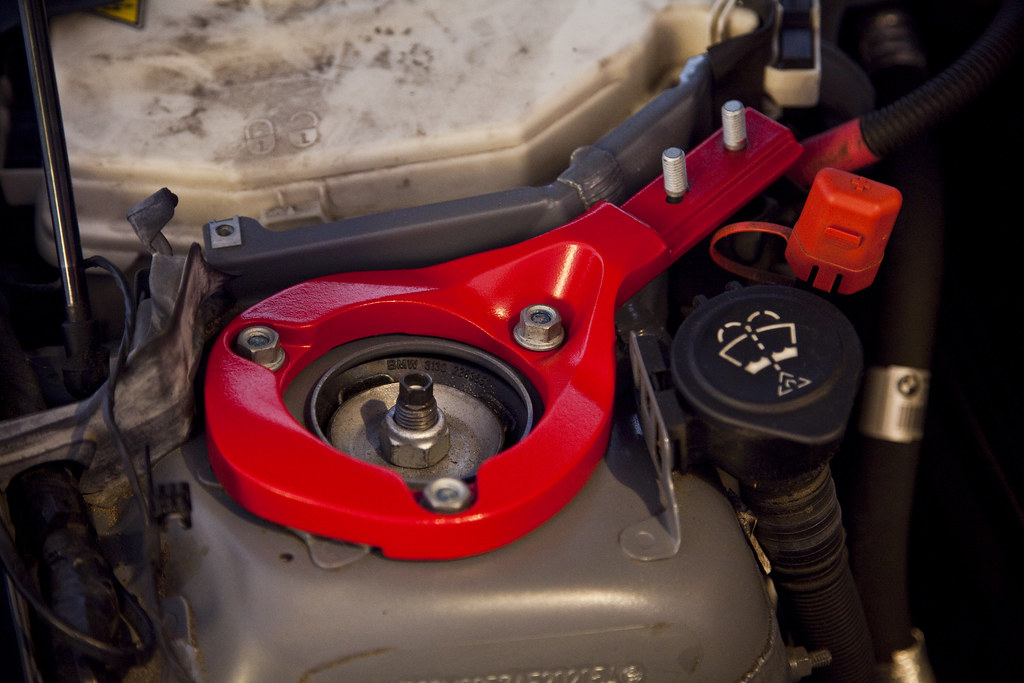
Close-up pic. You can see a little paint came up around one nut after torquing them down…will spot paint that later to fix.
 IMG_5190a by dj_dub, on Flickr
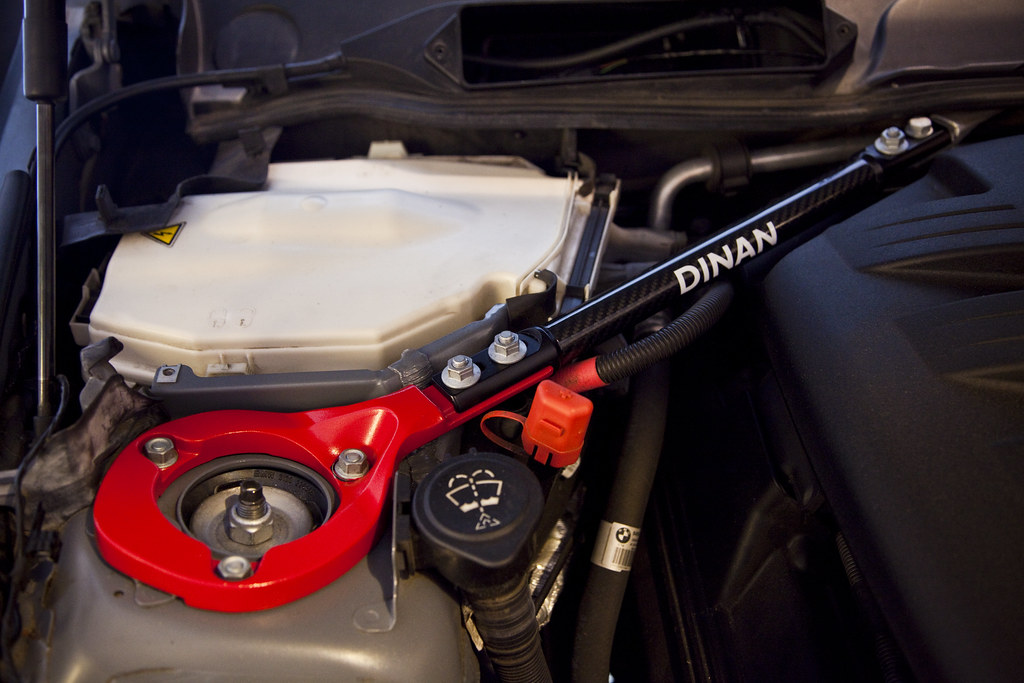
Both sides installed…
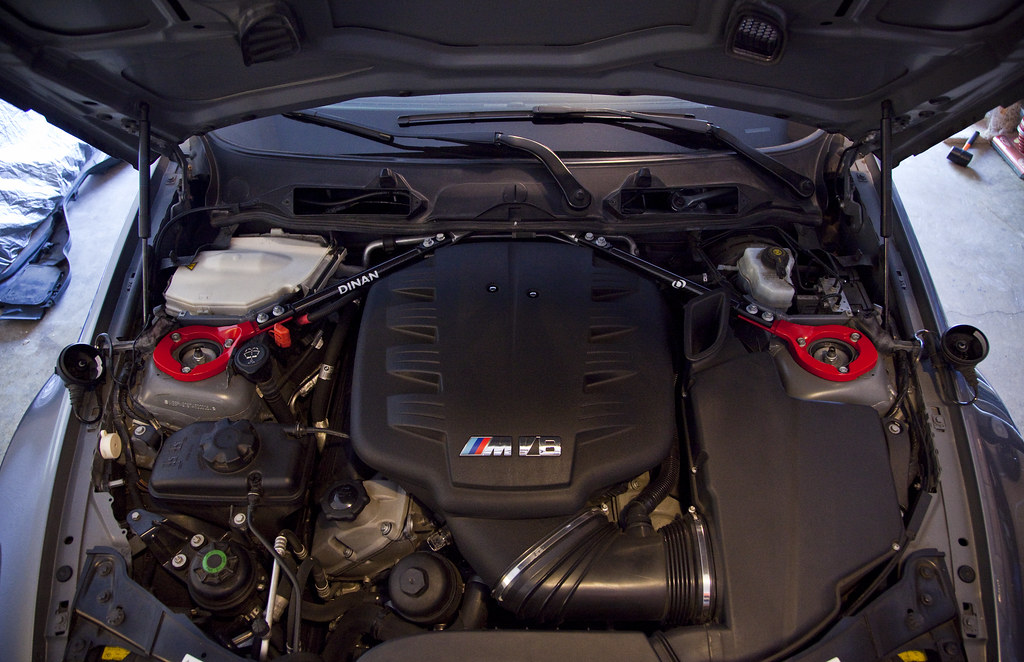 IMG_5193a by dj_dub, on Flickr
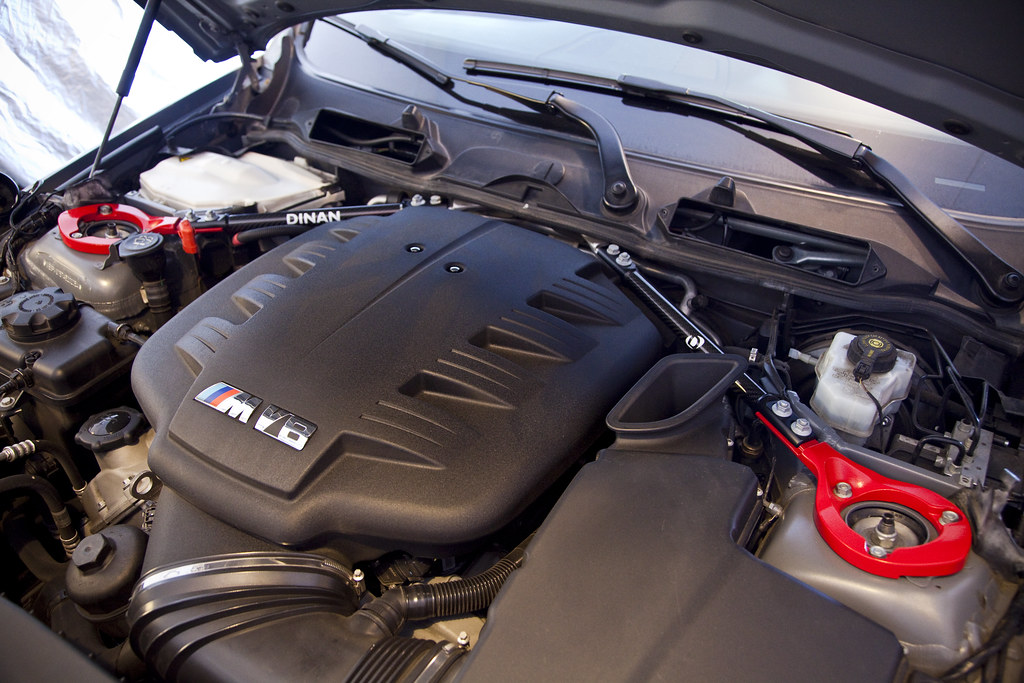 IMG_5203a by dj_dub, on Flickr
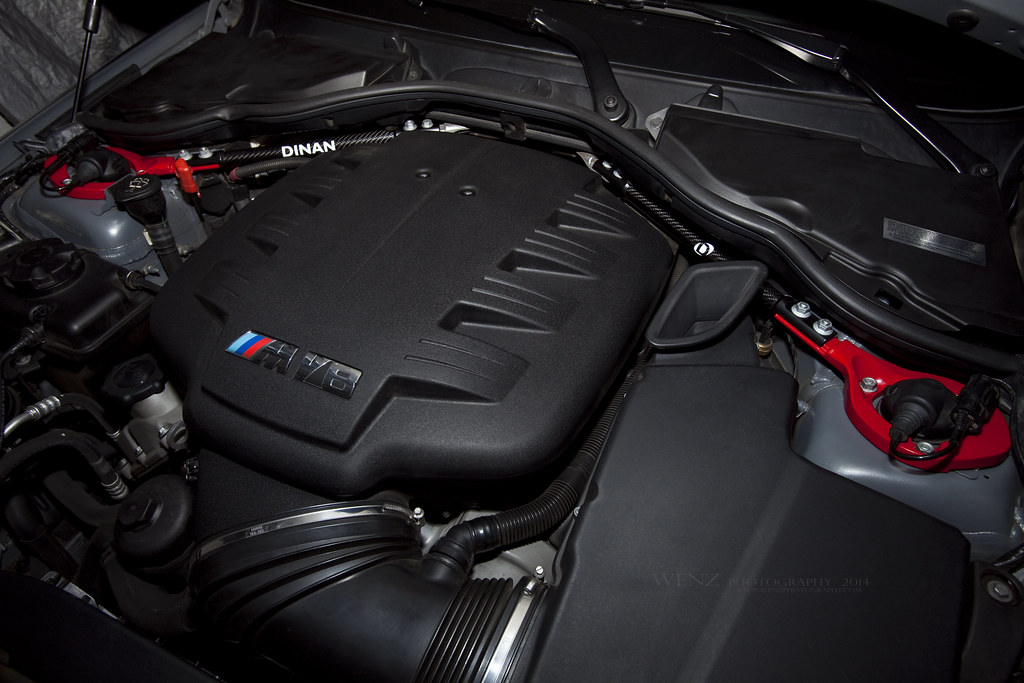
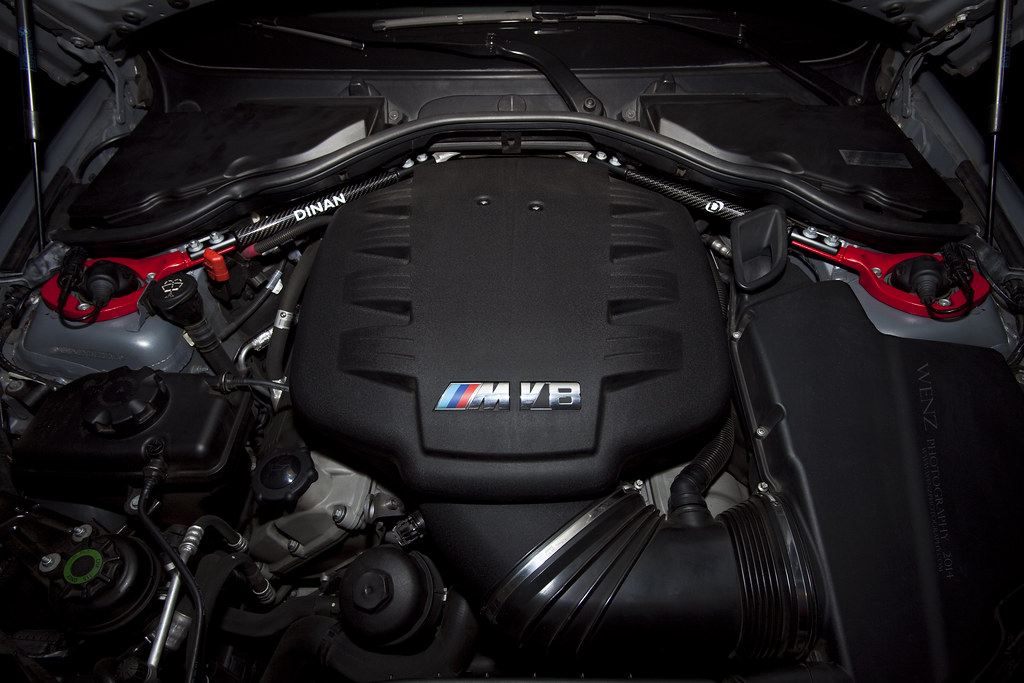
Reinstall the Microfilter Housings and replug the EDC wires carefully…and you're done. The engine bay looks so much better with this little mod. Adds that nice little bit of contrast to break up all that black.
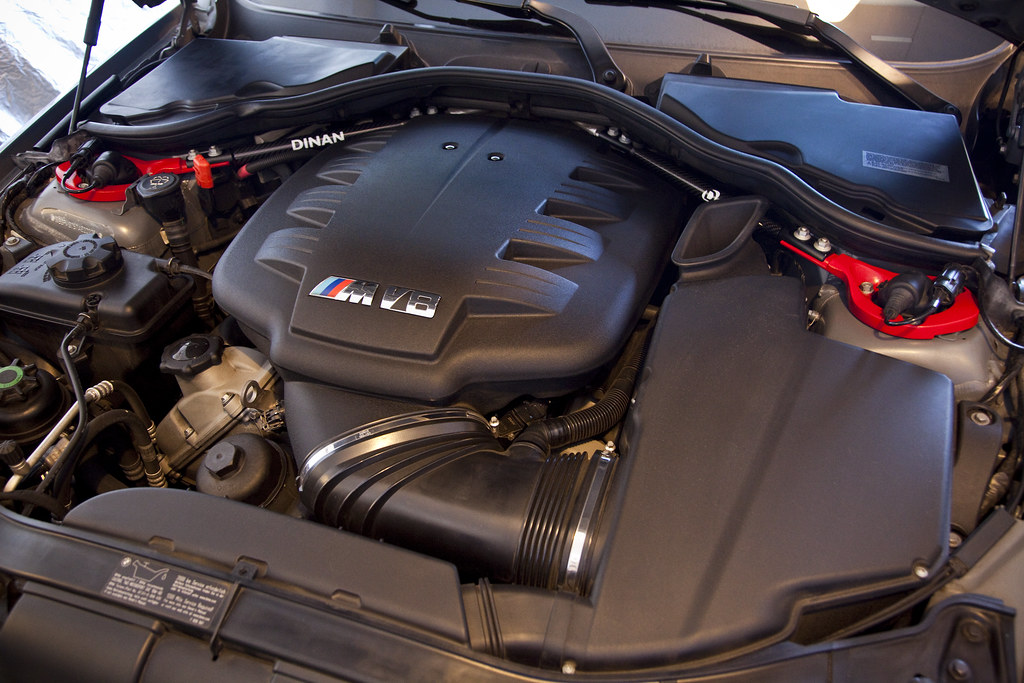 IMG_5213a by dj_dub, on Flickr
A few "beauty shots" I took after the install…
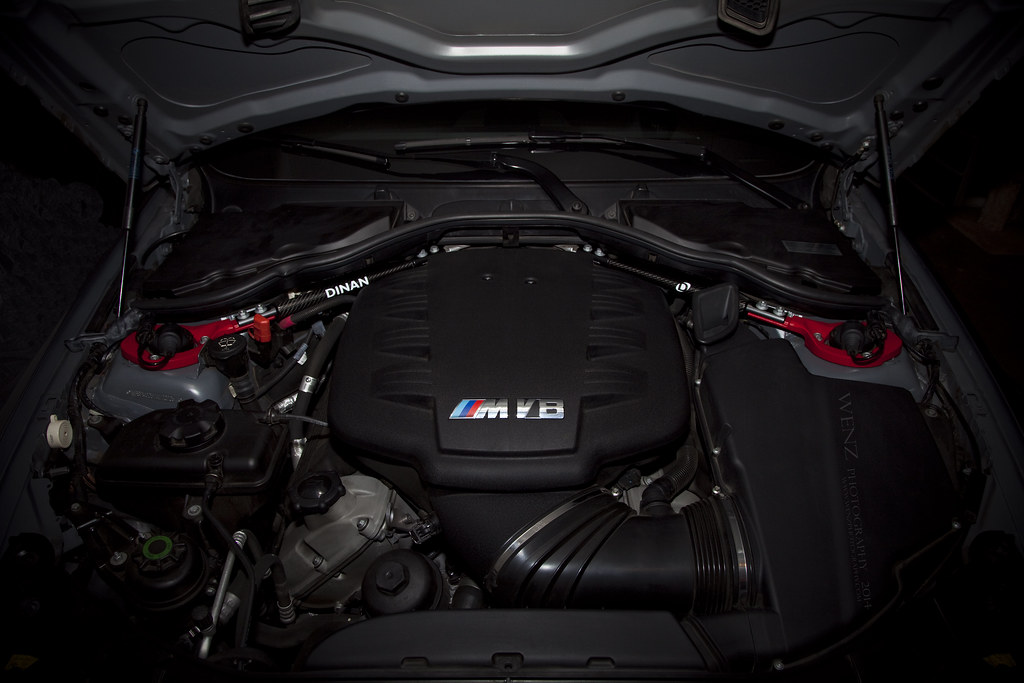 IMG_5219aa by dj_dub, on Flickr
 IMG_5238aa by dj_dub, on Flickr
 IMG_5251aa by dj_dub, on Flickr
I've always liked the look of Red Painted Strut Tower Rings…gives that nice Motorsport look to the engine bay.
Well, I picked up a spare set of OEM Strut Tower Rings, painted them Red myself, and completed the install. Very pleased with the outcome…glad I was right. It looks great!
IMG_5234aa by dj_dub, on FlickrThe install and painting the rings myself was very easy. Total time with painting to complete this install was around 3 hours. Well worth the time and money for the outcome at the end IMO. Enjoy the pics of the guide below!
The OEM Strut Tower Rings…one comes in a plastic bag and one comes in a box, weird. lol
The Part Numbers for your reference are:
LEFT: 51618055091
RIGHT: 51618055092
IMG_5122a by dj_dub, on FlickrGrabbed a few sheets of different grits of sandpaper and began to prep the rings. Tried to get it as smooth as possible and remove the texture.
IMG_5126a by dj_dub, on FlickrFigured I would paint these myself because I can't justify paying a shop a crazy amount to do the work when I can do this myself. Decided on this color…it's as close as the color red I was looking for.
IMG_5141a by dj_dub, on FlickrPainted the rings in my backyard on a non-windy warm afternoon…hey it worked. lol
IMG_5144a by dj_dub, on FlickrHere's how they came out after 4 coats…not bad for a rattlecan job if I say so myself! (The black parts around the threads are from the tape and the black square lets me know which ring is which. Those black areas won't be seen in the end.)
IMG_5164a by dj_dub, on FlickrThose with EDC, you'll need to remove this cap and wire. Squeeze the dust cap and pull up gently, then pull the wire inside straight up slowly to unplug it. Be careful with this step not to break the 2 small wire plug…unless you wanna buy a new set. lol
IMG_5175a by dj_dub, on FlickrIMG_5180a by dj_dub, on FlickrRemove both Microfilter Housings and you can begin removing the strut braces and strut rings.
IMG_5179a by dj_dub, on FlickrHere's one ring installed…not yet torqued down.
IMG_5184a by dj_dub, on FlickrPassenger side completed. A pic for comparison to the stock side…
IMG_5187a by dj_dub, on FlickrClose-up pic. You can see a little paint came up around one nut after torquing them down…will spot paint that later to fix.
IMG_5190a by dj_dub, on FlickrBoth sides installed…
IMG_5193a by dj_dub, on FlickrIMG_5203a by dj_dub, on FlickrReinstall the Microfilter Housings and replug the EDC wires carefully…and you're done. The engine bay looks so much better with this little mod. Adds that nice little bit of contrast to break up all that black.
IMG_5213a by dj_dub, on FlickrA few "beauty shots" I took after the install…
IMG_5219aa by dj_dub, on FlickrIMG_5238aa by dj_dub, on FlickrIMG_5251aa by dj_dub, on Flickr


