

Nihilation wrote24 new collar screws at $4-$6 apiece makes this an expensive job! On other models, the rubber part of the collar screw is available separately!!Is there an official recommended parts list for this job? I'll be filming this job for my YouTube channel (/taylordjosh) will have this done before my next track day in 4 weeks.
So far it looks like:
1x Valve Cover Gasket Cyl 1-4: 11127838271
1x Valve Cover Gasket Cyl 5-8: 11127838272
8x Spark Plug Tubes: 11127835170 (recommended due to age)
2x Collar Screws M6: 11127841218
24x Collar Screws M6x37.5: 1127841217
All part numbers sourced from http://www.realoem.com/bmw/en/showparts?id=WD93-USA---E92-BMW-M3&diagId=11_4115
127KVIEWS
186REPLIES
84APPRECIATES
01-15-2026LAST POST
JonM wroteYeah stupid expensive. Mine were 5.25 when I did them and I see they go up from there.Nihilation wrote24 new collar screws at $4-$6 apiece makes this an expensive job! On other models, the rubber part of the collar screw is available separately!!Is there an official recommended parts list for this job? I'll be filming this job for my YouTube channel (/taylordjosh) will have this done before my next track day in 4 weeks.
So far it looks like:
1x Valve Cover Gasket Cyl 1-4: 11127838271
1x Valve Cover Gasket Cyl 5-8: 11127838272
8x Spark Plug Tubes: 11127835170 (recommended due to age)
2x Collar Screws M6: 11127841218
24x Collar Screws M6x37.5: 1127841217
All part numbers sourced from http://www.realoem.com/bmw/en/showparts?id=WD93-USA---E92-BMW-M3&diagId=11_4115
I would also recommend replacing the spark plug tubes
Valve cover gasket DIY video, just as promised:
Nihilation wroteWatched your DIY, Thank you for the video! I didn't realize i wasn't following ur channel even though i've watched all of your vids lolValve cover gasket DIY video, just as promised:
m3gasm wroteI would not put any pry bars in there... aluminum block will get scratched up or chipped!Watched your DIY, Thank you for the video! I didn't realize i wasn't following ur channel even though i've watched all of your vids lol
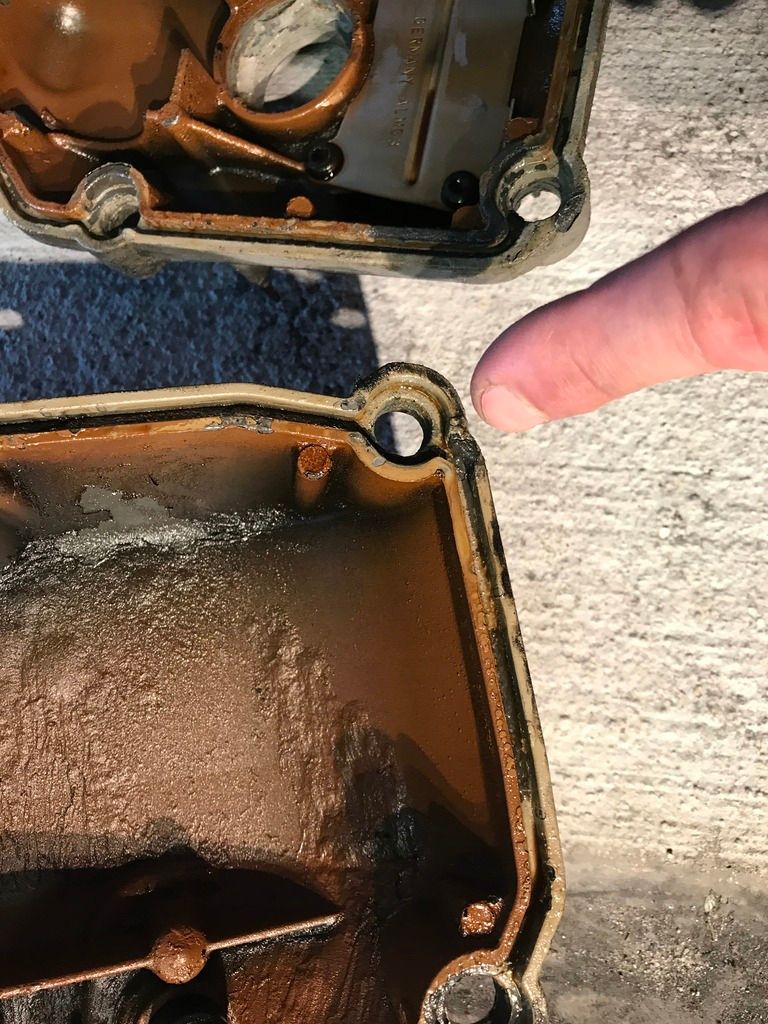
BzsBimmer wrotejust took off my valve cover today, I sent it out for powder coating since the oem finish peeled off pretty bad. peeling finish caused persistent leaks.. Had my VC gasket changed twice and leaks kept coming back. in the pictures you will be able to see the paint/ finish missing allowing oil leak around the gasketLooked around and surprisingly I could not find a DIY for replacing the valve cover gaskets.
Anyone have the TIS, pictures, torque specs, and tightening pattern etc.?
I have my covers off till Wednesday so if anyone needs any additional pictures or anything let me know. But I can't compete with above video.. that it really as easy as that.. nothing to it... just have to take it slow, stretch your back a lot and be careful... slow and take your time. easy!
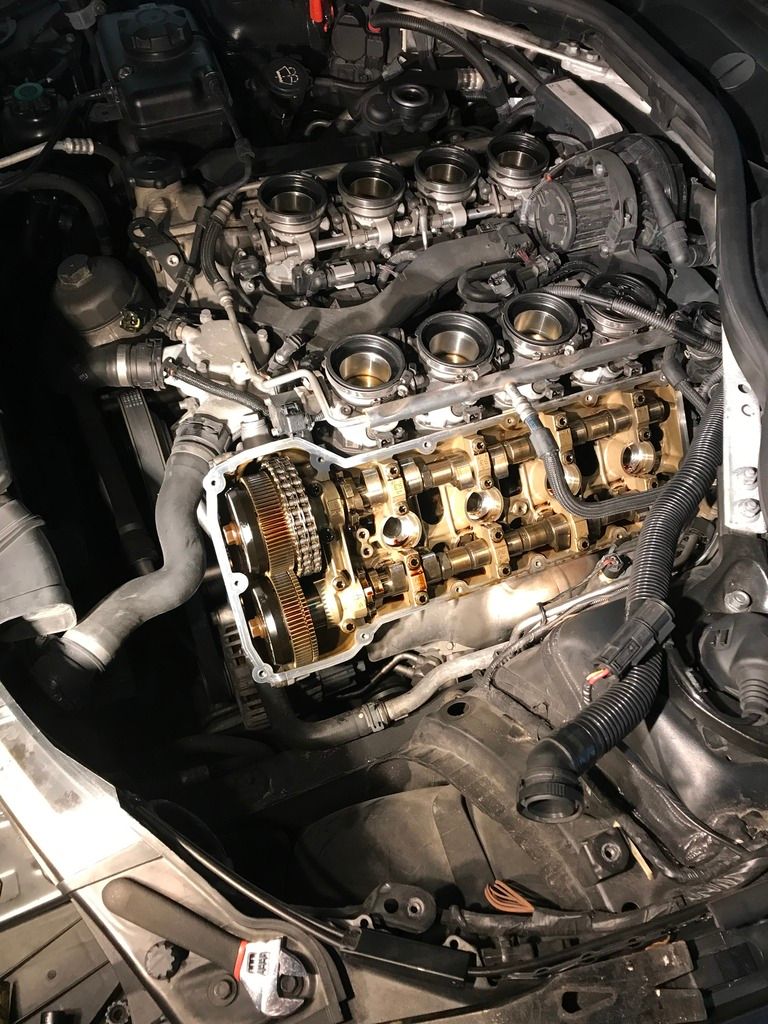
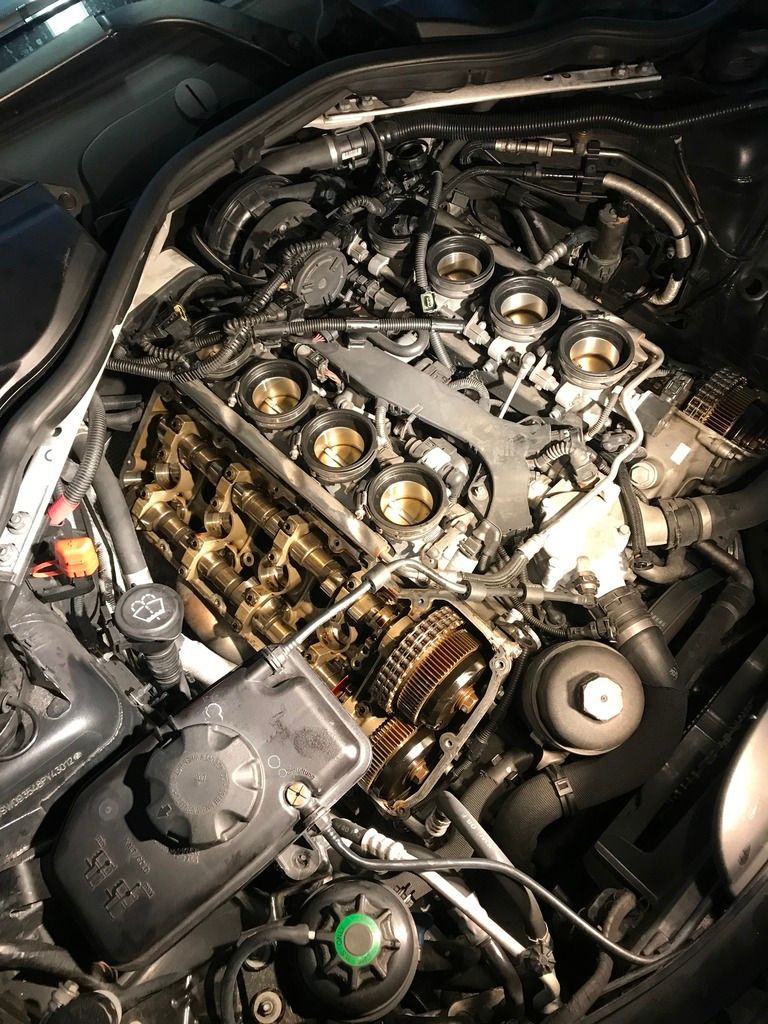
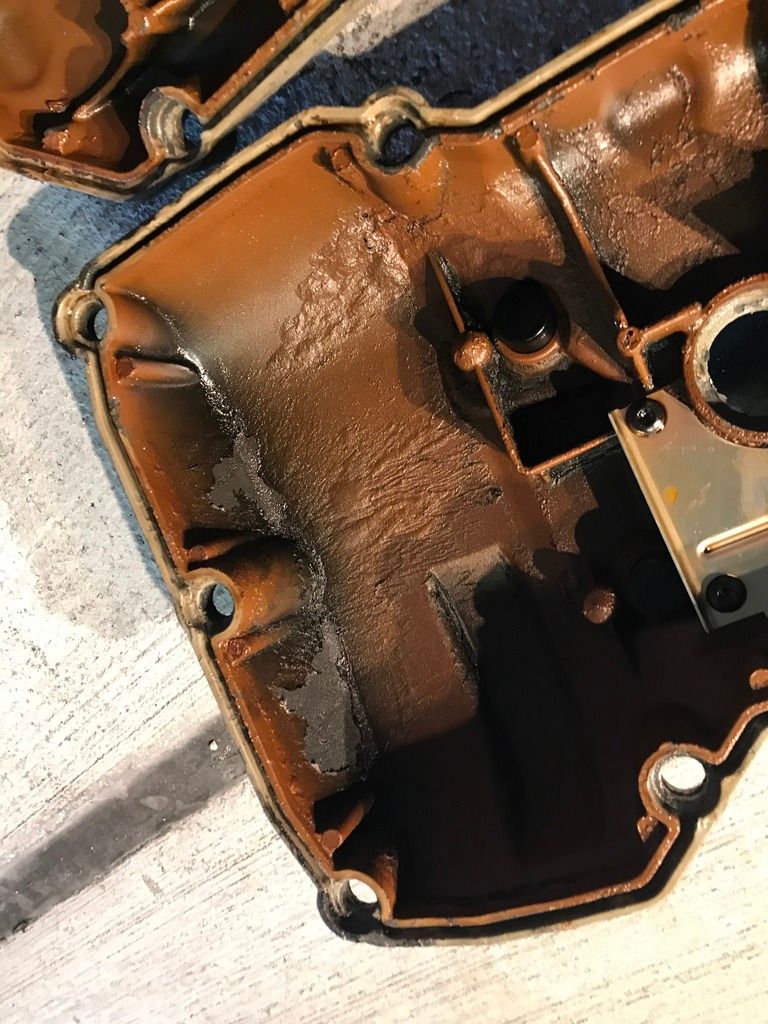
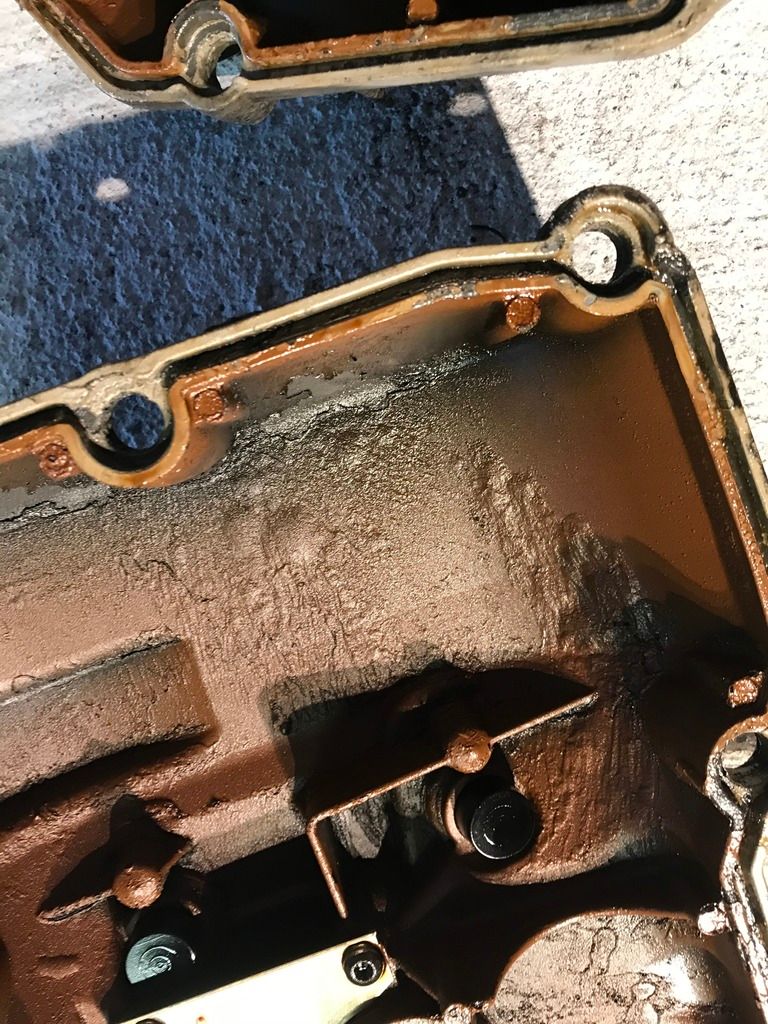
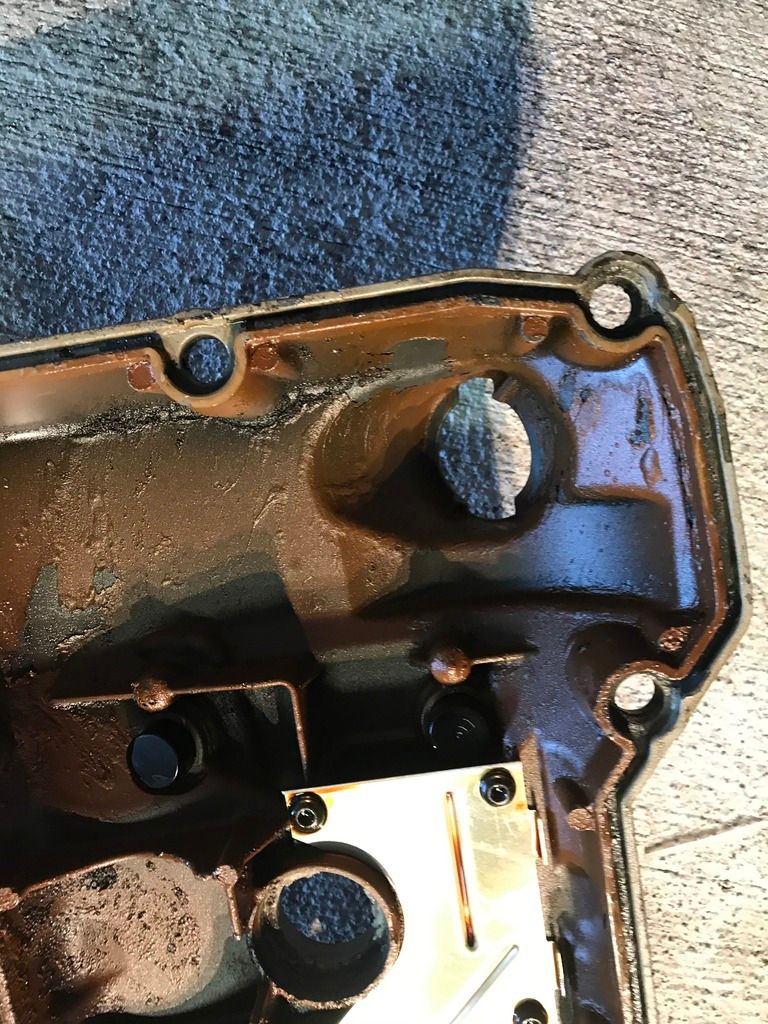
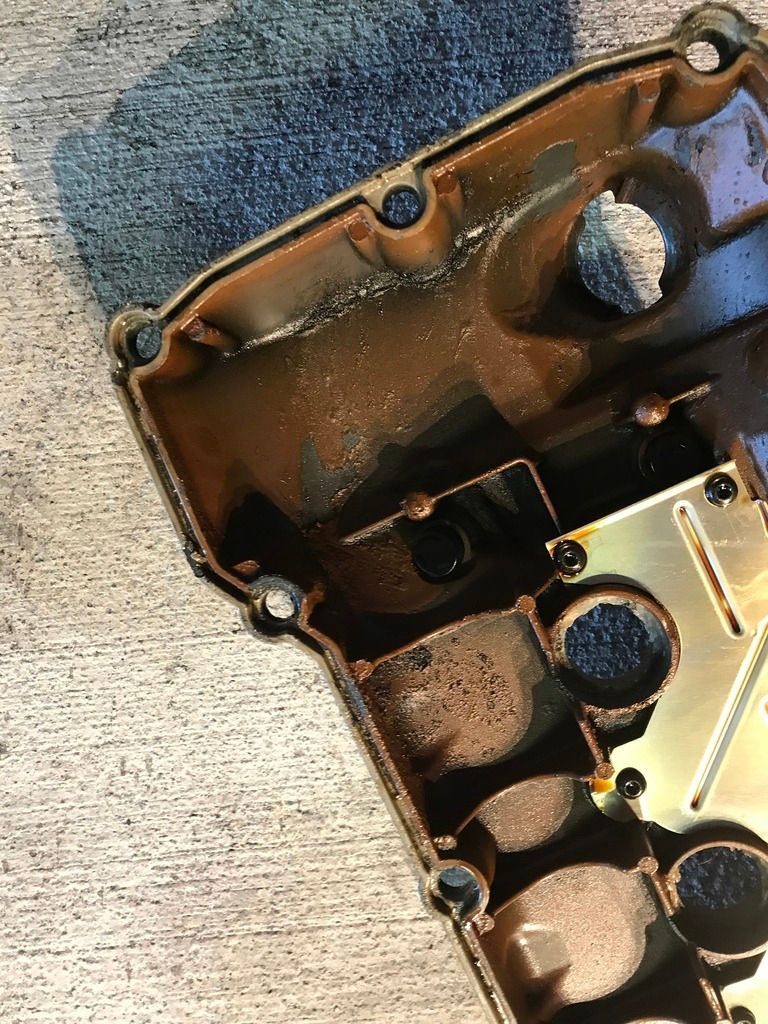
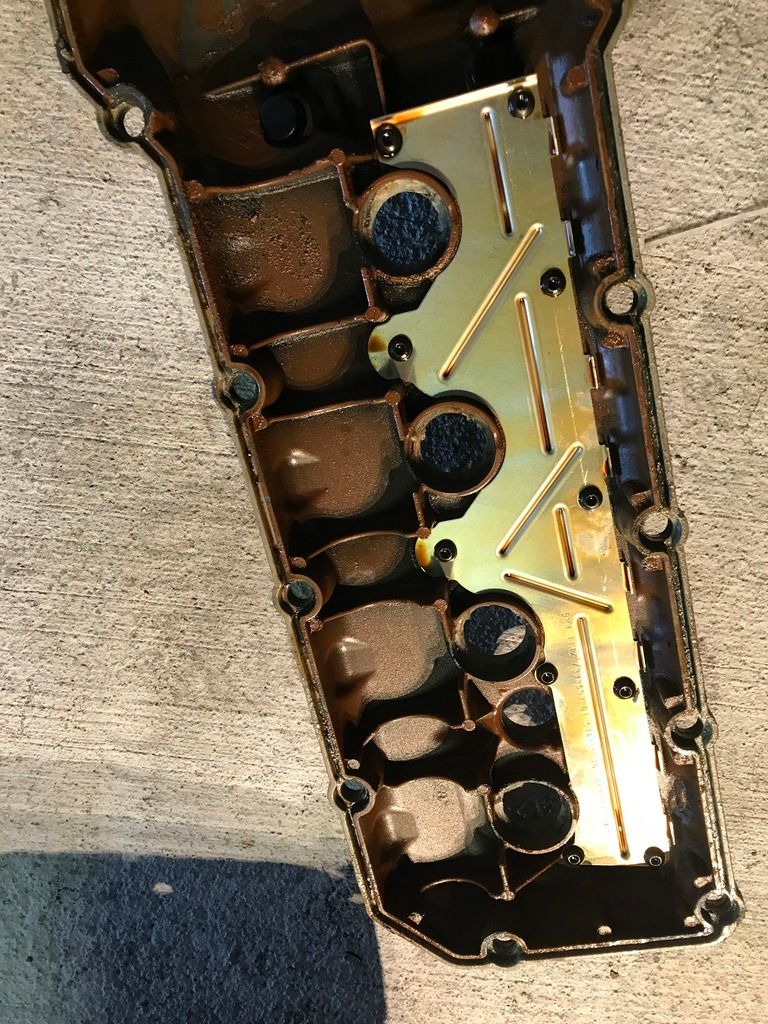
crazy thing is that tech left stickers on spark plug tubes and stickers got disinterested and went somewhere!!
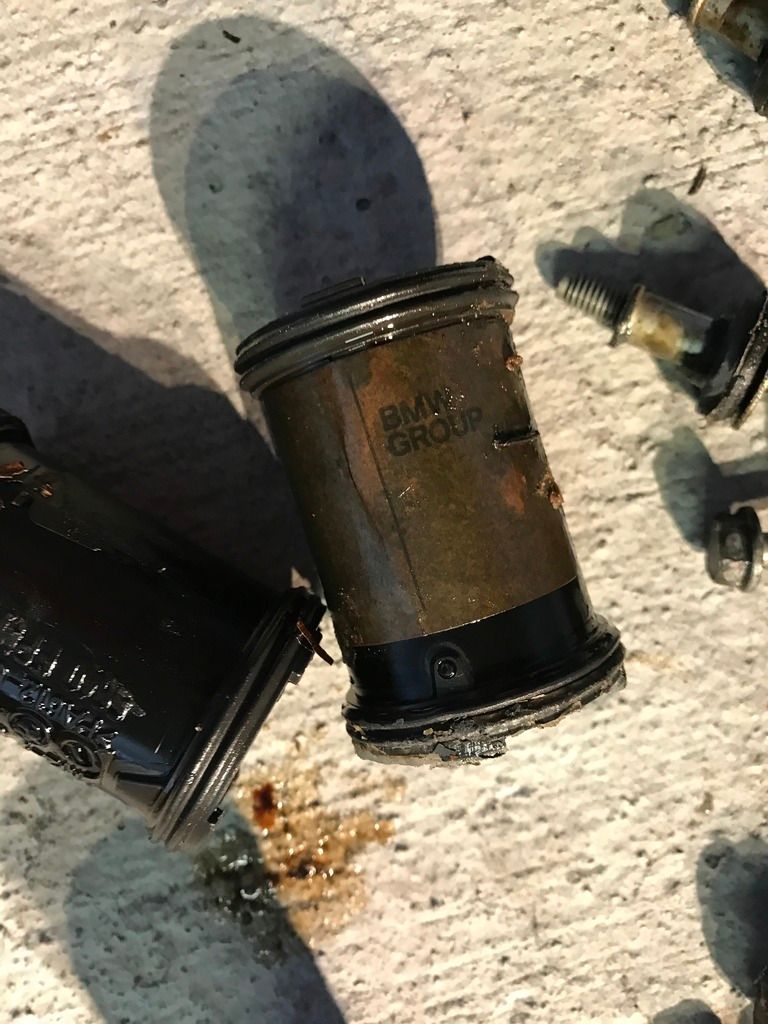
here is where it was leaking really bad.. I guess oil made it around the gasket with all those chips!
I am planning on replacing my valve covers & associated gaskets this week and was hoping someone could comment on the torque pattern for the valve cover bolts. I came up with three alternatives:

Which one looks best?
Also, would it be possible to tie fishing line around the cover to keep the gasket in place, and then to cut/remove the line once the cover is seated in place?
Many thanks!
Which one looks best?
Also, would it be possible to tie fishing line around the cover to keep the gasket in place, and then to cut/remove the line once the cover is seated in place?
Many thanks!
rantarM3 wrotewhere in FL are you? maybe you can help me finish mine and I'll help you with yours...? I'm picking up my powder coated covers on Wednesday! let me knowI am planning on replacing my valve covers & associated gaskets this week and was hoping someone could comment on the torque pattern for the valve cover bolts. I came up with three alternatives:
Which one looks best?
Also, would it be possible to tie fishing line around the cover to keep the gasket in place, and then to cut/remove the line once the cover is seated in place?
Many thanks!
I started on the corners of the valve cover and worked my way in... Worked for me and no leaks. The hardest part was trying the get the valve cover gasket to not fall off when putting back the valve cover. If they are not aligned properly you'll have a leak. I had to redo the passenger side bank twice because of that.
chamba002 wrotehaha that's the opposite way of doing it lol but I"m glad it's not leakingI started on the corners of the valve cover and worked my way in... Worked for me and no leaks. The hardest part was trying the get the valve cover gasket to not fall off when putting back the valve cover. If they are not aligned properly you'll have a leak. I had to redo the passenger side bank twice because of that.
Cbozz wroteLol yeah I saw that part after I tightened valve covers.... I was rushing and didn't bother to read the manual once I put the valve cover back in. After you do it once, its not that terrible. 10mm swivel socket helps a lot with this.haha that's the opposite way of doing it lol but I"m glad it's not leaking
Tighten down all retaining elements
diagonally from inside to outside.
Tightening torque: 11 12 8AZ.
diagonally from inside to outside.
Tightening torque: 11 12 8AZ.
Cbozz wroteI'm in Boynton Beach, out west of the Turnpike. Are you nearby?where in FL are you? maybe you can help me finish mine and I'll help you with yours...? I'm picking up my powder coated covers on Wednesday! let me know
Because I am doing other work on the car this week I am stuck at home until I'm all done, unfortunately.
Forgot to add the torque:
11 12 8AZ Decoupling adapter screw to cylinder head cover.
S65 M6 6 Nm
11 12 8AZ Decoupling adapter screw to cylinder head cover.
S65 M6 6 Nm
rantarM3 wroteI'm in fort lauderdale stuck as well, i'm picking up my valve cover tomorrow and flying to saint louis thursday but will be back mid next week if you need help..I'm in Boynton Beach, out west of the Turnpike. Are you nearby?
Because I am doing other work on the car this week I am stuck at home until I'm all done, unfortunately.
KawBoy wroteyea I saw that one there but i'm going with 10NM...Forgot to add the torque:
11 12 8AZ Decoupling adapter screw to cylinder head cover.
S65 M6 6 Nm
in that manual online book one tq says 17NM, one 10NM and this one said 6NM for decoupling... I'll go with 10NM right in between.. and also it may be very hard to tq the back bolts since there is no space for the tq wrench...
I think 10NM is a safe tq
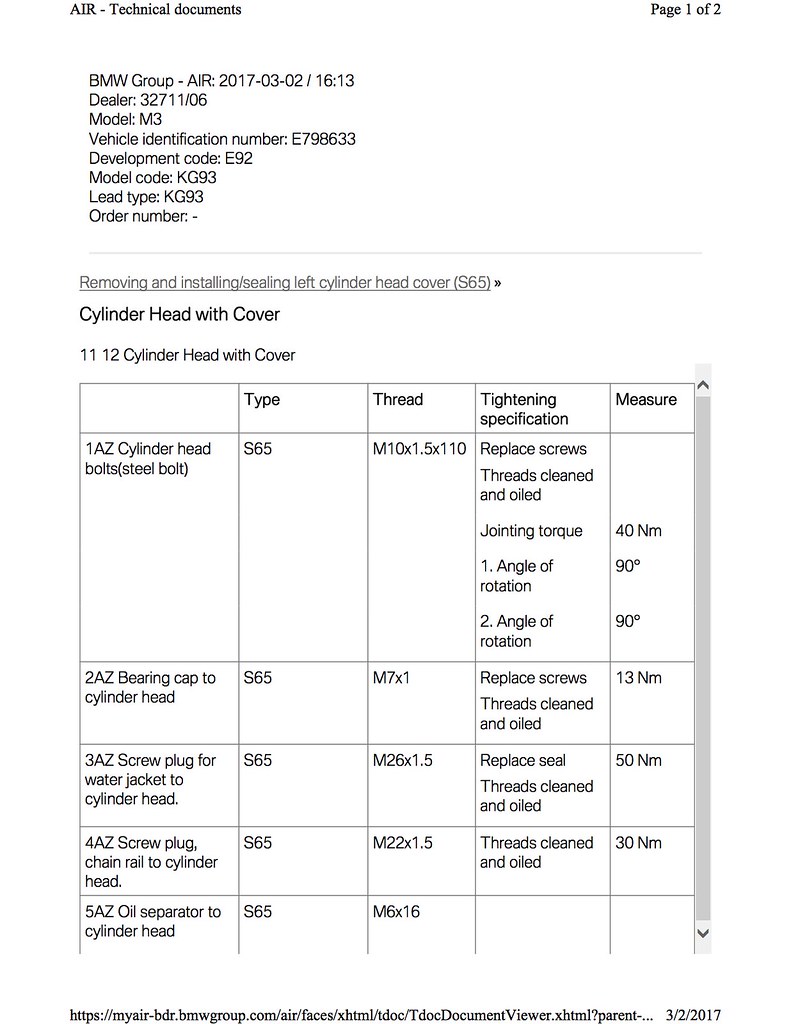
Cbozz wroteIt should be OK with 10Nm. However, I believe the screws touch the bottom. And they are aluminum. Just saying that maybe, just maybe, 10Nm might be a bit excessive. The torque I posted came from BMW AIR (former TIS) for my VIN (2012 car). I can post the document tomorrow when I get to the office if you'd like, just to make sure.yea I saw that one there but i'm going with 10NM...
in that manual online book one tq says 17NM, one 10NM and this one said 6NM for decoupling... I'll go with 10NM right in between.. and also it may be very hard to tq the back bolts since there is no space for the tq wrench...
I think 10NM is a safe tq
KawBoy wrotesure, please post themIt should be OK with 10Nm. However, I believe the screws touch the bottom. And they are aluminum. Just saying that maybe, just maybe, 10Nm might be a bit excessive. The torque I posted came from BMW AIR (former TIS) for my VIN (2012 car). I can post the document tomorrow when I get to the office if you'd like, just to make sure.
I actually used my TQ wrench to unscrew my old bolts that were installed by BMW technicians of Fort Lauderdale and the TQ varied from 13NM to 17NM so go figure if they even cared to use a TQ wrench....
Cbozz wroteReadings from a torque wrench while unscrewing bolts usually are way off due to various factors; regardless, I agree with you that most technicians do not use a torque wrench.sure, please post them
I actually used my TQ wrench to unscrew my old bolts that were installed by BMW technicians of Fort Lauderdale and the TQ varied from 13NM to 17NM so go figure if they even cared to use a TQ wrench....
As promised:
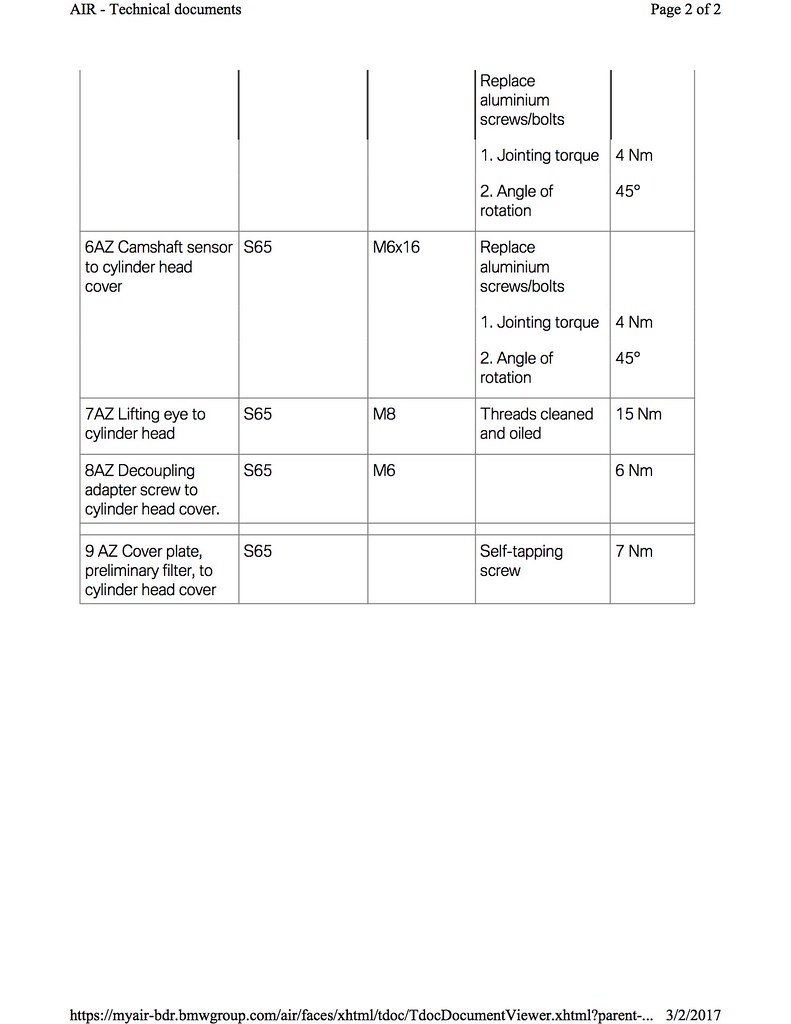
I've completed the replacement and have some notes that might be useful to those of you doing this in the near future.
1) Removing the strut braces and cowl cover gives you more space in the rear to work in. It's only a few screws/bolts/nuts and I think it is worthwhile. With those parts removes, I was able to use a torque wrench on every valve cover bolt. The only exception was the passenger side stud that acts as a ground and onto which the plastic ignition coil cover snaps.
2) I bought replacement valve covers which came with the gaskets, grommets, and bolts all in place. Leaving the bolts in the cover keeps the gasket from falling off of the valve cover during installation. You could even use some little foam pipe spacers to keep the bolts in the raised position.
3) When removing the covers most of the old DreiBond was stuck on the gaskets. But some could stay behind on the heads and could easily fall inside the engine. Keep an eye out for the old DreiBond and make sure you remove all of it and that none fell into the engine.
4) I installed the spark plug tubes onto the heads first and then fitted the valve covers. That seemed to work well.
5) If you are getting new valve covers or are getting your old ones powder coated, keep in mind that all of the fasteners are one time use. For example, the bolts for the cam sensors are one time use and the new ones need to be torqued and stretched (4 Nm + 45 degrees).
6) I used a small torque wrench (graduated in in-lbs and Nm) for everything (except the strut brace nuts/bolts (34 Nm) - also one-time use) and it worked very well - easily getting to the rear bolts without the need for swivel joints. I used that wrench and a variety of extensions and sockets.
Now for some photos I took along the way.
Looking pretty clean at 45K miles:


New and old valve covers:


Spark plug tubes in place:

Ready to torque everything down:


1) Removing the strut braces and cowl cover gives you more space in the rear to work in. It's only a few screws/bolts/nuts and I think it is worthwhile. With those parts removes, I was able to use a torque wrench on every valve cover bolt. The only exception was the passenger side stud that acts as a ground and onto which the plastic ignition coil cover snaps.
2) I bought replacement valve covers which came with the gaskets, grommets, and bolts all in place. Leaving the bolts in the cover keeps the gasket from falling off of the valve cover during installation. You could even use some little foam pipe spacers to keep the bolts in the raised position.
3) When removing the covers most of the old DreiBond was stuck on the gaskets. But some could stay behind on the heads and could easily fall inside the engine. Keep an eye out for the old DreiBond and make sure you remove all of it and that none fell into the engine.
4) I installed the spark plug tubes onto the heads first and then fitted the valve covers. That seemed to work well.
5) If you are getting new valve covers or are getting your old ones powder coated, keep in mind that all of the fasteners are one time use. For example, the bolts for the cam sensors are one time use and the new ones need to be torqued and stretched (4 Nm + 45 degrees).
6) I used a small torque wrench (graduated in in-lbs and Nm) for everything (except the strut brace nuts/bolts (34 Nm) - also one-time use) and it worked very well - easily getting to the rear bolts without the need for swivel joints. I used that wrench and a variety of extensions and sockets.
Now for some photos I took along the way.
Looking pretty clean at 45K miles:
New and old valve covers:
Spark plug tubes in place:
Ready to torque everything down:
Did they coat the new covers differently? They look more grey than tan
BzsBimmer wroteMaybe that tan comes from normal varnish on the inside and heat embrittlement/yellowing on the outside? When I need to do this I'm definitely getting my covers media blasted and powder coated.Did they coat the new covers differently? They look more grey than tan
What's the consensus about recoating the interior of the covers? Is the magnesium reactive internally? Why did they coat them in the first place?
