This Carplay/AA box seems to have been released in August 2021. Only a few have installed this so far, I believe I am #3 but there could be others out there that haven't posted about it. Hopefully there will be improvements along the way.
The major improvement with this option is audio is output digitally using the MOST bus. The same way the factory OEM CD Changer outputs audio. In fact this unit simulates CD1 audio source.
SQ is a huge improvement over AUX/Quadlock Aux of similar type boxes.
The one downside is the Mic situation, the 12Volt unit comes with a separate mic to plug into the unit. The Carsara oem mic splitter harness can be used but its harder to buy separately and most likely have to hope Carsara has some they can sell. They have sold them to previous Carsara customers, but we are unsure how long that will continue.
There is a CCC version but my experience with this has only been with the CIC version on an E92 M3, which should apply to any E90, E91, E92, E92 3 series, E60 5 Series, early F10s, E81, E82, E87, E88 1 Series. E70, E71 X Series, E89 Z series, F01 7 series and probably more models that came with the CIC navigation system.
Mr12Volt P2000 Pros:
- M.O.S.T fully digital audio output to CIC
- Supports Lossless Audio via Wireless Carplay and Apple Music
- Faster / More responsive UI
- Less bulky harness (no quadlock so no hassle hiding bulky cables behind the CIC
- Supports Backup Camera / Front Camera / 360 R/L Cameras
Cons:
- Initial setup issues, Mr12Volt claims no coding is required, but none of us could get it to work without coding CDMM_CHANGER_3 to mp3_cdc
- Aftermarket Mic included, no OEM mic splitter cable included (But could be bought separately)
- Fairly new product, so software might have the odd bugs but it looks like they already promised an update. But out of the box it is already more polished than the Joyeauto, Andream, Kremersino, etc units.
- After more testing, users are now reporting a lack of low end bass compared to the same audio played directly from the CIC unit. mr12volt says this can't be fixed without new hardware unfortunately. next gen units may be coming in 6-12 months. It does still deliver crystal clear crisp sound compare to the AUX CarPlay though, Just that it doesn't deliver very strong bass. Your listening style/type of music might determine how important this is to you.
Update (April 2022): New model with updated dsp is out: P2000 CICMD
https://www.mr12volt.com/collections/frontpage/products/bmw-cic-carplay-aa-interface-dsp
This new unit fixes the bass issue, the LVDS cable has changed so you'll need to re-run that wire from the CIC HU.
A $100 credit was offered to previous buyers, read the website for more info expires May 31, 2022: https://www.mr12volt.com/pages/p2000-md-discount-program-returningcustomers
Thanks to both 2009550iMSport
  Tigamilla for being one of the first to install this unit and provide tips for the install and setup.
Link to Mr12Volt website (currently pre-order as of 8/22/2021: https://mr12v.com/products/most-carplay-android-auto-interface-for-bmw-cic-e90-e92-x5-x6-z4-f01
E-Bay link (Currently Sold out 8/22/2021):https://ebay.us/4CT5Pf
A few units were available on ebay for $299, but has since sold out. Perhaps they will list more in the future.
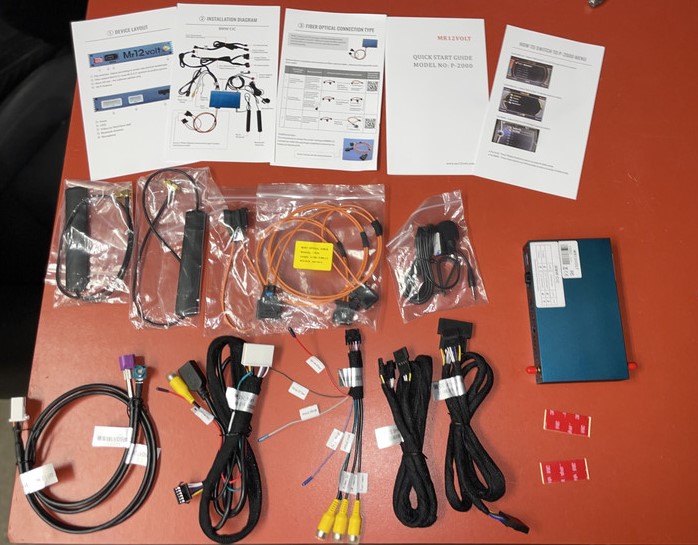
This is everything that comes in the box.
Some images of the UI From2009550iMSport
Install Tips
2024 EDIT: New units have a different harness that goes behind the HU. This prevents coding CIC after installed, I suggest anyone installing the new unit to complete the coding steps prior to install.
This is not meant to be a step by step how-to, this at least assumes you are familiar with taking apart the dash and removing the CIC head-unit. Those steps are well documented in other places so we wont cover them here. As always continue at your own risk or seek help from a professional. The new unit and harness in 2024 differents from the pictures below
Probably a good idea to check out the Mr12Volt install video below:
- Remove the center trim, remove the start button, hazard switch connectors, I recommend removing the trim and plugging the start button back in for testing later on.
- Remove the Climate control panel and connectors, put it aside.
- Remove the CIC trim
- Remove the Center trim with CIC controller, put it aside
- Cover shifter and area below the CIC HU so when you pull it out it doesn't scratch anything
- Remove CIC HU
- Remove Quadlock and LDVS screen cable
- Remove MOST fiber optic connections from quadlock by releasing the small clip holding it in. Remove plastic housing from 1 end of the 12volt splitter harness, put it onto the OEM most connection, plug into the splitter harness, put the other end into the Quadlock connector.
- Run CIC controller splitter harness up to behind the CIC
- Run backup / front / 360 cameras (Optional)
- Run Mic and place it where you want it. (or install oem mic splitter if you have it)
- Run cables to where you plan to mount the 12Volt unit.
- Connect everything
- Test it out, plug in CIC controller to test.
- Put everything back together
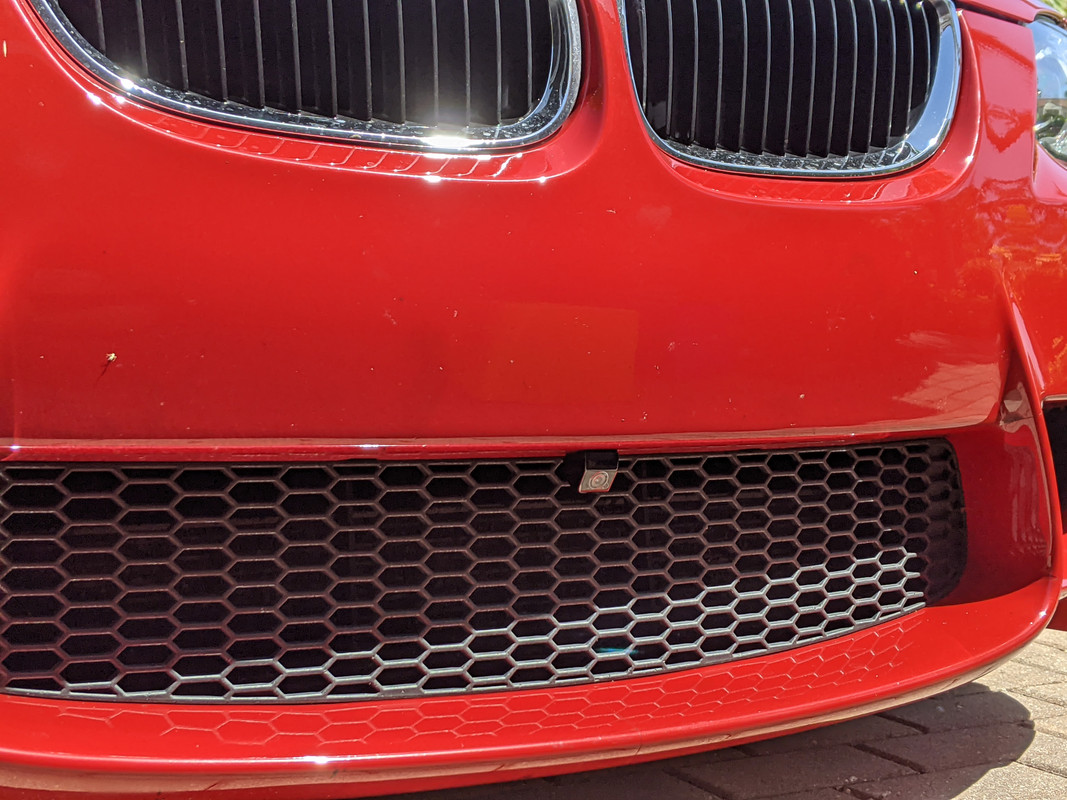
This is the rear camera I used: https://amzn.to/3kuFuIl
Front:
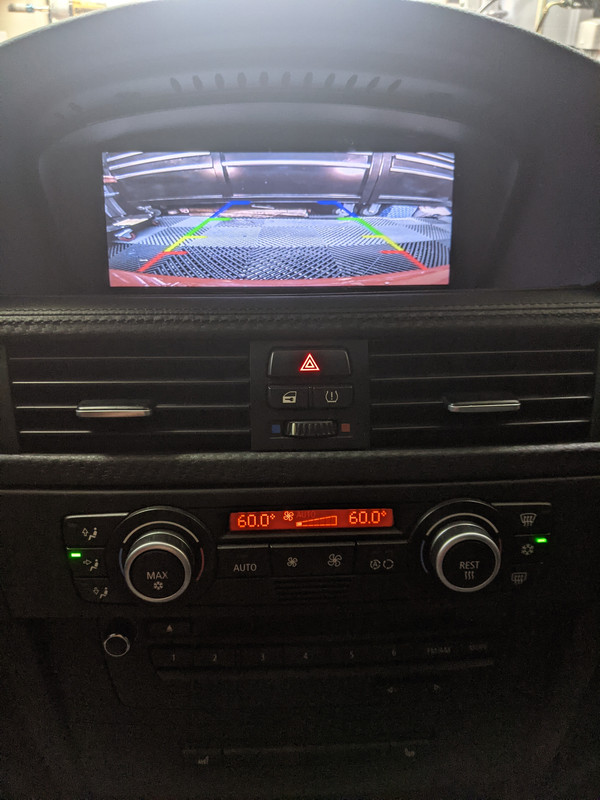
Rear:
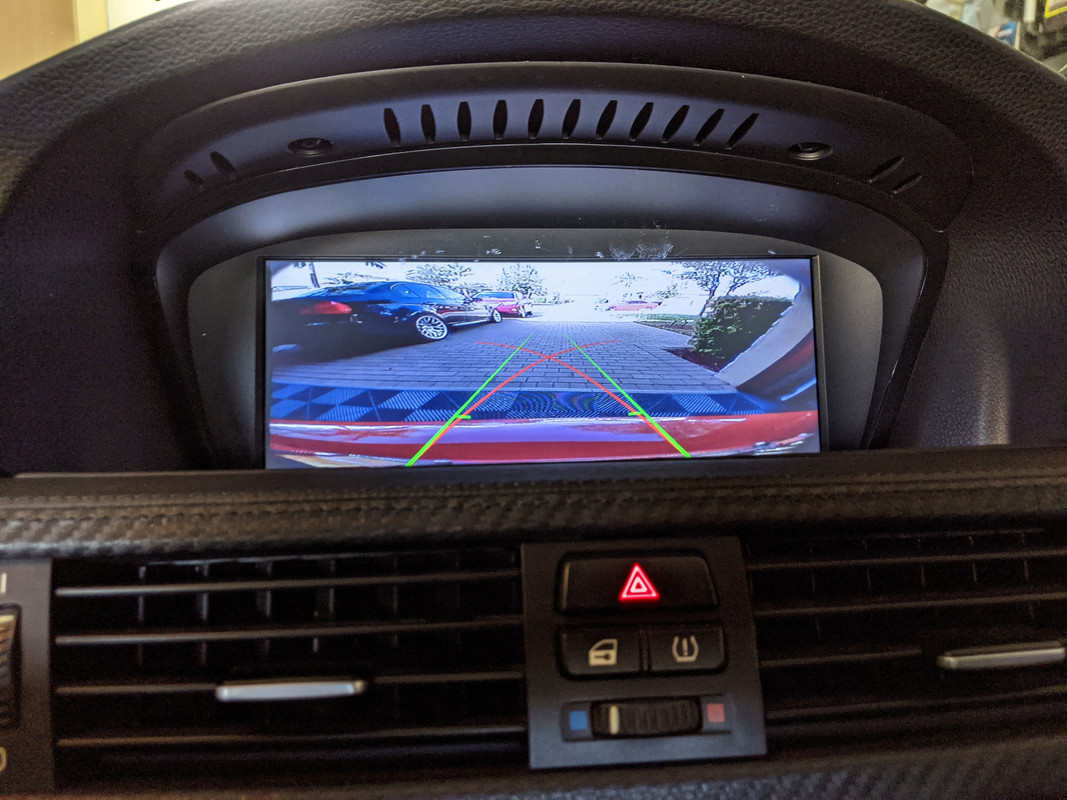
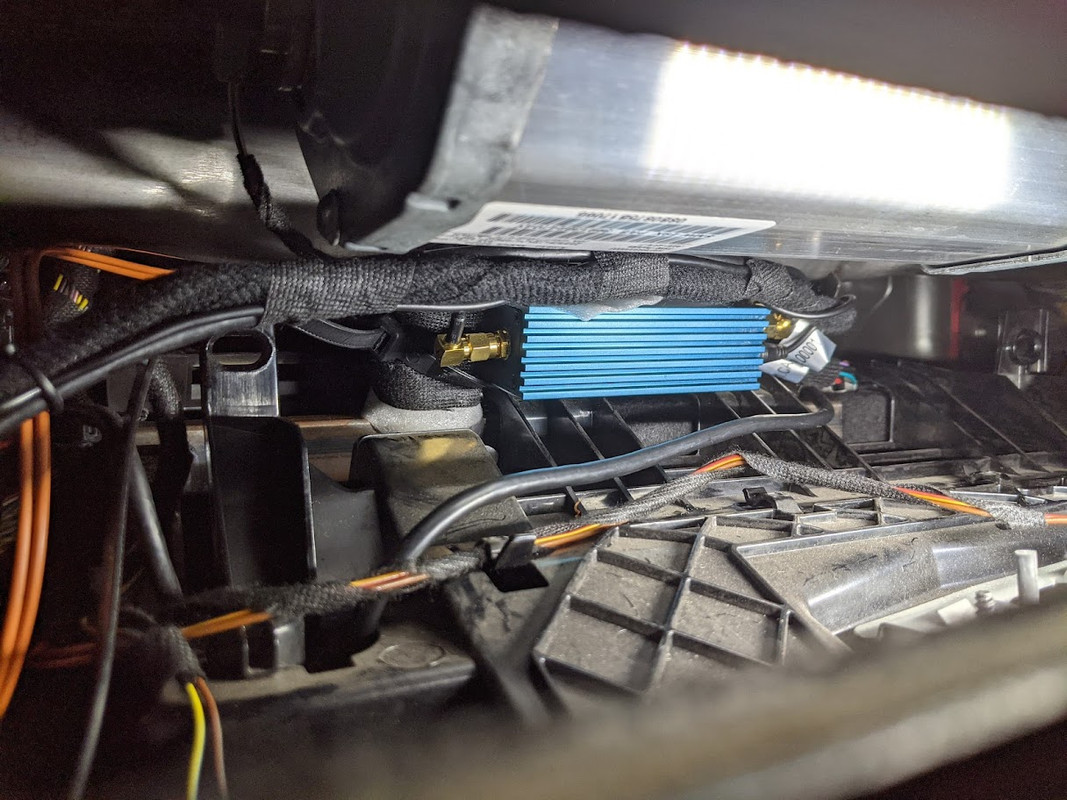
Now I will get into a little more about how I mounted mine which is probably more involved that some would want. I choose to mount mine above the glove box. 12Volt just tucked it to the right side of the cic and left it there. I prefer above the glovebox because I can remove it fairly easy if I need access it. I also think there is more room and can be mounted better.
This is the spot I choose:
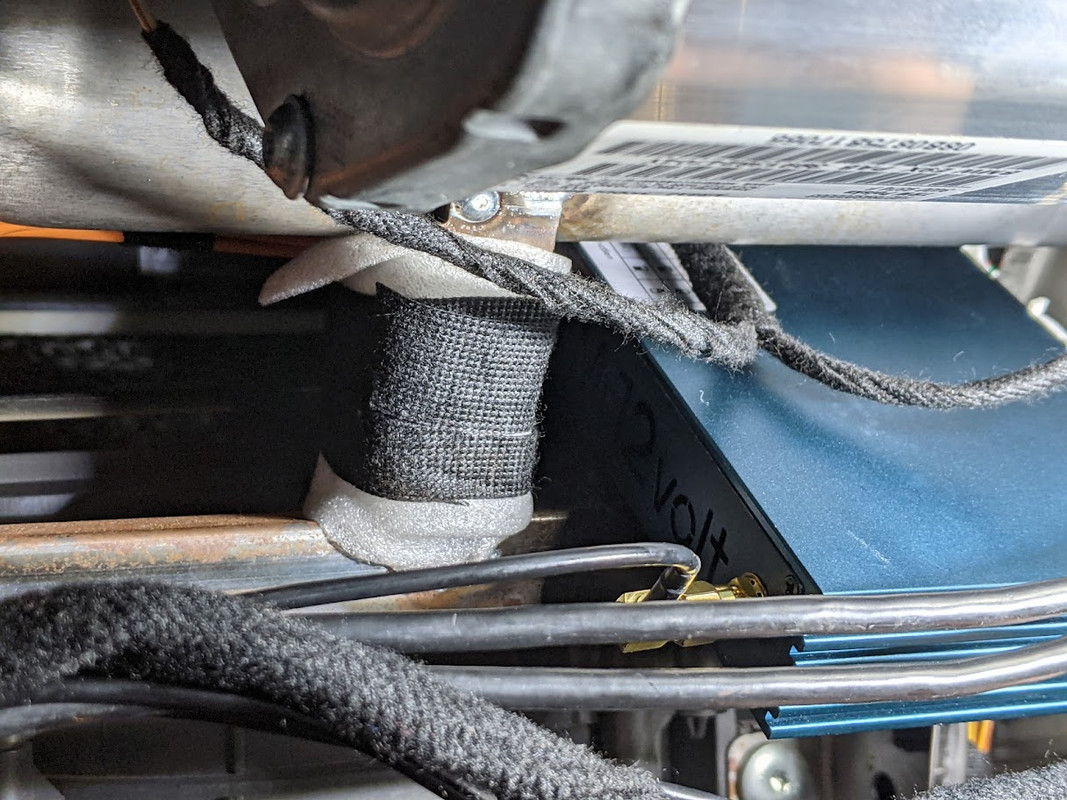
I wrapped metal dash frame with some foam packing material and put some oem like Tesa electrical harness tape around it, then zip tied the unit to securely mount it and stop it from rattling around in the dash. Wrapped up the wires to keep things neat.
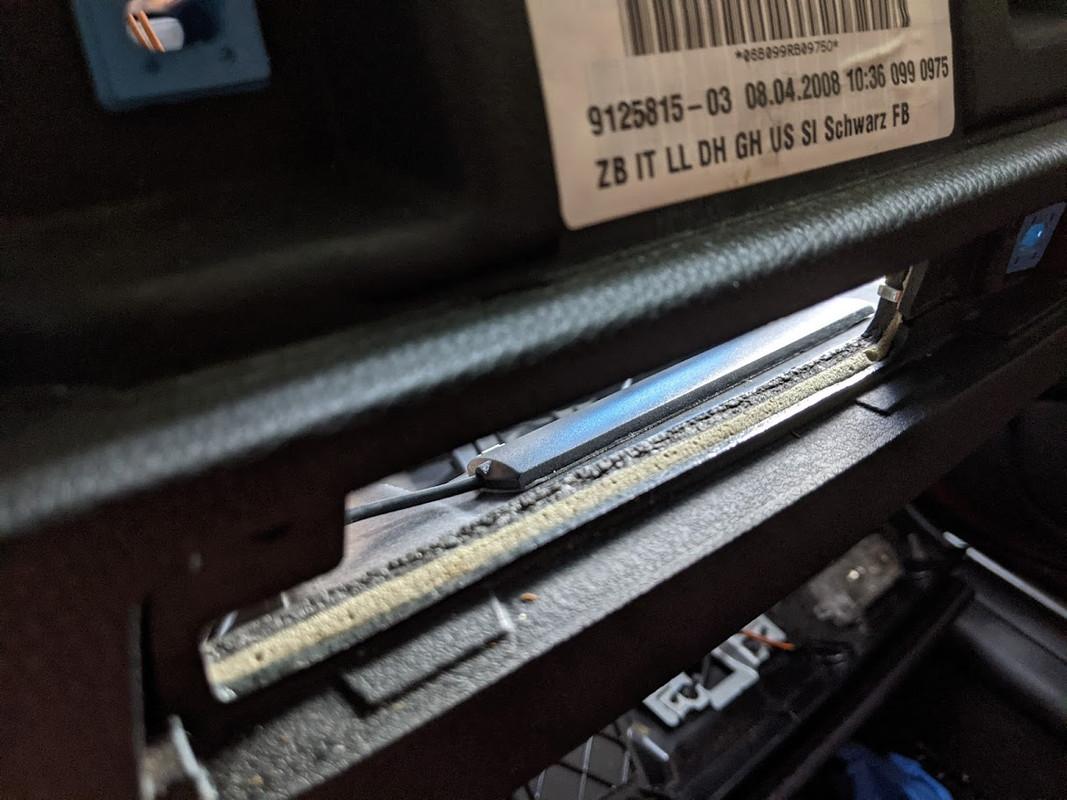
This is where I mounted the bluetooth and wifi antennas. Hopefully since the dash is plastic signal will be good in the car or at least towards the center where my phone will be
Now the initial setup issues, also why I recommend you test everything before putting stuff back together.
2009550iMSport has this to say about his setup:
2024 EDIT: New units have a different harness that goes behind the HU. This prevents coding CIC after installed, I suggest anyone installing the new unit to complete the coding steps prior to install.
As soon as I coded CDMM_CHANGER_3 to mp3_cdc everything started to work and the CD1 option appeared. So far all 3 of us that have gotten it to work have coded this option. So we are unsure if the Mr12Volt without coding method even works. (there has been 1 report of the owner not needing to code anything without having a cd changer and it worked for them. But more have reported needing to have the above coded, this feature seems hit or miss for most. It is a good idea to be ready to have the coding done if needed).
Tips for coding with Bimmercode (Thanks djan9el
  ):
):
Headunit -> Expert Mode -> 3000 HMI
Find CDMM_CHANGER_3 option and change it to mp3_cdc
CODE -> START CODING
Tips for accessing admin password protected menu (Thanks @2009550imsport):
1. Go to the Settings -> System -> Factory Mode
2. Click on Advanced Setting
3. This will bring up a password prompt. Enter “688612” and press OK
Full details on changing the bootloader logo here: https://www.m3post.com/forums/showpost.php?p=27954618&postcount=12
The major improvement with this option is audio is output digitally using the MOST bus. The same way the factory OEM CD Changer outputs audio. In fact this unit simulates CD1 audio source.
SQ is a huge improvement over AUX/Quadlock Aux of similar type boxes.
The one downside is the Mic situation, the 12Volt unit comes with a separate mic to plug into the unit. The Carsara oem mic splitter harness can be used but its harder to buy separately and most likely have to hope Carsara has some they can sell. They have sold them to previous Carsara customers, but we are unsure how long that will continue.
There is a CCC version but my experience with this has only been with the CIC version on an E92 M3, which should apply to any E90, E91, E92, E92 3 series, E60 5 Series, early F10s, E81, E82, E87, E88 1 Series. E70, E71 X Series, E89 Z series, F01 7 series and probably more models that came with the CIC navigation system.
Mr12Volt P2000 Pros:
- M.O.S.T fully digital audio output to CIC
- Supports Lossless Audio via Wireless Carplay and Apple Music
- Faster / More responsive UI
- Less bulky harness (no quadlock so no hassle hiding bulky cables behind the CIC
- Supports Backup Camera / Front Camera / 360 R/L Cameras
Cons:
- Initial setup issues, Mr12Volt claims no coding is required, but none of us could get it to work without coding CDMM_CHANGER_3 to mp3_cdc
- Aftermarket Mic included, no OEM mic splitter cable included (But could be bought separately)
- Fairly new product, so software might have the odd bugs but it looks like they already promised an update. But out of the box it is already more polished than the Joyeauto, Andream, Kremersino, etc units.
- After more testing, users are now reporting a lack of low end bass compared to the same audio played directly from the CIC unit. mr12volt says this can't be fixed without new hardware unfortunately. next gen units may be coming in 6-12 months. It does still deliver crystal clear crisp sound compare to the AUX CarPlay though, Just that it doesn't deliver very strong bass. Your listening style/type of music might determine how important this is to you.
Update (April 2022): New model with updated dsp is out: P2000 CICMD
https://www.mr12volt.com/collections/frontpage/products/bmw-cic-carplay-aa-interface-dsp
This new unit fixes the bass issue, the LVDS cable has changed so you'll need to re-run that wire from the CIC HU.
A $100 credit was offered to previous buyers, read the website for more info expires May 31, 2022: https://www.mr12volt.com/pages/p2000-md-discount-program-returningcustomers
Thanks to both
2009550iMSport Tigamilla for being one of the first to install this unit and provide tips for the install and setup.Link to Mr12Volt website (currently pre-order as of 8/22/2021: https://mr12v.com/products/most-carplay-android-auto-interface-for-bmw-cic-e90-e92-x5-x6-z4-f01
E-Bay link (Currently Sold out 8/22/2021):https://ebay.us/4CT5Pf
A few units were available on ebay for $299, but has since sold out. Perhaps they will list more in the future.
This is everything that comes in the box.
Some images of the UI From
2009550iMSport


Install Tips
2024 EDIT: New units have a different harness that goes behind the HU. This prevents coding CIC after installed, I suggest anyone installing the new unit to complete the coding steps prior to install.
This is not meant to be a step by step how-to, this at least assumes you are familiar with taking apart the dash and removing the CIC head-unit. Those steps are well documented in other places so we wont cover them here. As always continue at your own risk or seek help from a professional. The new unit and harness in 2024 differents from the pictures below
Probably a good idea to check out the Mr12Volt install video below:
- Remove the center trim, remove the start button, hazard switch connectors, I recommend removing the trim and plugging the start button back in for testing later on.
- Remove the Climate control panel and connectors, put it aside.
- Remove the CIC trim
- Remove the Center trim with CIC controller, put it aside
- Cover shifter and area below the CIC HU so when you pull it out it doesn't scratch anything
- Remove CIC HU
- Remove Quadlock and LDVS screen cable
- Remove MOST fiber optic connections from quadlock by releasing the small clip holding it in. Remove plastic housing from 1 end of the 12volt splitter harness, put it onto the OEM most connection, plug into the splitter harness, put the other end into the Quadlock connector.
- Run CIC controller splitter harness up to behind the CIC
- Run backup / front / 360 cameras (Optional)
- Run Mic and place it where you want it. (or install oem mic splitter if you have it)
- Run cables to where you plan to mount the 12Volt unit.
- Connect everything
- Test it out, plug in CIC controller to test.
- Put everything back together
This is the rear camera I used: https://amzn.to/3kuFuIl
Front:
Rear:
Now I will get into a little more about how I mounted mine which is probably more involved that some would want. I choose to mount mine above the glove box. 12Volt just tucked it to the right side of the cic and left it there. I prefer above the glovebox because I can remove it fairly easy if I need access it. I also think there is more room and can be mounted better.
This is the spot I choose:
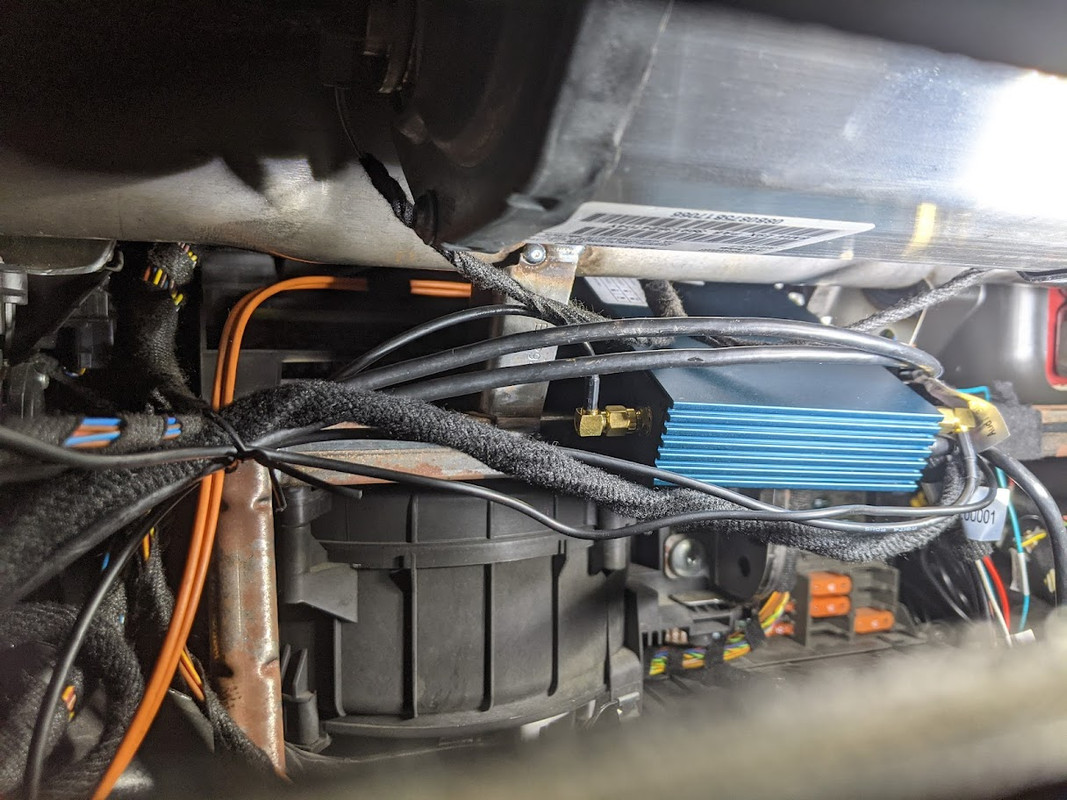
I wrapped metal dash frame with some foam packing material and put some oem like Tesa electrical harness tape around it, then zip tied the unit to securely mount it and stop it from rattling around in the dash. Wrapped up the wires to keep things neat.
This is where I mounted the bluetooth and wifi antennas. Hopefully since the dash is plastic signal will be good in the car or at least towards the center where my phone will be
Now the initial setup issues, also why I recommend you test everything before putting stuff back together.
2009550iMSport has this to say about his setup:2009550iMSport wroteMy experience was that Mr12Volt instructions said coding wasn't needed and the unit will activate the CD Changer on it's own, but I couldn't get it to work after unplugging the connectors and trying different dip switch options....do not change the DIP switches. Leave them ALL off. The instructions are wrong. The only DIP switch you might need to change is the one for E/F series, depending on if any of you has an F-chassis car. Upon digging through the developer menu, I learned this box automatically senses your display’s resolution and aspect ratio and will auto-adjust.
2024 EDIT: New units have a different harness that goes behind the HU. This prevents coding CIC after installed, I suggest anyone installing the new unit to complete the coding steps prior to install.
As soon as I coded CDMM_CHANGER_3 to mp3_cdc everything started to work and the CD1 option appeared. So far all 3 of us that have gotten it to work have coded this option. So we are unsure if the Mr12Volt without coding method even works. (there has been 1 report of the owner not needing to code anything without having a cd changer and it worked for them. But more have reported needing to have the above coded, this feature seems hit or miss for most. It is a good idea to be ready to have the coding done if needed).
Tips for coding with Bimmercode (Thanks
djan9el ):Headunit -> Expert Mode -> 3000 HMI
Find CDMM_CHANGER_3 option and change it to mp3_cdc
CODE -> START CODING
Tips for accessing admin password protected menu (Thanks @2009550imsport
):1. Go to the Settings -> System -> Factory Mode
2. Click on Advanced Setting
3. This will bring up a password prompt. Enter “688612” and press OK
Full details on changing the bootloader logo here: https://www.m3post.com/forums/showpost.php?p=27954618&postcount=12