131.2KVIEWS
10REPLIES
0APPRECIATES
01-14-2026LAST POST
Tools Required:
- Trim removal tool – a small plastic pry-bar
- T10 Torx screwdriver
- T20 Torx screwdriver
- Various small Common and Philips screwdrivers
- 10mm socket wrench to disconnect battery terminal

BEFORE YOU WILL START ANY WORK, PLEASE REMOVE CD/DVDs FROM YOUR CCC NAVIGATION UNIT AND THEN DISCONNECT NEGATIVE TERMINAL FROM THE BATTERY.


Dissassembly of old CCC Navigation Display and Installation of new Central Information Display.


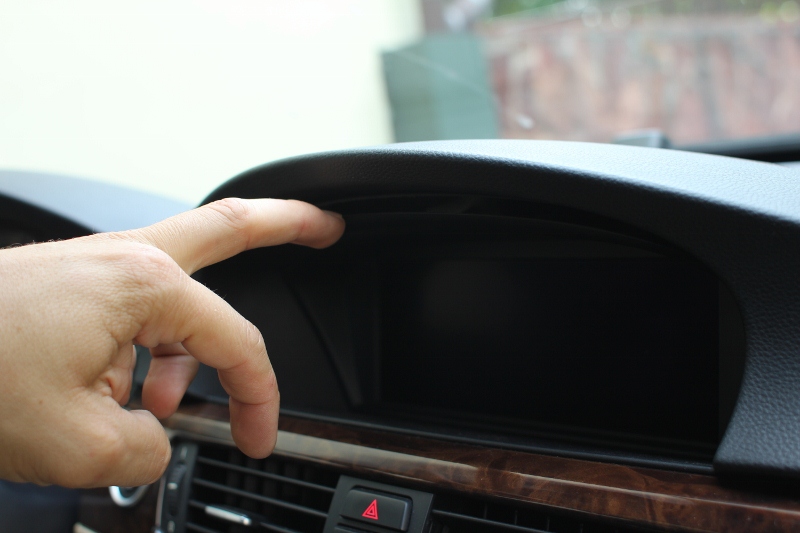
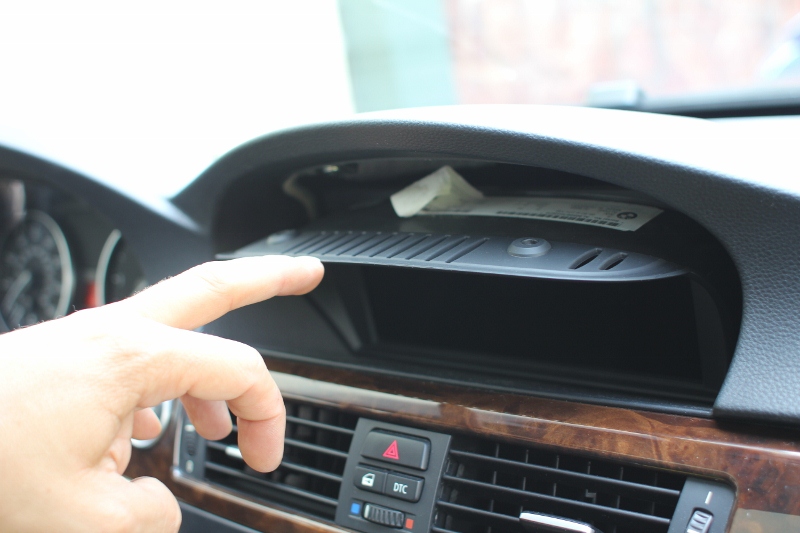
Take out two T10 torx screws and remove old Display Screen.
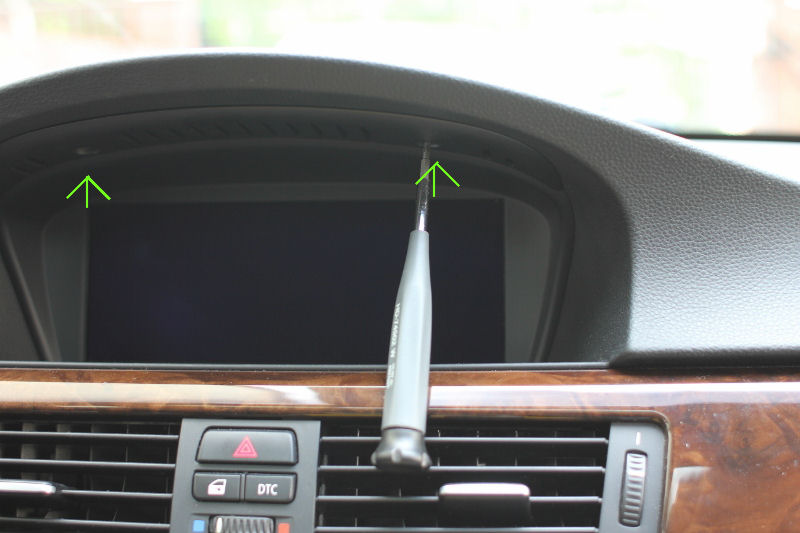
Attached image

Attached image

Attached image

Unplug power connector (black plug) and LVDS screen connector (silver plug). You no longer need the display screen connector, so you can insulate this socket with black tape and hide inside the hole in the dashboard.

Once the old display will be out, you need to change pins in the power socket.
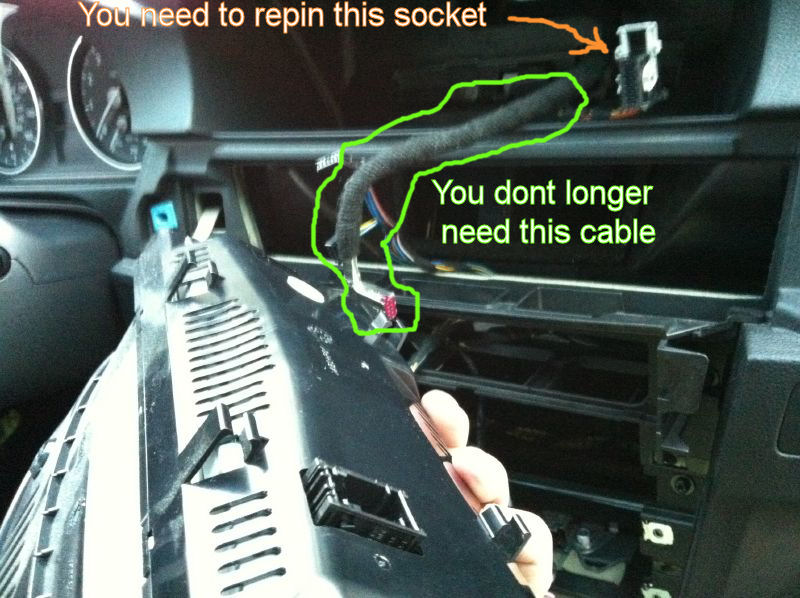
Attached image

You will need new CID Power socket #6113 6954526.
Start one by one switching wires to the holes with the same numbers:
1 to 1 (Red/Yellow)
3 to 3 (Brown)
5 to 5 (Orange/Grey)
6 to 6 (Green)
Each time, when you plug new wire to the hole you need to hear a “click”. After repining 4 wires, you need to press down plastic tab at the top of the socket.
This is how new CID Power socket #6113 6954526 should look like (sometimes this socket has blue color).
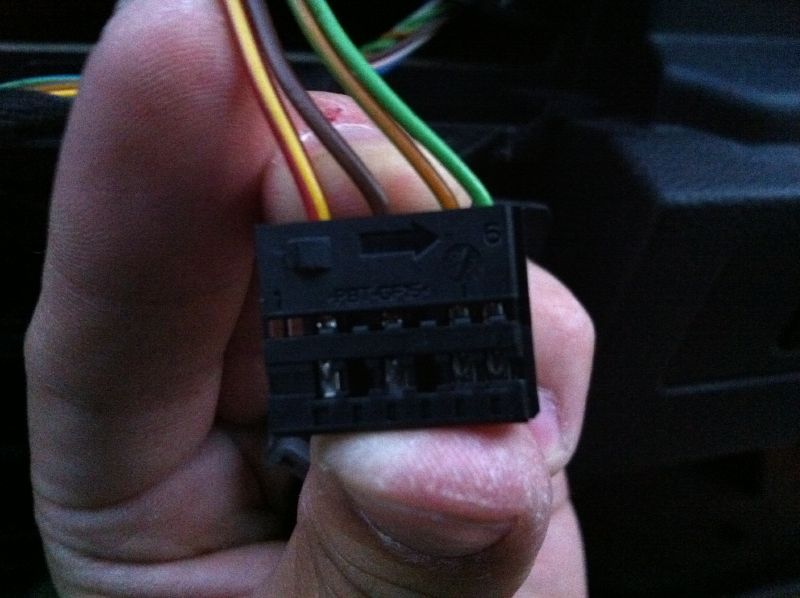
Attached image

It is time to install brand new HD screen connector #61119185171. ConnectBordeaux plug into the the same color socket at the back of the HD display screen. The other end of the cable run down in the hole towards the CCC/CIC Navigation Unit. Also connect new power connector to the HD screen.
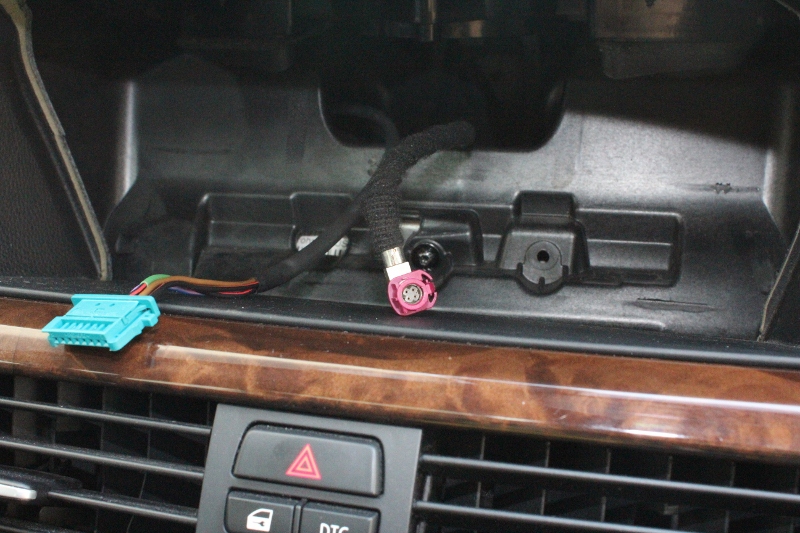
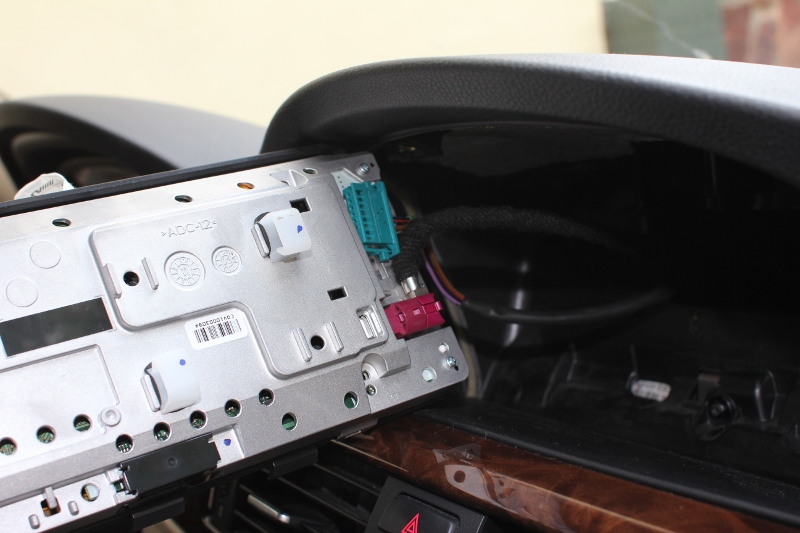
Attached image

Attached image

Insert new display screen into the hole in the dashboard and secure it back using two previously removed T10 Torx screws.

CONGRATULATIONS, YOUR NEW HD DISPLAY IS ALREADY INSTALLED.
Disassembly of old CCC Navigation Unit and Installation of new CIC Unit.

Using plastic pry-bar remove Center Dashboard trim. You can start from left side or right side.
Please be very careful not to make any scratches on the trim, neither break it.

Attached image

Attached image

When you remove center console trim, unplug start/stop button…..

Attached image

and DTC, flasher switch.

Attached image


Place center dashboard trim on the side.


Next remove Air Condition Control Unit. Again you need to lift plastic trim with plastic pry-bar.
There are two clips on the left and right, which hold this AC controller in place.

Attached image

Unplug 3 sockets and again place AC Unit on the side.

Attached image

Next remove the shifter knob. You need to press the button and pull it straight off.

Attached image

Then, remove old trim around the CCC Unit. Again you need to use plastic pry-bar.

Attached image

Unscrew 4 screws securing Navigation Unit.

Attached image

Unplug all connectors from CCC Unit.

Attached image

As to big radio square connector, you need to press down tab at the bottom of big socket and lift the “handle” up.
Attached image


When all the connectors will be out and as well as CCC unit, it is time to connect EMULATOR (please note that there are different types of emulators and way how to connect them).


Attached image


Start again from “square” socket form CCC unit and find the top of it.

Using small screwdriver, press down the tab…


Attached image

…and lift up the blue plug.

Attached image

Now you have gained access to pins (9,11,12, 15). Start removing them one by one.

Let’s start from removing pin 12 (Ground)

Attached image

Again you will need small screwdriver to press down small tab on a side of the pin and in the same time start pulling out from the other side brown wire. Don’t use too much force. When you press the tab correctly, you should be able to remove this wire without problems.
When the brown wire will be out, take in hand empty socket attached to emulator harness and plug it into the hole #3.

Attached image

Now it is time to insert one of the four wires attached to emulator. Brown wire with yellow ending goes into PIN 12 (the same hole which you have just emptied). Push this wire until you will hear a “click”.

Attached image

Do the same procedure with pin #15. Remove red wire from the navigation socket, next insert it into hole #4 from provided socket.

Attached image

Finally insert Red wire with the red ending from emulator harness into the same hole #15 in Navi socket.


Good job, there are two more wires left to replace. Remove Pin 9 (Green wire) from Navigation socket and plug it into the same hole green wire from the emulator harness.

Attached image

The Green wire which you have just removed from Pin 9 should be plug in the hole #2 from the provided socket. Don’t suggest much with my photo because I have additional wires connected to PIN 9 and 11.

Finally remove Brown wire with green stripe from Pin 11 and in the empty hole plug black wire from emulator harness. The wire which you have just disconnected from square socket should be plug into the hole #1 from the provided socket.

Attached image


In the end , your new socket should looks like this. Again, please ignore my additional white wires in the holes 1 and 2.

Attached image

Press down the tab to lock the socket and you are ready to insert plug into socket.
Attached image

Please double check if you have connected wires is the same way like at the above photo.


Don’t forget to insert back blue security tab.
Attached image
more to come later
Thread referenced by Johndong888 in Assistance doing a CCC to CIC retrofit in 2008 m3 04-23-2013
marius76 wrote
more to come later
I've done the CIC upgrade but, ran into some snags as was noted on another thread of the forum.

Issue 1.
Strange, funny whatever you'd like to call it. I had the same issue with the brown #3 wire pin. I broke.

The part number I was given is Part #61136954526.

Does this sound familiar? I can get it locally I'm hoping. How did you splice the two pieces. I have been told the been is a solder splice.
Is this the correct number?

Issue 2.
You've heard of the hindsight is 20/20 thing. Well, IMO the center console trim should also be removed. I didn't and now due to the extremely tight fit, have damaged the trim. Now I'm looking to replace the black alacantra leather trim piece only. Surprise, I have all the pieces.

Any idea where I can track one down and the cost?
This DIY is the best detailed one I ever seen, but unfortunately not complete...Marius will you upload remain of DIY or it is finished without any pics?
marius76 wrote
more to come later
Why did the OP never come back to finish up the detailed write-up? This is good reading.:popcorn:
this was the best diy i've seen, where is the rest of it???
Thread referenced by Theodore in Dash Clunking/Rattle noise 09-13-2016 · and 2 more related references...
Thread referenced by d4springer in iDrive upgrade from 2008 to 2010 + 10-05-2015
Thread referenced by reisf in 08 Idrive, want to upgrade to the fixed screen 02-24-2016
Thread referenced by BIMMER_Tech 631 in Considering doing the CIC Retorfit.... 11-20-2016
Bumping this from the grave. This is definitely the best DIY I have seen so far.

Any chance you have the remaining steps saved somewhere?
bump, curious of parts list and remaining instructions as well
Thread referenced by BimmerRob08 in I’d there a car-play system for my M3? 05-19-2023
Since this thread is dead, anyone have a new DIY? :)
xaappx wrote
Since this thread is dead, anyone have a new DIY? :)
Reading this in 2026 as I’m wanting to do this retrofit myself. I’m not sure if my Google-fu is failing me but I cannot find a complete parts list and how to guide on the forums.

Did you manage to get the retrofit done yourself since then?