

Tournevis à tête plate
Douille de 10 mm
Supports Jack (facultatif)
Fournitures nécessaires :
1/2" OD tubes transparents
Prise de vide
1 ou 2 colliers de serrage
2 litres de liquide de direction assistée http://www.ecstuning.com/ES2550608/
Réservoir OEM (facultatif) http://www.ecstuning.com/ES2194319
Je recommanderais de monter l'avant de la voiture sur des supports avant de commencer. Il suffit d'être assez haut pour retirer le contact du pneu du sol. C’est facultatif, mais cela facilitera les choses plus tard.
La première étape consiste à vider le réservoir avec une seringue et à le démonter de la voiture. Il y a deux boulons de 10mm tenant le support sur la voiture et un boulon de 10mm tenant le support sur le réservoir.
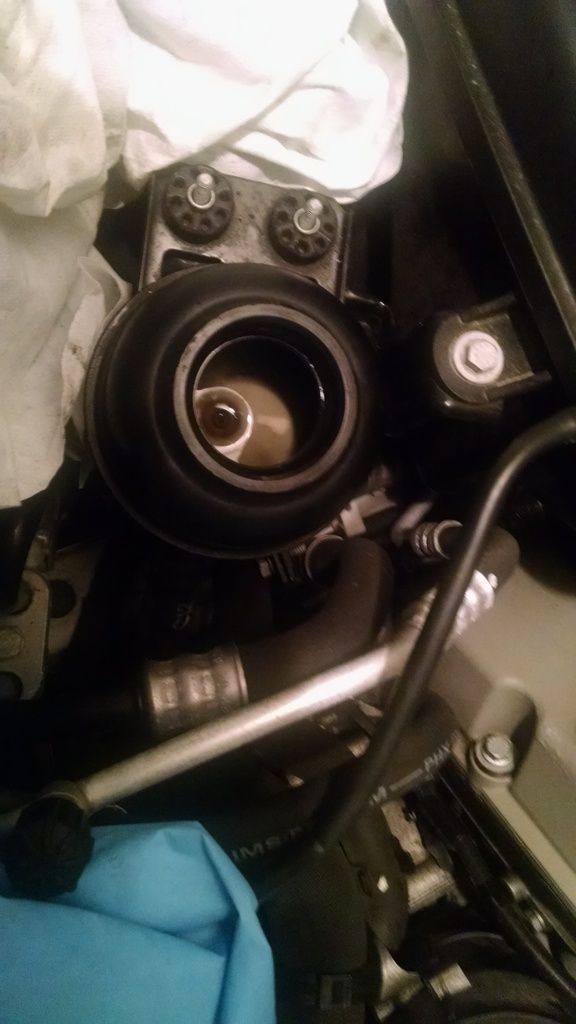
Utilisez un tournevis à tête plate et retirez la pince d'utilisation unique du fond, plus petit tuyau et retirez le tuyau du réservoir.
*Facultatif* Le réservoir a un filtre intégré. J'ai décidé de changer tout ça parce que ma voiture a sept ans. Si vous choisissez de le faire, vous devez également retirer la pince à usage unique du tuyau plus grand, enlever le réservoir et le remplacer par un nouveau. **
Utilisez un bouchon d'orifice de vide et couvrez le mamelon laissé ouvert lorsque vous avez retiré le petit tuyau du réservoir.
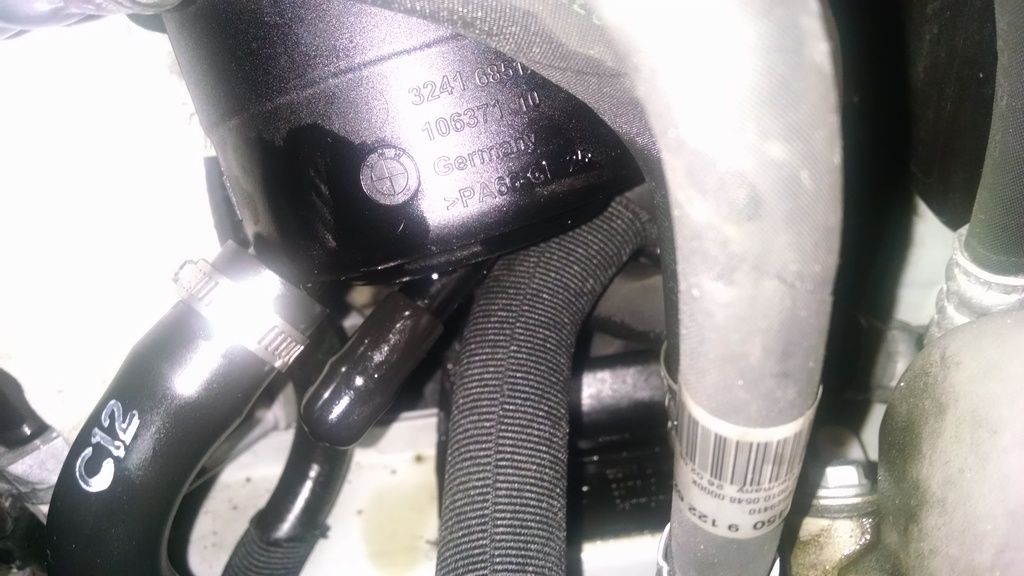
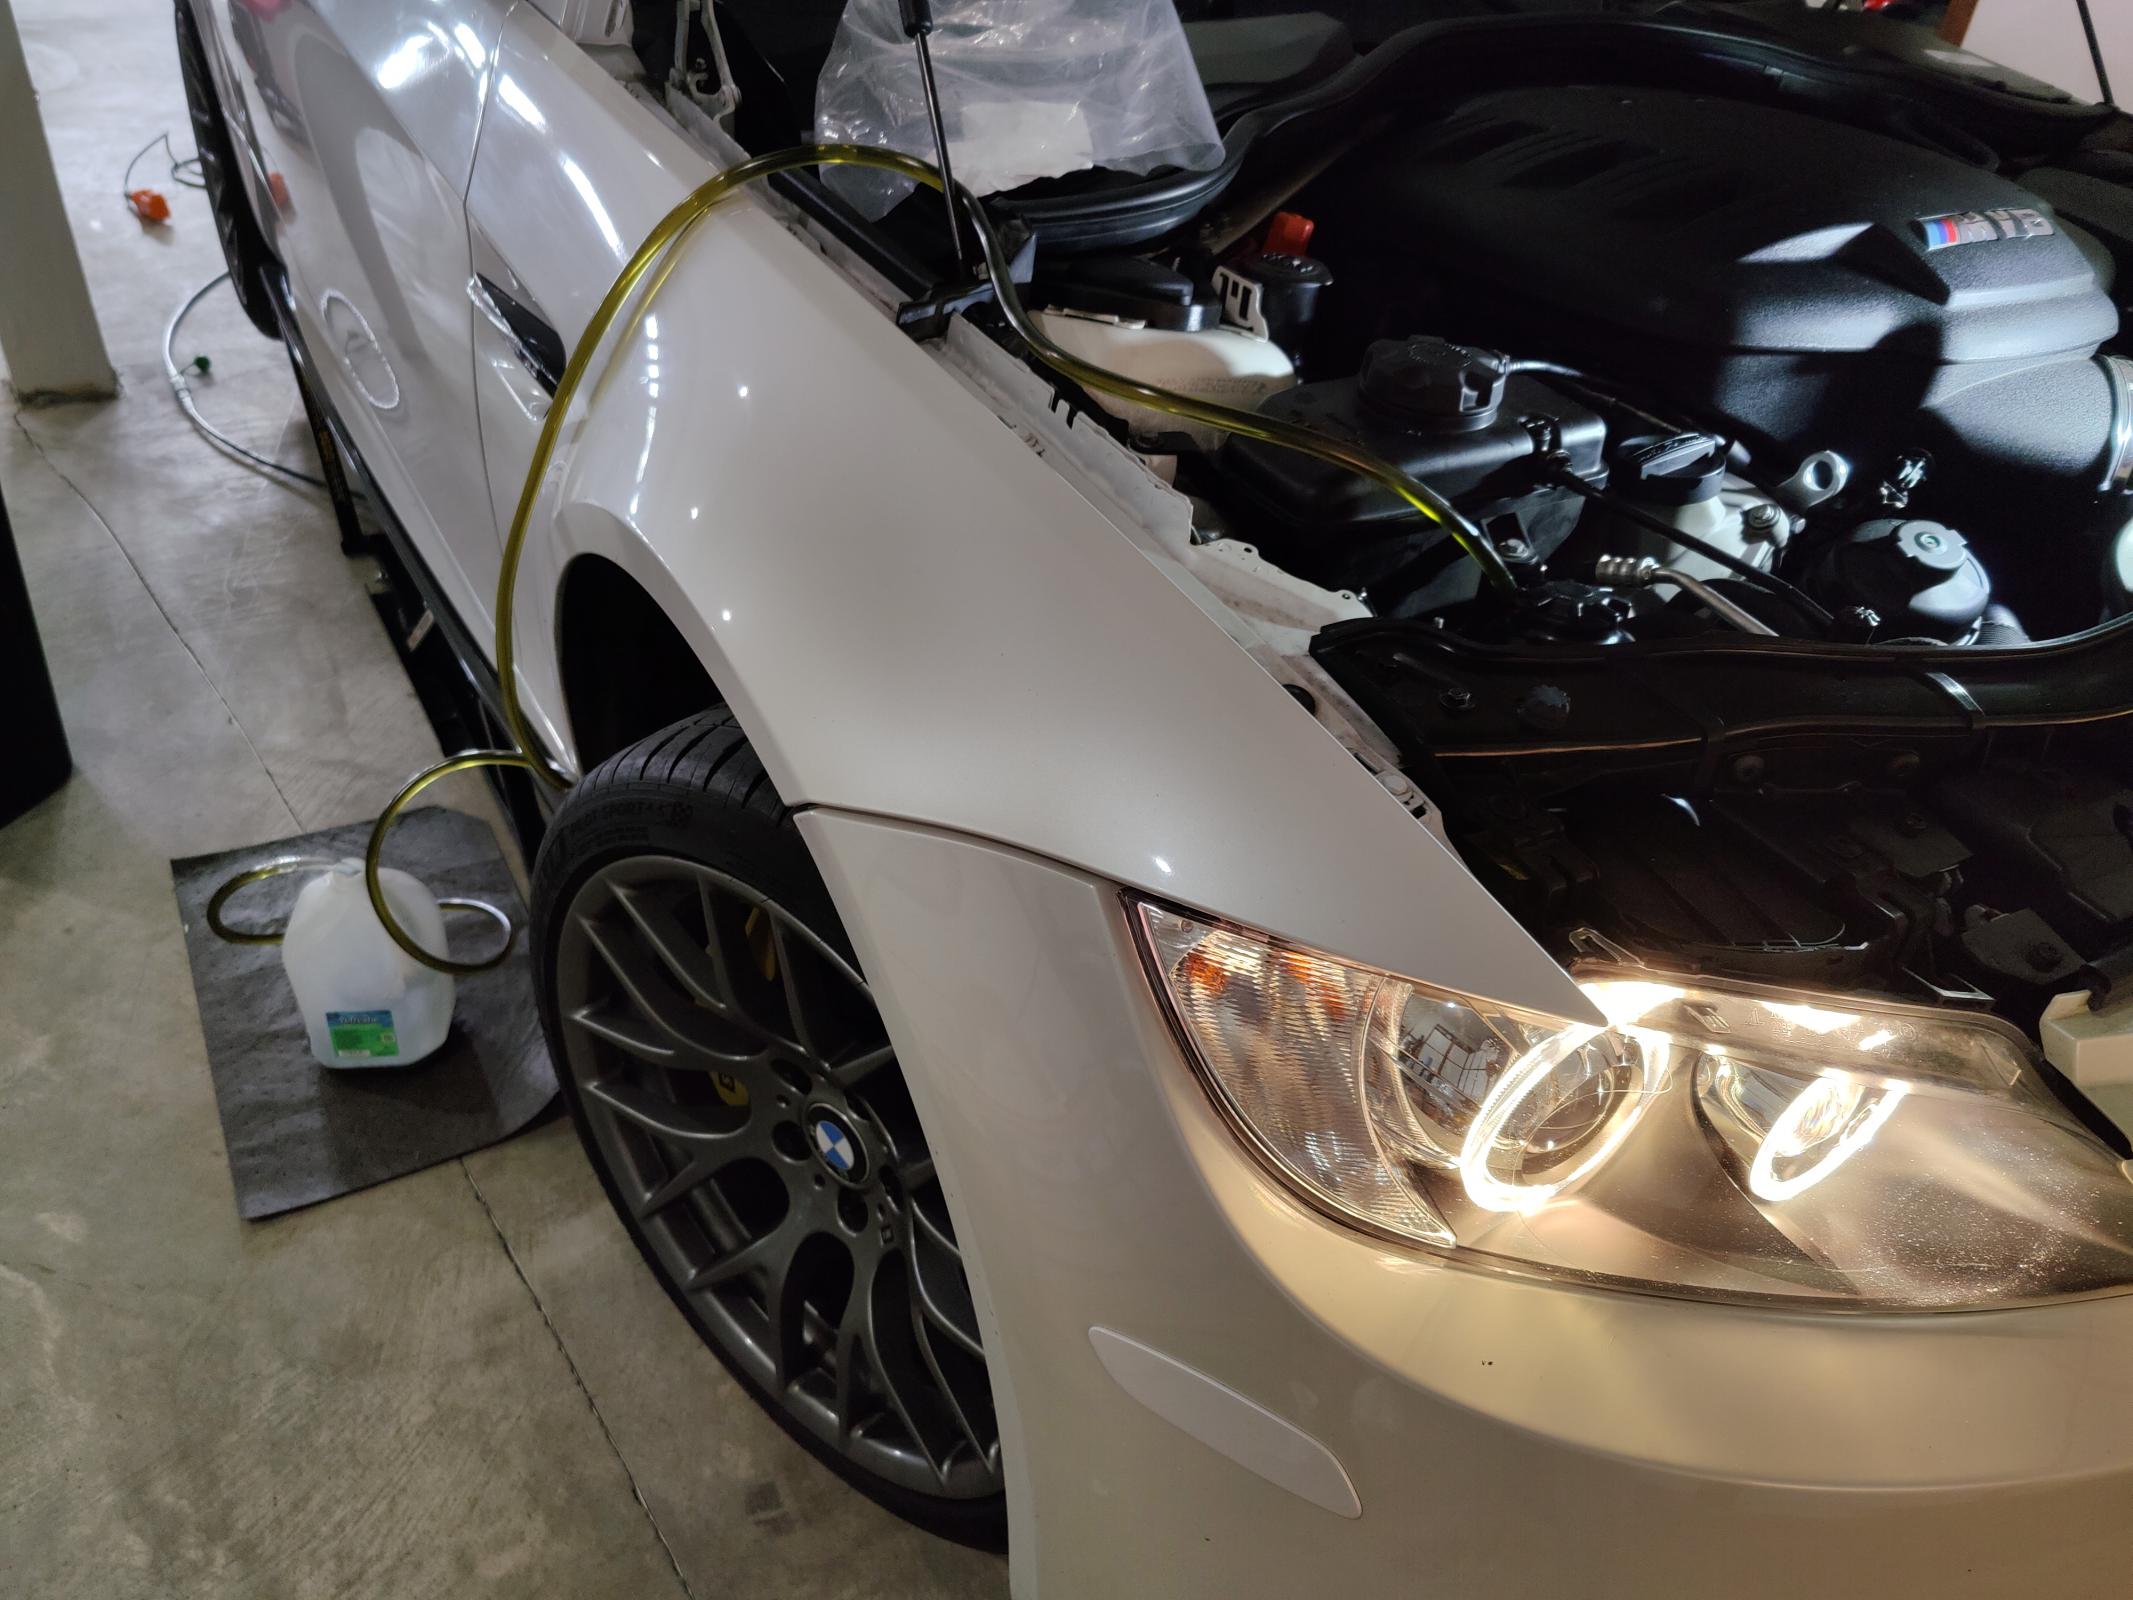
Poussez une longueur de tube transparent dans le petit tuyau ouvert. Le tube doit être assez long pour atteindre une sorte de boîte à capture.
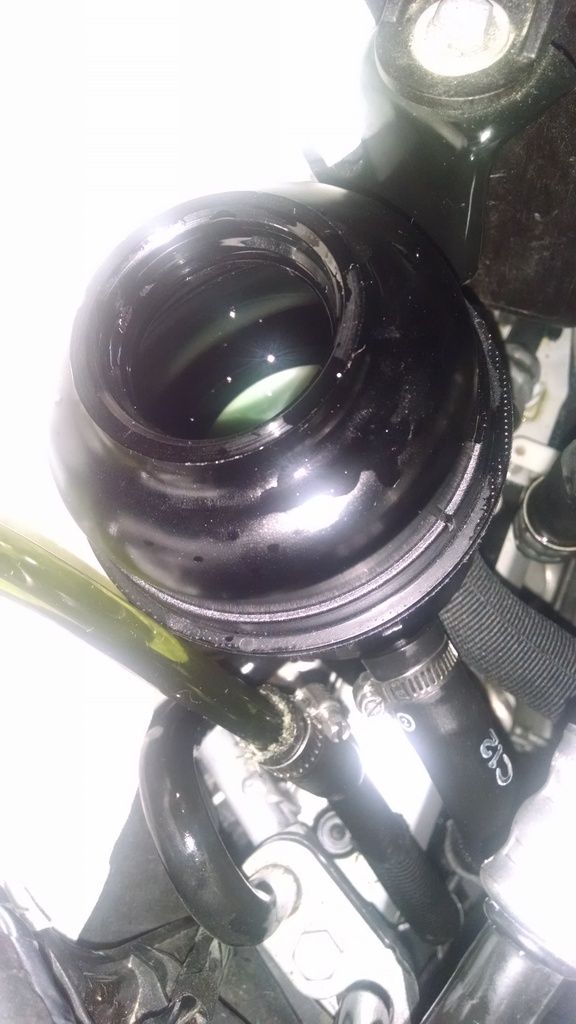
Remplissez le réservoir avec du nouveau fluide et allumez l'allumage. Do NON Démarre la voiture. C'est inutile et le travail est beaucoup plus sûr avec la voiture éteinte. Tournez la roue de verrouillage en verrouillage et le nouveau fluide fera sortir l'ancien. C'est plus facile à faire avec un partenaire, mais peut être fait seul tant que vous continuez à vérifier le réservoir. C'est fatigant si vous n'avez pas utilisé les supports de prise mais cela fonctionnera toujours. Si votre liquide est sale, il sortira brun. Lorsque vous voyez du liquide vert dans le tube clair, vous avez terminé. Il m'a fallu un litre avant de commencer à voir du nouveau liquide. Ajoutez du liquide lentement pendant que vous faites cela et essayez de le chronométrer afin qu’il n’y ait pas ou peu de fluide dans le réservoir lorsque vous avez terminé. S'il y a du liquide, il suffit de le sortir avant la dernière étape. N'ignorez pas cette partie ou vous aurez un gâchis.
Retirez le tube transparent, retirez la fiche de vide du fond du réservoir et raccrochez la plus petite ligne au réservoir. Assurez-vous d'ajouter de nouveaux colliers de serrage avant de terminer. Remplir le réservoir, démarrer la voiture et vérifier les fuites. Cette méthode éliminera 100% du liquide du système sans mélange et sans dilution de fluide propre avec un fluide sale. Il n'est pas nécessaire de jouer avec des boulons de banjo et des rondelles d'écrasement que je trouve peut être délicat.
41,7 kVIEWS
26REPLIES
21APPRECIATES
08/02/2026LAST POST
Outils nécessaires :
Sympa. Merci pour votre suggestion.
Pouvez-vous s'il vous plaît préciser, "Utilisez un bouchon de vide et couvrir le mamelon laissé ouvert lorsque vous avez retiré le petit tuyau du réservoir." ???
Pouvez-vous s'il vous plaît préciser, "Utilisez un bouchon de vide et couvrir le mamelon laissé ouvert lorsque vous avez retiré le petit tuyau du réservoir." ???
MTM wroteYou can buy an assortment of vacuum caps from an auto parts store. You need a 1/2" cap.Nice. Thank you for sharing.
Can you please clarify, "Use a vacuum port plug and cover the nipple left open when you removed the small hose from the reservoir." ???
http://www.oreillyauto.com/site/c/search/Vacuum+Caps/N1167/N1171.oap
When you remove the hose from the reservoir you must block the reservoir nipple so fluid doesn't come out. Look at picture #2. The bottom, smaller nipple has a vacuum cap on it while the top, larger line is still hooked up to the steering rack.
Cheers. Thanks.
Did you use just regular hose clamps? Or was there a special replacement part?
MTM wroteI used regular hose clamps. The stock ones are just the one time use crimp on style.Did you use just regular hose clamps? Or was there a special replacement part?
you have to do all that you mentioned here plus replace the reservoir which I did because the filter inside the reservoir can not be taken out...
I bought new OEM reservoir and hooked it up to the intake line and kept return line into the bottle after flushing entire system just hooked up the return line to new reservoir and it was done. Very quick and easy DIY...
I followed your steps before I did it so BIG THANKS!!! only issue I ran into was that my return line was melted onto the reservoir nipple and I had to spend 5 min wiggling it and finally got it off and I had to cut about 1/8 of an inch because the rubber was deteriorated... that didn't change anything and hooked up new setup without issue and now fluid is nice and green!!!
Thanks again!
I bought new OEM reservoir and hooked it up to the intake line and kept return line into the bottle after flushing entire system just hooked up the return line to new reservoir and it was done. Very quick and easy DIY...
I followed your steps before I did it so BIG THANKS!!! only issue I ran into was that my return line was melted onto the reservoir nipple and I had to spend 5 min wiggling it and finally got it off and I had to cut about 1/8 of an inch because the rubber was deteriorated... that didn't change anything and hooked up new setup without issue and now fluid is nice and green!!!
Thanks again!
yea i thought this was gonna be a piece of cake but that return line would not budge for the life of me.  I finally pulled so hard with a set of hose pliers it ripped a little so i just started cutting with a little drywall saw i had. Wish i had used a finer saw. finally when I cut off about 1/2" or maybe a little more i got the res off.
My plan for minimum spillage is rather then connecting the new res to the feed line directly, I am going to run a tube from the new res to the feed line and operate the steering wheel. Then empty the fluid in the new res, detach both tubes and install the new res as usual. I just don't want the new res dumping fluid as I try to connect a shortened return line.
Maybe i should upgrade the power steering radiator to keep the fluid nice and cool so that return line is less likely to fuse with the res.
I finally pulled so hard with a set of hose pliers it ripped a little so i just started cutting with a little drywall saw i had. Wish i had used a finer saw. finally when I cut off about 1/2" or maybe a little more i got the res off.My plan for minimum spillage is rather then connecting the new res to the feed line directly, I am going to run a tube from the new res to the feed line and operate the steering wheel. Then empty the fluid in the new res, detach both tubes and install the new res as usual. I just don't want the new res dumping fluid as I try to connect a shortened return line.
Maybe i should upgrade the power steering radiator to keep the fluid nice and cool so that return line is less likely to fuse with the res.
Wanted to thank the OP for this very helpful DIY. Did it today on my wife's 328, and will do the M3 next weekend.
I have one additional lesson to add:
- when removing the reservoir, take note of the sleeves between the threaded bolts and reservoir. If they drop, you might end up taking off the underbelly cover to retrieve it!
I have one additional lesson to add:
- when removing the reservoir, take note of the sleeves between the threaded bolts and reservoir. If they drop, you might end up taking off the underbelly cover to retrieve it!
this is by far my favorite and cleanest method for changing PS fluid!
I haven't done it yet but will be using your method.
Just 2 quick questions
1. so having the ignition on, but car off .. will cylce the fluid when you turn the wheel correct?
2. After the new fluid is coming out and you are ready to hook it back up to the reservoir, what happens to the fluid in the return hose and clear tubing? does it drain back down or will there be fluid right at the top of the hose?
I haven't done it yet but will be using your method.
Just 2 quick questions
1. so having the ignition on, but car off .. will cylce the fluid when you turn the wheel correct?
2. After the new fluid is coming out and you are ready to hook it back up to the reservoir, what happens to the fluid in the return hose and clear tubing? does it drain back down or will there be fluid right at the top of the hose?
Reviving an old post, did this today in less than an hour while taking my time. Super easy, little mess to clean, no crush washers/gaskets to deal with.
Old thread but if anyone could advise. It took you 1 liters exactly to see the new fluid come out? Was that with a empty reservoir? I have a bottle with about 4 quarts/400ml left and didn't want to order 2 bottles for no reason.
I have active steering to I wonder if it takes more.
I have active steering to I wonder if it takes more.
TheMidnightNarwhal wroteYou should have plenty, I used roughly 1 1/2 quarts after everything was said and done (w/ an empty reservoir to fill).Old thread but if anyone could advise. It took you 1 liters exactly to see the new fluid come out? Was that with a empty reservoir? I have a bottle with about 4 quarts/400ml left and didn't want to order 2 bottles for no reason.
I have active steering to I wonder if it takes more.
Ajolives wroteAlright thanks I think I'll just get 2 bottles to make sure 100% then.You should have plenty, I used roughly 1 1/2 quarts after everything was said and done (w/ an empty reservoir to fill).
ok, i just did this and the flushing part was easy thanks to this process but i still.made a huge mess with the fluids. I siphoned as much as possible from the reservoir but there was still a lot left in there that when i undid the pipes, good bit still came out and drained into the belly pan. I had an old t shirt underneath but apparently that want enough to absorb all. anyway i wiped down everything so it's ok now. just curious how others were able to limit the mess.  :
:
I had an old t shirt underneath but apparently that want enough to absorb all. anyway i wiped down everything so it's ok now. just curious how others were able to limit the mess. :
I used a fluid pump in reverse to suck out the reservoir as best I could. I also took 2 or 3 rags and built a rag dam underneath the PS reservoir to catch the fluids. Still splattered a bit when I had to yank that bottom fitting off though.
Great method. I have done mine today!
For those who want to replace new reservoir, you can buy hose clamps as this size in O'Reilly Auto Parts. Both hoses can use this clamp 3/8" to 7/8".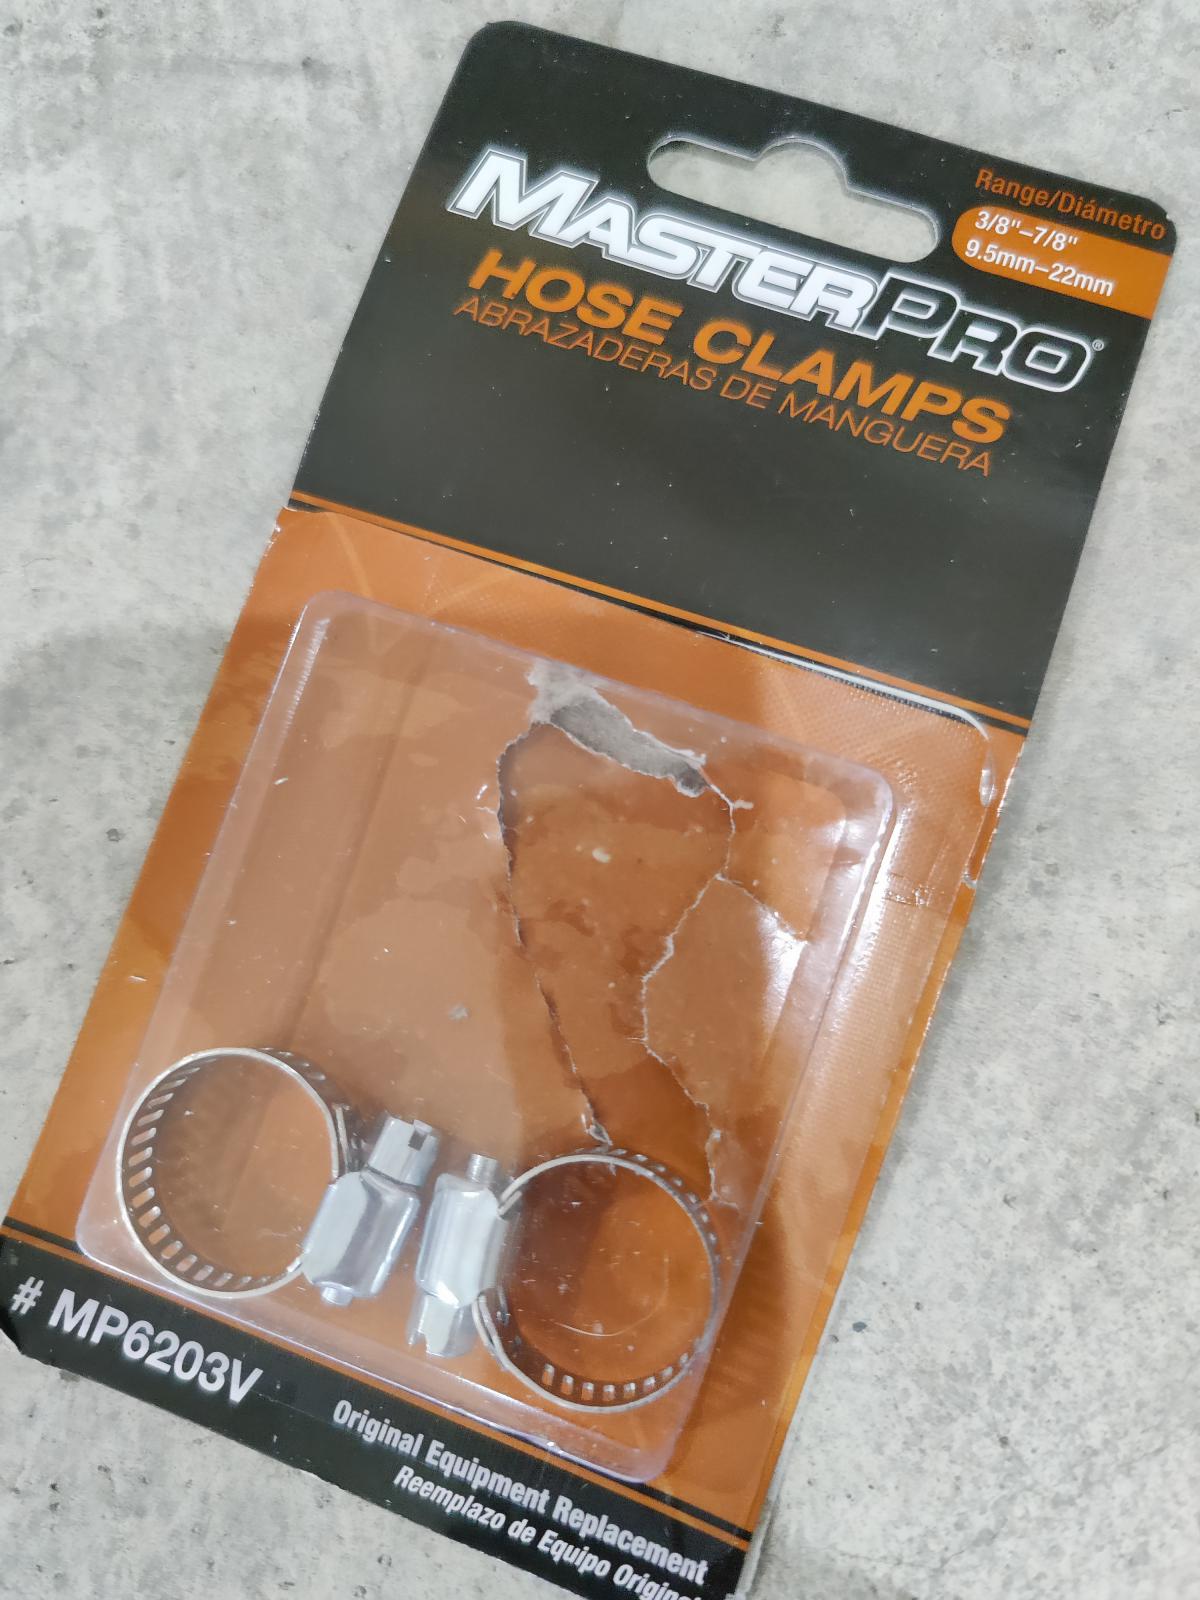
For those who want to replace new reservoir, you can buy hose clamps as this size in O'Reilly Auto Parts. Both hoses can use this clamp 3/8" to 7/8".
Thought I was the only one. Don't understand eithger why people go for the hardest line to detach when you can just detach it at the reservoir lol.
thanks for this DIY. I want to post for anyone having similar issues.
for the record I have an E90 335d, not an M3.
With key on and just turning the wheel lock to lock, no fluid was moving out of the resevoir or the return line.
I even applied 15psi vacuum to the return line and it wasn't doing shit.
At least in the E90 335d, and I imagine for the non-m cars too, needs the pump to move the fluid out.
Basically with the accessory belt off, I then just rotated the pump with a 6mm hex bit, a drill and some piece of shit amazon flexy thing I had laying around. I didn't have a low profile thing to do this, but an electric ratchet, 90degree screw driver will all work perfectly. You do not need much torque at all to rotate the pump.
My fan was already off when I was doing this, so I had enough clearance, but if you have your fan in the car, you'll need something lower profile than what I'm using
This moved all the old fluid out extremely quickly.


After refill, I also recommend to have a friend/spouse/enemy rotate lock to lock while youre running the pump with the drill, this bubbled a lot of air out in order to fill to the proper level, you'll see air bubbles coming out of the resevoir. For example, after doing the lock to lock trick the level went from Full to min, then i just did the final fill.
If you have a vacuum pump you might be able to do a better bleed by applying vacuum to the resevoir opening, but I didn't have anything that would properly seal there.
Also, if you're using a new resevoir, it comes with a clear little plastic cap for dust protection. This cap is actually sufficient to do this DIY (if installing a new ZF/BMW resevoir), no fluid leaked out of the return bib.
for the record I have an E90 335d, not an M3.
With key on and just turning the wheel lock to lock, no fluid was moving out of the resevoir or the return line.
I even applied 15psi vacuum to the return line and it wasn't doing shit.
At least in the E90 335d, and I imagine for the non-m cars too, needs the pump to move the fluid out.
Basically with the accessory belt off, I then just rotated the pump with a 6mm hex bit, a drill and some piece of shit amazon flexy thing I had laying around. I didn't have a low profile thing to do this, but an electric ratchet, 90degree screw driver will all work perfectly. You do not need much torque at all to rotate the pump.
My fan was already off when I was doing this, so I had enough clearance, but if you have your fan in the car, you'll need something lower profile than what I'm using
This moved all the old fluid out extremely quickly.
After refill, I also recommend to have a friend/spouse/enemy rotate lock to lock while youre running the pump with the drill, this bubbled a lot of air out in order to fill to the proper level, you'll see air bubbles coming out of the resevoir. For example, after doing the lock to lock trick the level went from Full to min, then i just did the final fill.
If you have a vacuum pump you might be able to do a better bleed by applying vacuum to the resevoir opening, but I didn't have anything that would properly seal there.
Also, if you're using a new resevoir, it comes with a clear little plastic cap for dust protection. This cap is actually sufficient to do this DIY (if installing a new ZF/BMW resevoir), no fluid leaked out of the return bib.
Kinda strange that, it worked for me without turning the pump.
Going to do this again tomorrow for the sixth time. It has worked every single time. Thanks once again OP.
KawBoy wroteWow. Why you're doing six times?Going to do this again tomorrow for the sixth time. It has worked every single time. Thanks once again OP.
