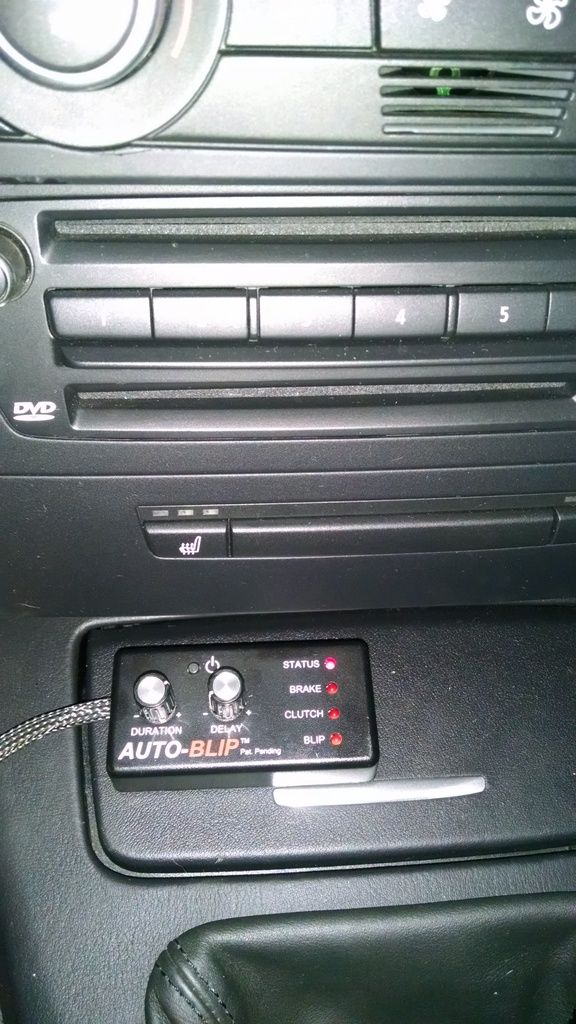
Today I finished the install of the Auto-Blip device. In brief, this device takes the input from the brake and clutch and sends an output to the drive by wire throttle. It basically performs part of a heal-toe downshift for you leaving you with just the brake and clutch to worry about. At this point I would kindly ask that this thread stay on track as a discussion about the product and install and not a long line of people telling me I need to learn how to drive a manual car or that I should have bought a DCT. I assure you I am 100% not interested in anyone’s thoughts on that. I only say this because this same thread on every other forum I have read turns into a self proclamation of everyone’s racing skills. Now back to the issue…
Information on the product at hand can be found here:
http://auto-blip.com/index.php?route=common/home
This is a video of what it does on a C6 Z06.
The way it operates is to monitor the brake and clutch sensors. When the brake is depressed and THEN the clutch pedal, the unit sends a user adjustable signal to the drive by wire which revs the engine. It does not rev match per se like the 370Z, C7, or Porsches because obviously there is no sensor at the shift gates to determine which gear you are selecting. It does get close enough to make a downshift smooth and honestly when I rev match I’m just guessing too. Now on to the install…
First you must take off the panel under the dash to access the pedals. Pelican Parts already has a great write up on this so I didn’t take pictures. Follow up through step 5.
http://www.pelicanparts.com/BMW/techarticles/BMW-3-Series-E90/BODY-Clutch_Switch_and_Pedal_Bushing_Replacement/BODY-Clutch_Switch_and_Pedal_Bushing_Replacement.htm
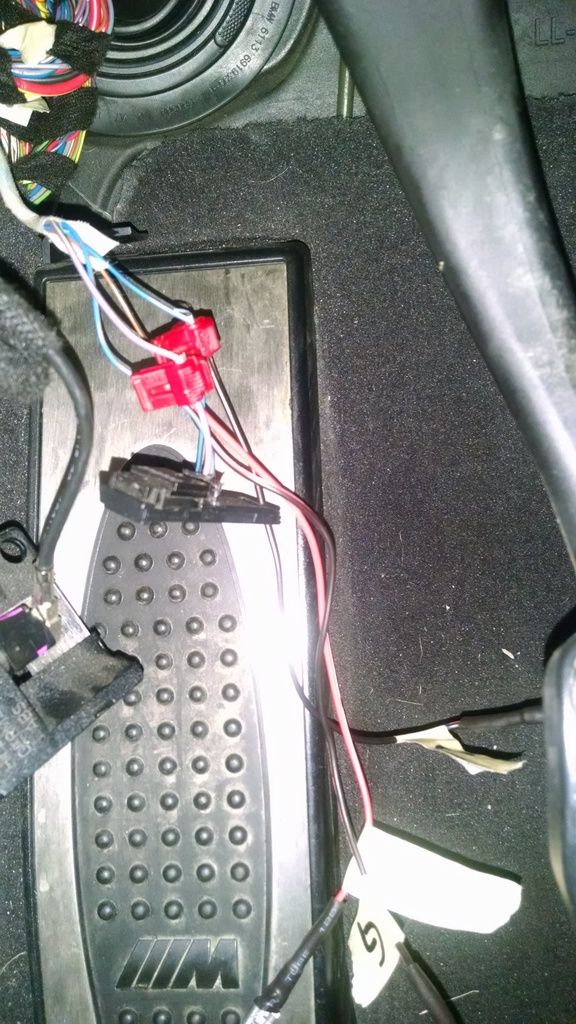
The unit requires six connections. They are 12V, ground, clutch, brake, and two throttles. I will start with the clutch. Once the bottom panel is off you are going to reach up to the top of the clutch and pop off the sensor that has the harness plugged in. You can tap into this harness for 12V, ground, and clutch depress signal. I simply made a short, approximately six inch, wire with a female end for each of the six connections. Be sure to label the wires if you are using the same color for everything like I did. The clutch connections are:
12V power – Purple with Yellow stripe
Ground – Brown with Black stripe
Clutch depress- Blue with Black stripe
You will NOT use the Blue with Brown stripe.
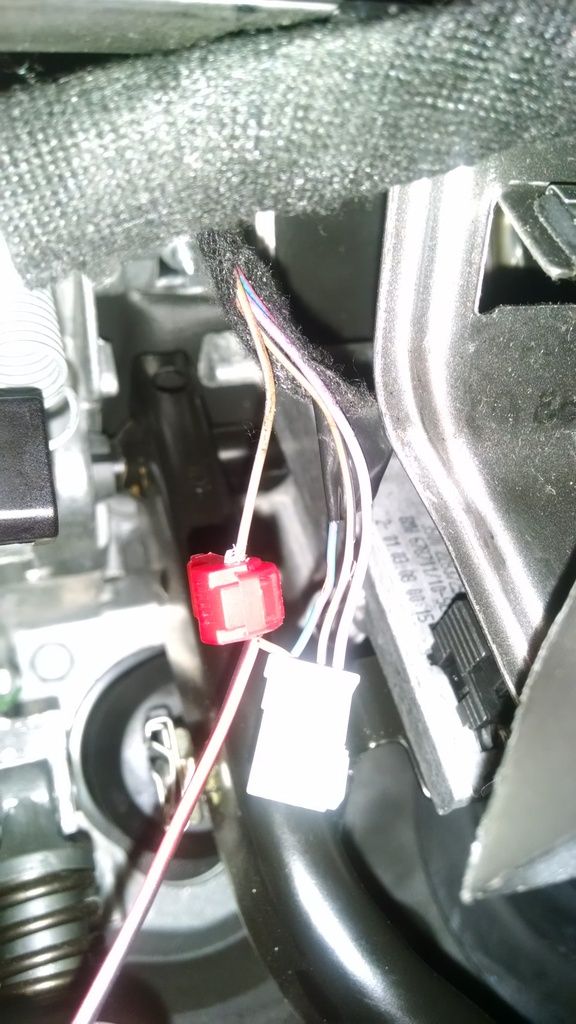
Next is the brake pedal sensor. It is located above the pedal and behind a metal bracket. You only need to tap into one wire.
Brake depress – Brown with White stripe
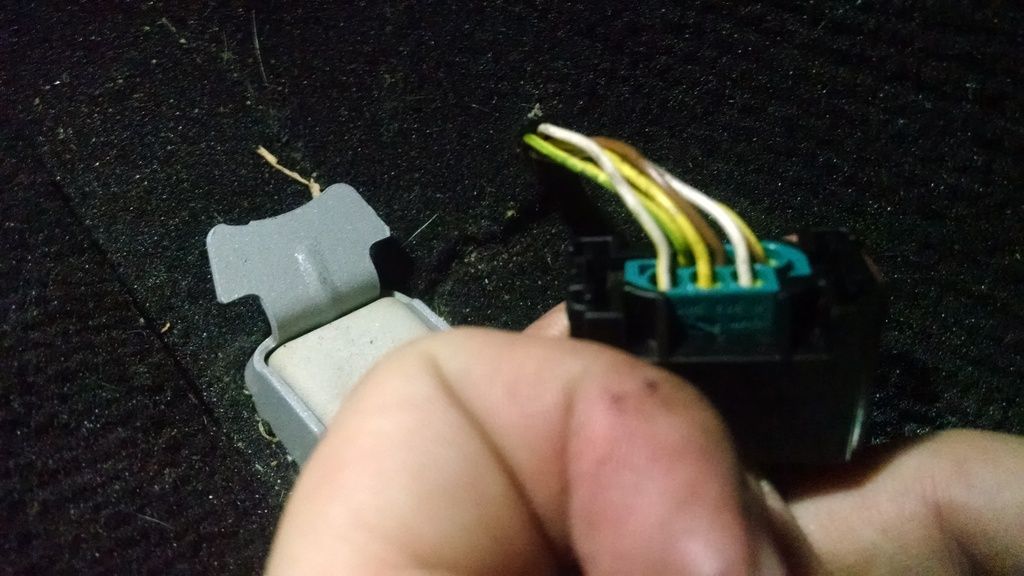
For the throttle connection you need to remove the gas pedal. Use a small flat tool and pop off the small cover at the base of the pedal. Once off, remove the torx screw holding the pedal on. Push up on the pedal and it will slide off. Now undo the harness and locate pins 4 & 6. They will be the only two white wires. Tap into both of those with your pre-made sections of wire. The order of these does not matter for the final connection to the unit so you do not need to label them. Plug the sensor back in and re-install the pedal making sure that your wires remain accessible.
All that is left is to connect each wire to the corresponding wires listed in the instructions for the Auto-Blip and run the quick calibration of the unit. If you did something wrong or it is not sensing a specific signal it will tell you.
I was only able to drive it for a few minutes to make sure it worked. I will update or reply to this thread tomorrow when I am able to drive it some more and get pictures of where I mount the unit. All I can say at this point is that it does what it says and it works.
Information on the product at hand can be found here:
http://auto-blip.com/index.php?route=common/home
This is a video of what it does on a C6 Z06.
The way it operates is to monitor the brake and clutch sensors. When the brake is depressed and THEN the clutch pedal, the unit sends a user adjustable signal to the drive by wire which revs the engine. It does not rev match per se like the 370Z, C7, or Porsches because obviously there is no sensor at the shift gates to determine which gear you are selecting. It does get close enough to make a downshift smooth and honestly when I rev match I’m just guessing too. Now on to the install…
First you must take off the panel under the dash to access the pedals. Pelican Parts already has a great write up on this so I didn’t take pictures. Follow up through step 5.
http://www.pelicanparts.com/BMW/techarticles/BMW-3-Series-E90/BODY-Clutch_Switch_and_Pedal_Bushing_Replacement/BODY-Clutch_Switch_and_Pedal_Bushing_Replacement.htm
The unit requires six connections. They are 12V, ground, clutch, brake, and two throttles. I will start with the clutch. Once the bottom panel is off you are going to reach up to the top of the clutch and pop off the sensor that has the harness plugged in. You can tap into this harness for 12V, ground, and clutch depress signal. I simply made a short, approximately six inch, wire with a female end for each of the six connections. Be sure to label the wires if you are using the same color for everything like I did. The clutch connections are:
12V power – Purple with Yellow stripe
Ground – Brown with Black stripe
Clutch depress- Blue with Black stripe
You will NOT use the Blue with Brown stripe.
Next is the brake pedal sensor. It is located above the pedal and behind a metal bracket. You only need to tap into one wire.
Brake depress – Brown with White stripe
For the throttle connection you need to remove the gas pedal. Use a small flat tool and pop off the small cover at the base of the pedal. Once off, remove the torx screw holding the pedal on. Push up on the pedal and it will slide off. Now undo the harness and locate pins 4 & 6. They will be the only two white wires. Tap into both of those with your pre-made sections of wire. The order of these does not matter for the final connection to the unit so you do not need to label them. Plug the sensor back in and re-install the pedal making sure that your wires remain accessible.
All that is left is to connect each wire to the corresponding wires listed in the instructions for the Auto-Blip and run the quick calibration of the unit. If you did something wrong or it is not sensing a specific signal it will tell you.
I was only able to drive it for a few minutes to make sure it worked. I will update or reply to this thread tomorrow when I am able to drive it some more and get pictures of where I mount the unit. All I can say at this point is that it does what it says and it works.