

I finally got around to changing my fuel tank breather valve after more than a year of procrastinating and decided to do a DIY on the process as I didn't see that one already existed. I hope this will help someone out in the future, because there is absolutely no reason to pay the dealership to do this job if you are in the slightest bit mechanically inclined. I have not priced the job at the dealership myself, but have been told that they are getting nearly $800-$900 for this. Knowing how easy this is and what little goes into it, I find that absolutely absurd.
Symptoms: Upon filling your gas tank, when you start the car you may notice a bouncing, loping, or otherwise erratic idle. Many owners have reported the car starting just fine when leaving the gas pumps, and then when stopping at a stop light just outside the gas station, the idle will bounce up and down from 300 RPM's to 1500 RPM's or so, and will sometimes drop so much that the car stalls. I was personally experiencing this once every month. This is a fairly common, yet minor, and therefore often overlooked issue with these cars.
See the below video for a visual of what this issue looks like (this is not my video)
Diagnosis: If you have ever experienced the above after getting gas, there is a high chance the culprit is your fuel tank breather valve, OEM part # 13907838281. This can be purchased from ECSTuning for around $80.00 (link below).
https://www.ecstuning.com/ES35640/
DIY Difficulty: 3.5 (1 = Oil Change, 10 = Motor Swap)
Similar jobs: Throttle actuators, Idle Control Valve/Throttle Strips, Secondary Air Pump
Tools required:
-Socket wrench (recommend 3/8" drive)
-10mm socket
-T20 driver
-Long flat blade screwdriver or 6mm socket on long extension (recommend 1/4" drive)
-Tin snips or pliers with cutting ability
-Pliers
Parts required:
-Fuel Tank Breather Valve (OEM part # 13907838281)
-Hose Clamp (OEM part # 16121180240) Alternately you can use a regular 6-10mm hose clamp
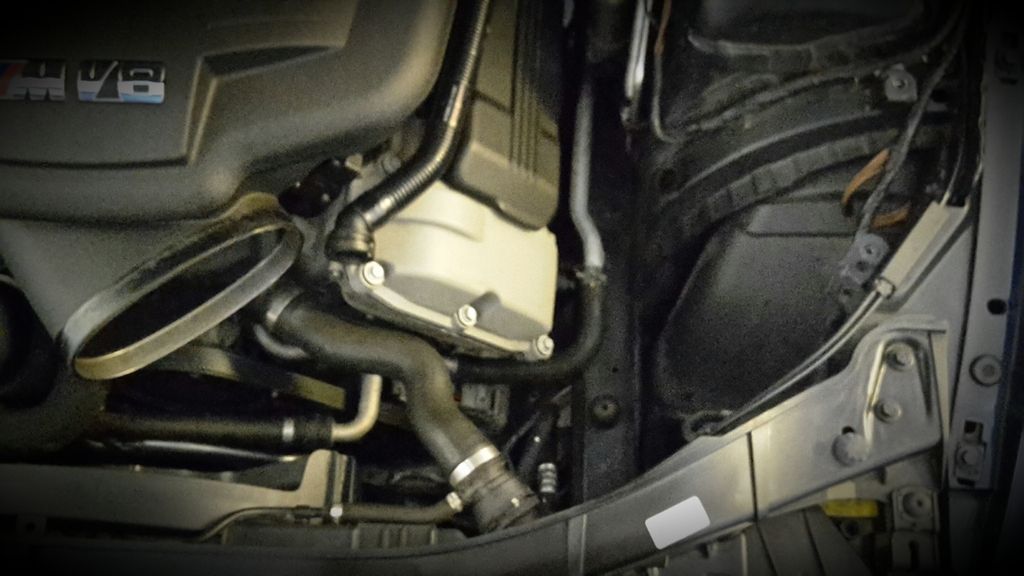
Before we get started, let's go ahead and familiarize ourselves with the engine bay and what needs to be removed. The fuel tank breather valve is located under the intake plenum in the valley between bank 1 and 2 valve covers, and is attached to the Idle Control Valve. The following need to be removed to accomplish this job:
1. Rear suction hood
2. Front suction hood (does not need to be completely removed)
3. Air box
4. Coolant reservoir (does not need to be completely removed)
5. Intake plenum
6. Intake elbow
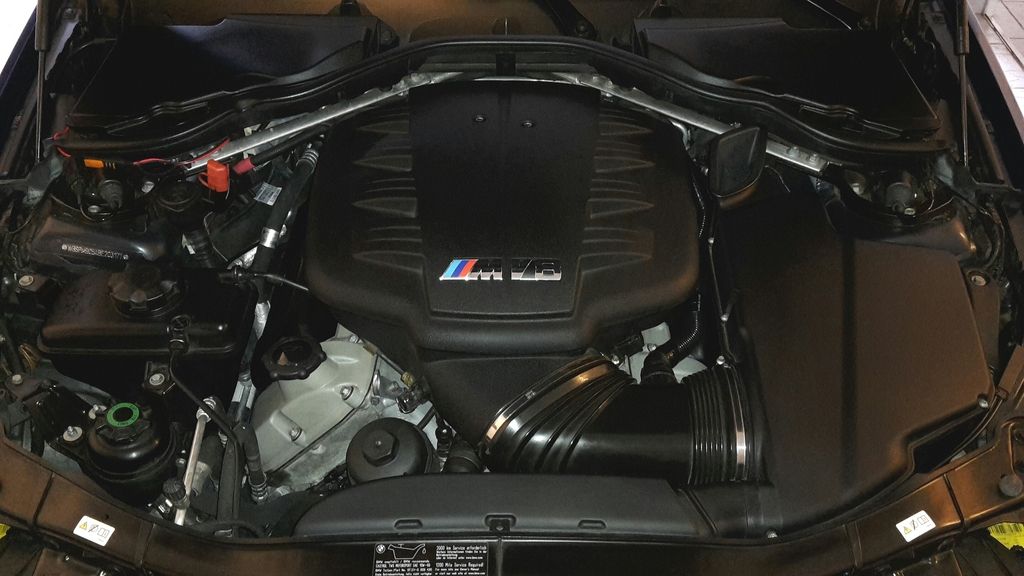
Step One: Remove factory airbox assembly
-Remove the two bolts marked below from air box with a 10mm socket
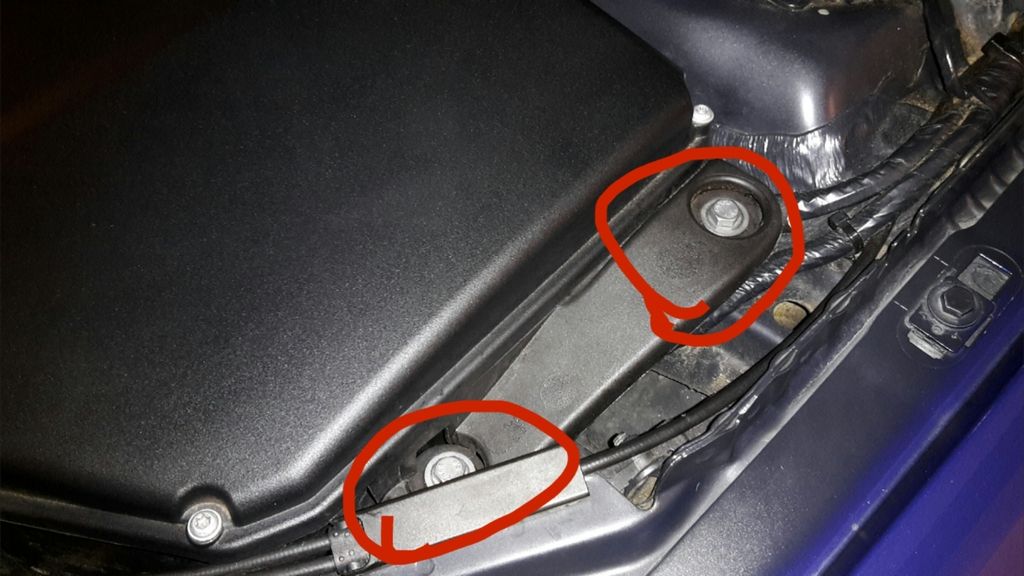
-Remove the two torx screws marked below from the front suction hood with a T20 torx driver (do not remove the hood, just the screws)
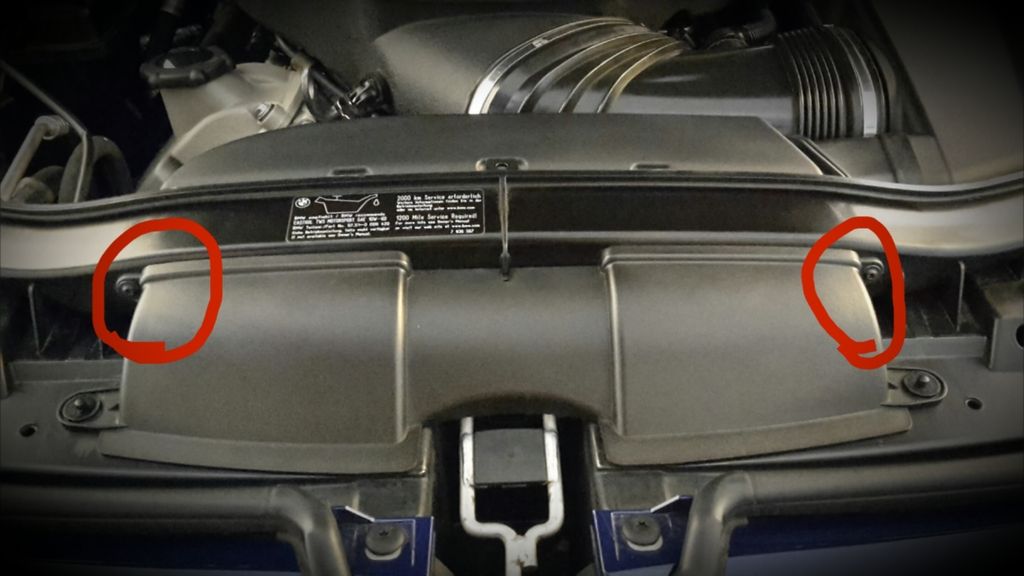
-Loosen two clamps on either end of intake elbow with a flat head screwdriver and unclip Secondary Air Pump hose by squeezing with thumb and forefinger and pulling away
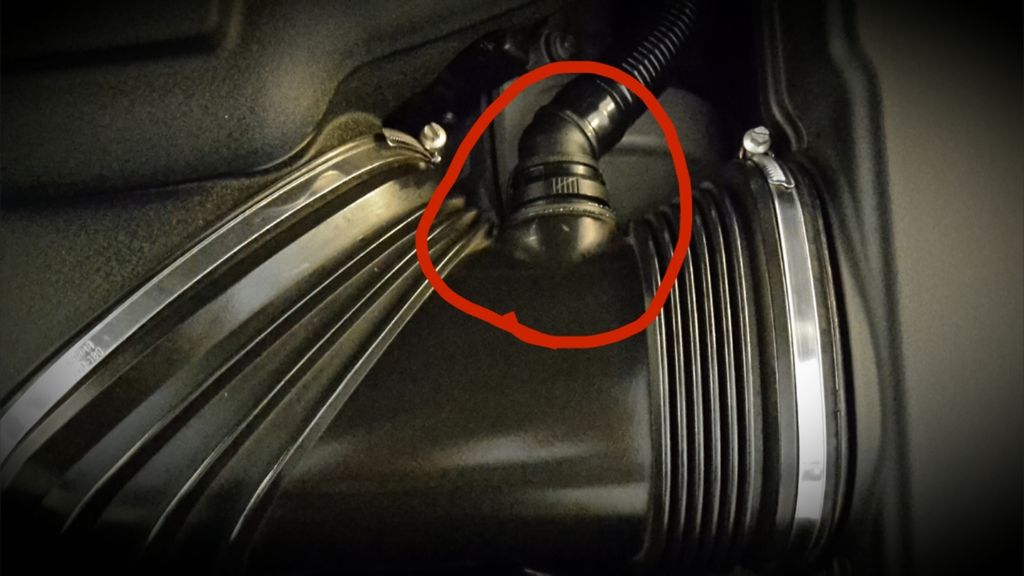
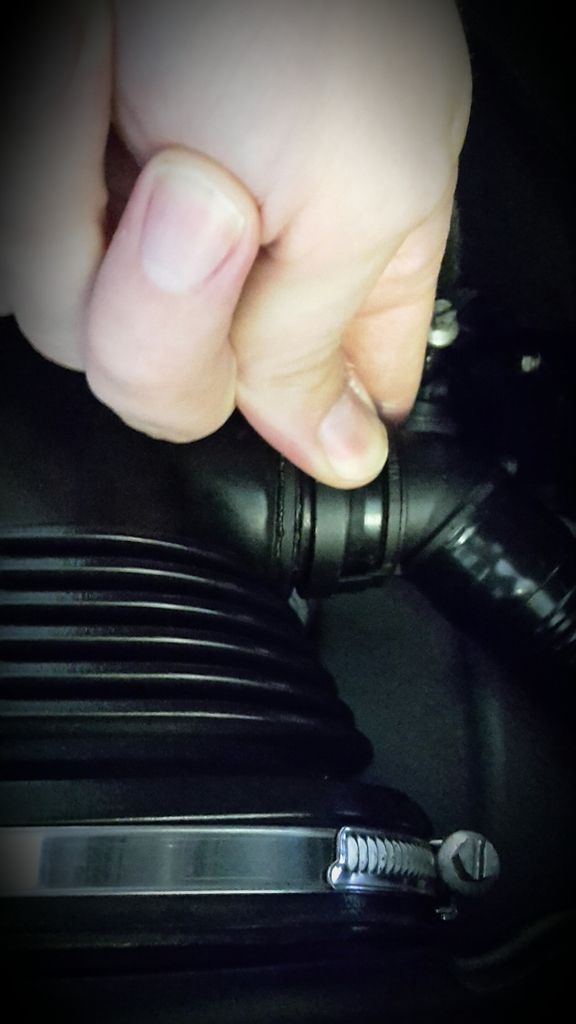
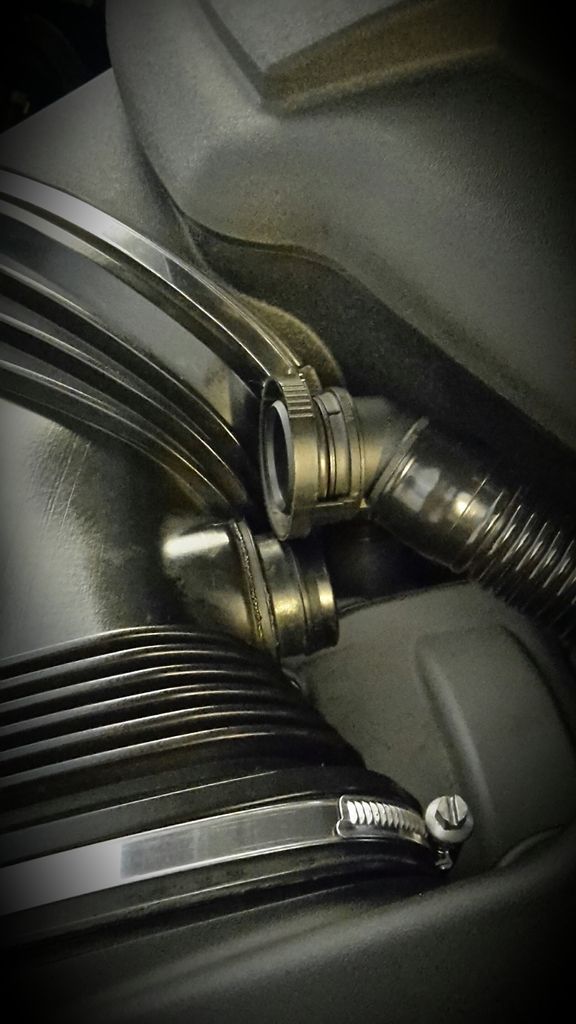
-Pull intake elbow off of intake plenum by grasping firmly with both hands, and pulling toward you
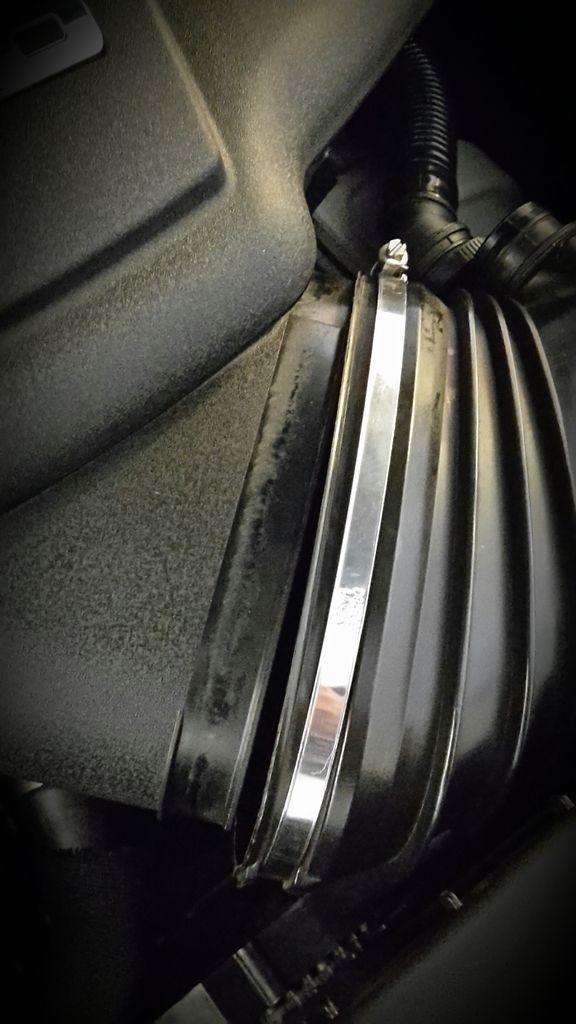
-Pull intake elbow off of air box by grasping firmly with both hands, and pushing away from you
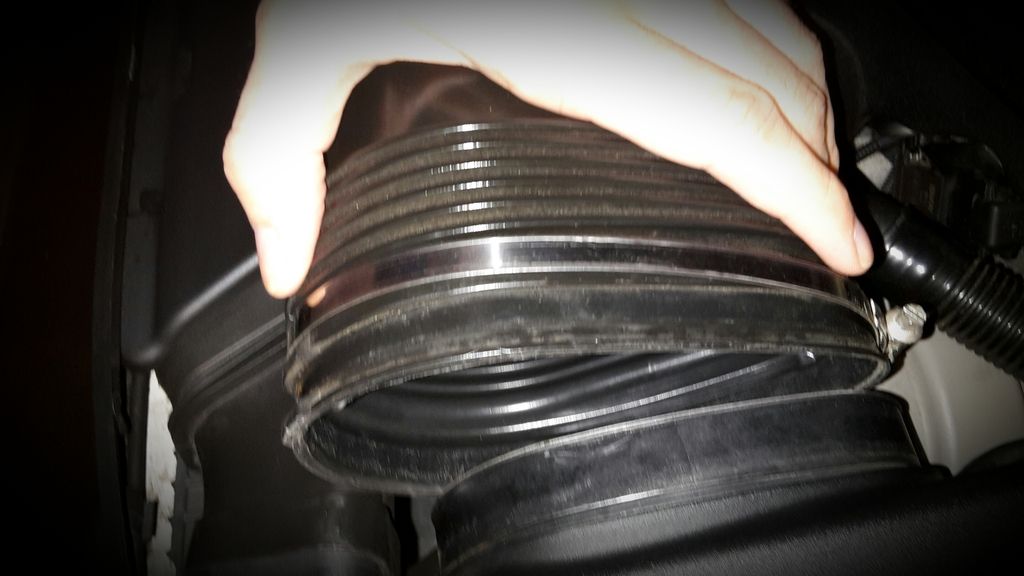
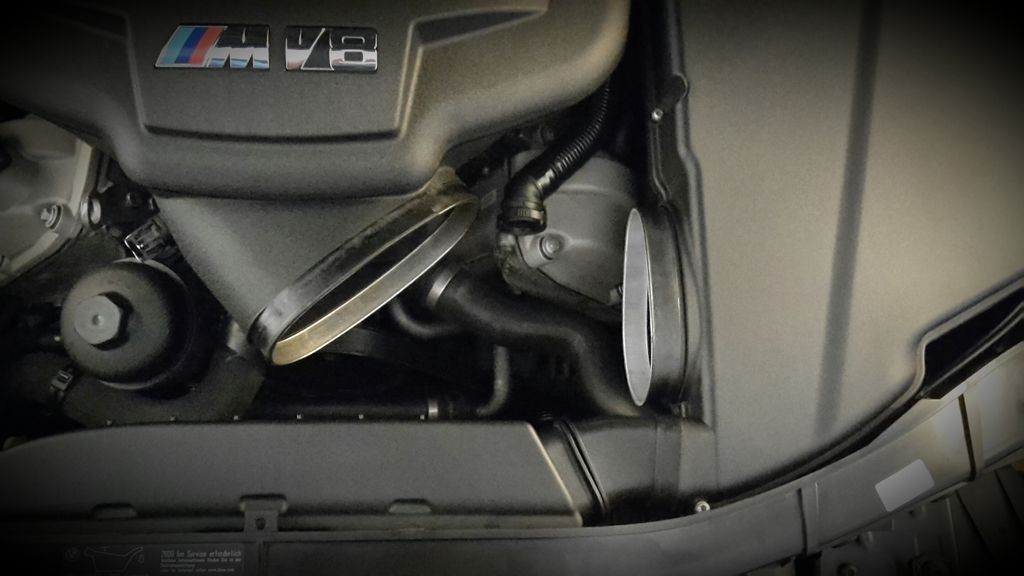
-Remove rear suction hood by first pulling it toward the intake plenum, then toward the passenger side
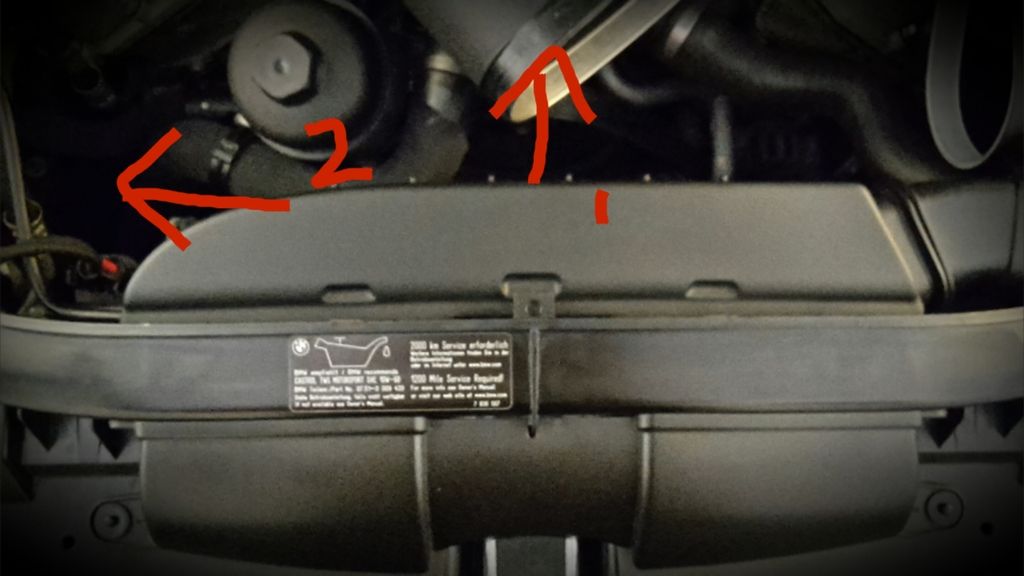
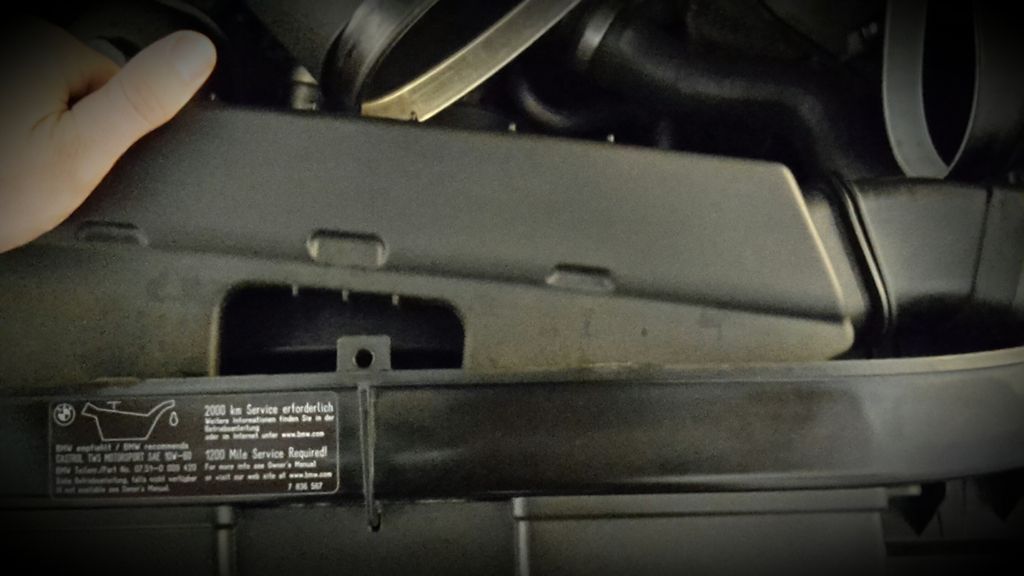
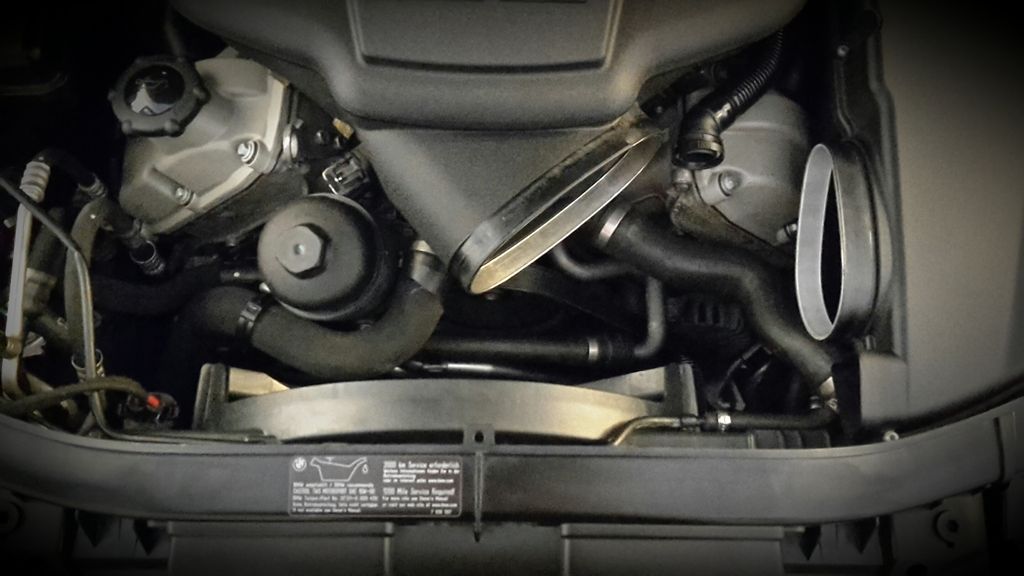
-Remove air box by lifting straight up and out of the engine bay
Step two: Remove intake plenum
-Unclip Intake Air Temperature sensor (located on passenger side of intake plenum inlet) by pressing metal bar down and pulling gently downward
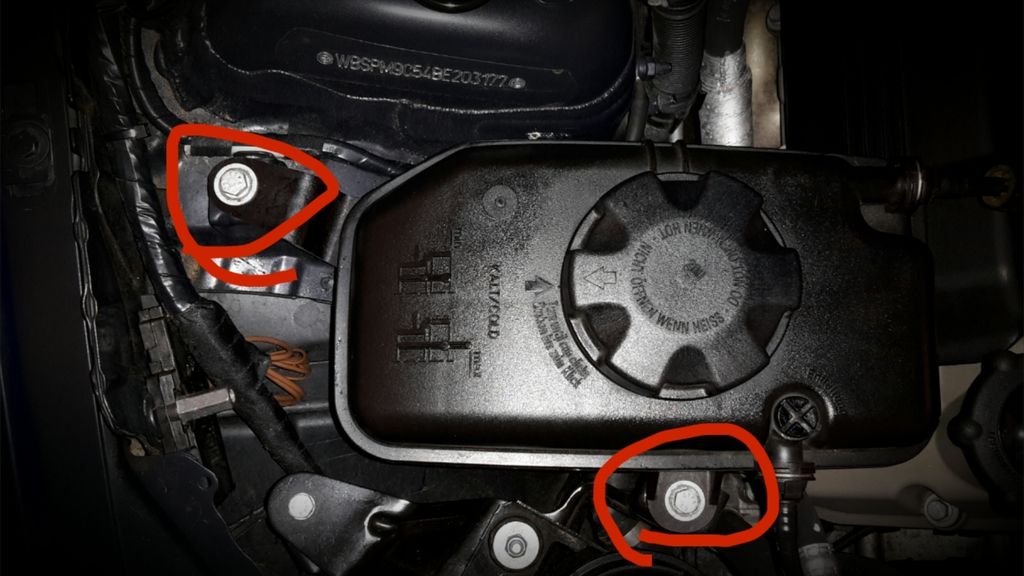
-Using a 10mm socket, remove two bolts (circled) from coolant reservoir. The coolant reservoir does not need to be removed, but once loose, it will need to be lifted up and out of the way to reach the passenger side throttle body clamps
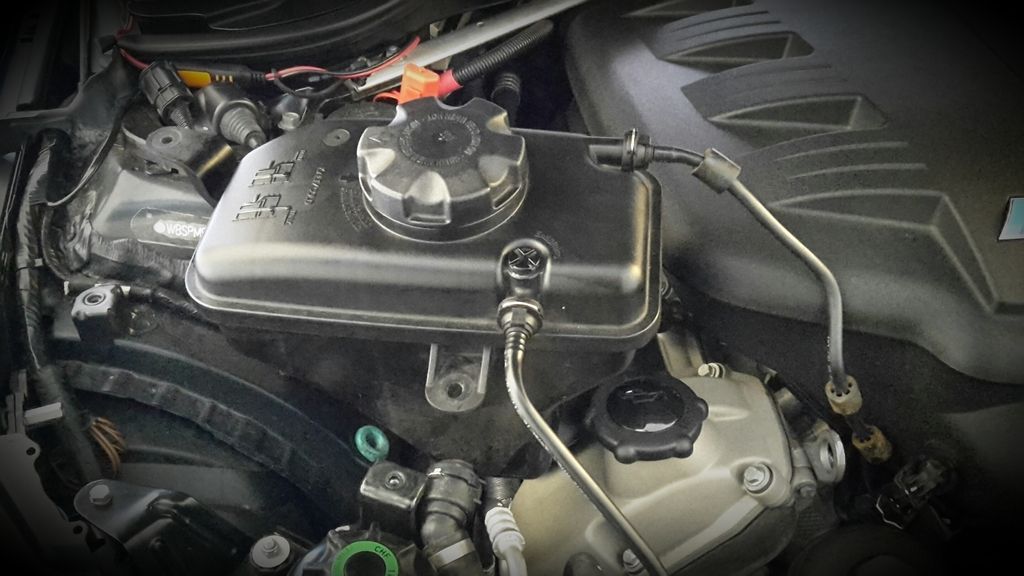
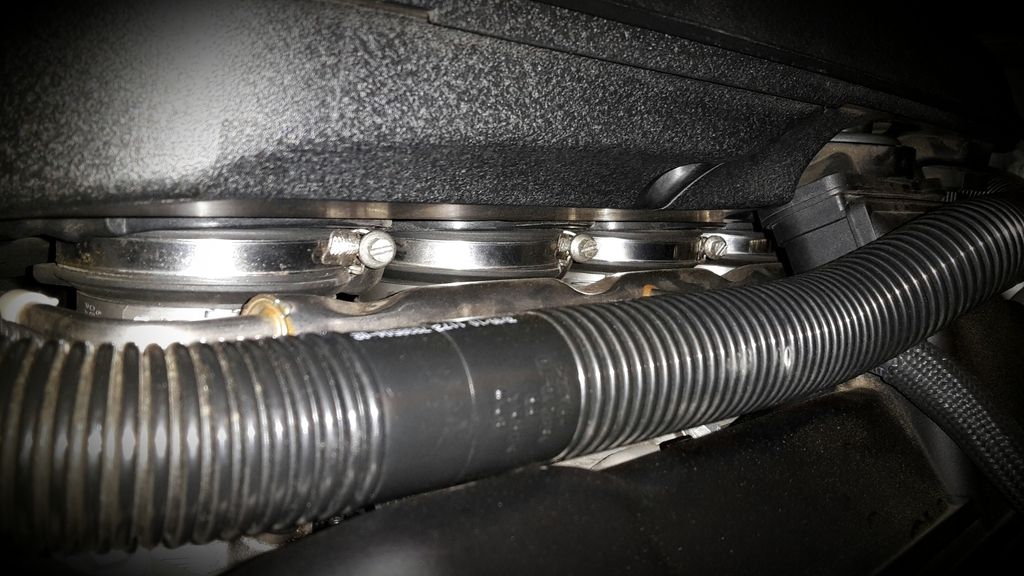
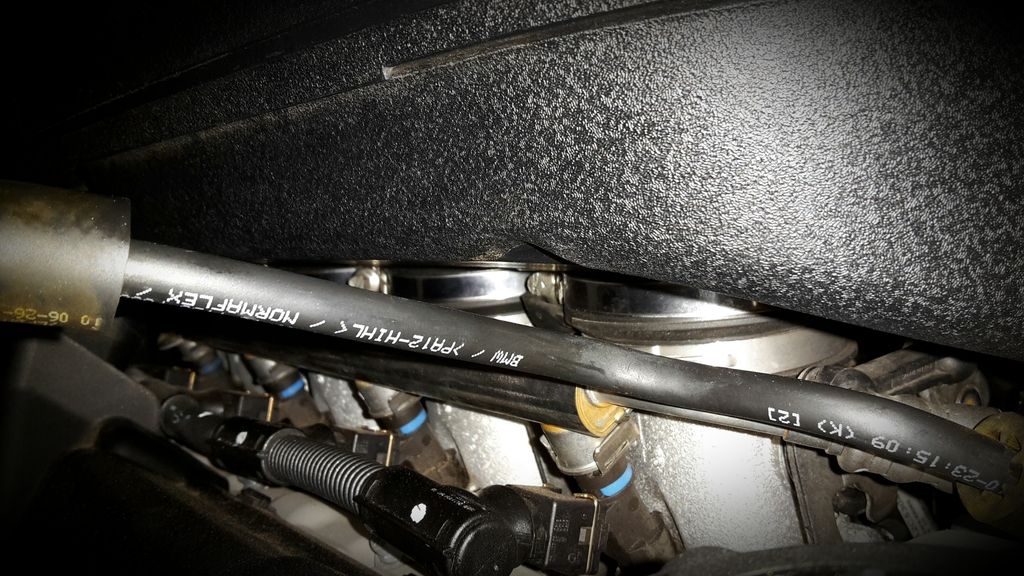
-Using a long flat blade screw driver or a 6mm socket on a long extension (1/4" drive recommended) loosen the 8 clamps holding the intake plenum to the individual throttle bodies. The front three on the driver side are easy. The driver side rear is a little more difficult (see photo for best angle of approach). Once the coolant reservoir is loosened and lifted out of the way as in the previous step, the passenger side front 3 clamps can be access fairly easily. The passenger side rear clamp is the most difficult and is done 80% by feel (see photo for best angle of approach). A 6mm socket will work much easier on this step, though a screwdriver can be used.
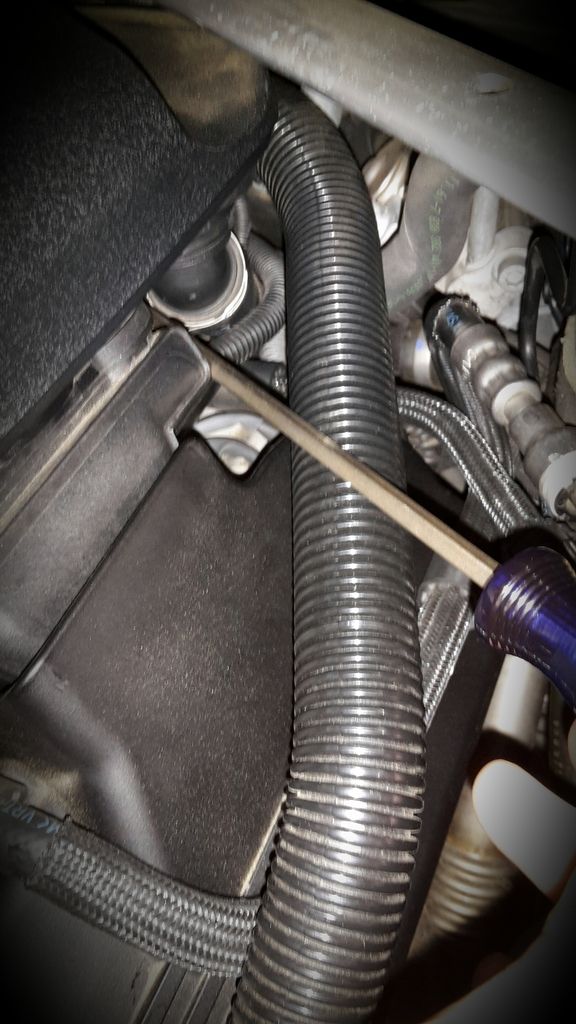
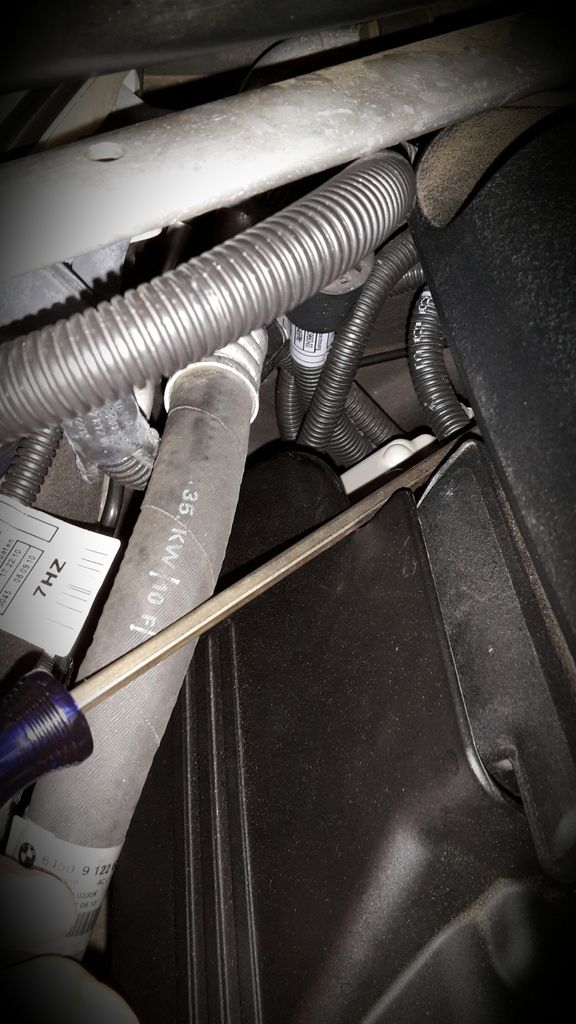
-Once all clamps are loosened, lift up on the front of the plenum and the front 6 risers will pop out of the throttle body housings. Finally, lift up on each back corner of the plenum to pop the rear risers out. At this point, the plenum is loose from the engine, but cannot be removed just yet.
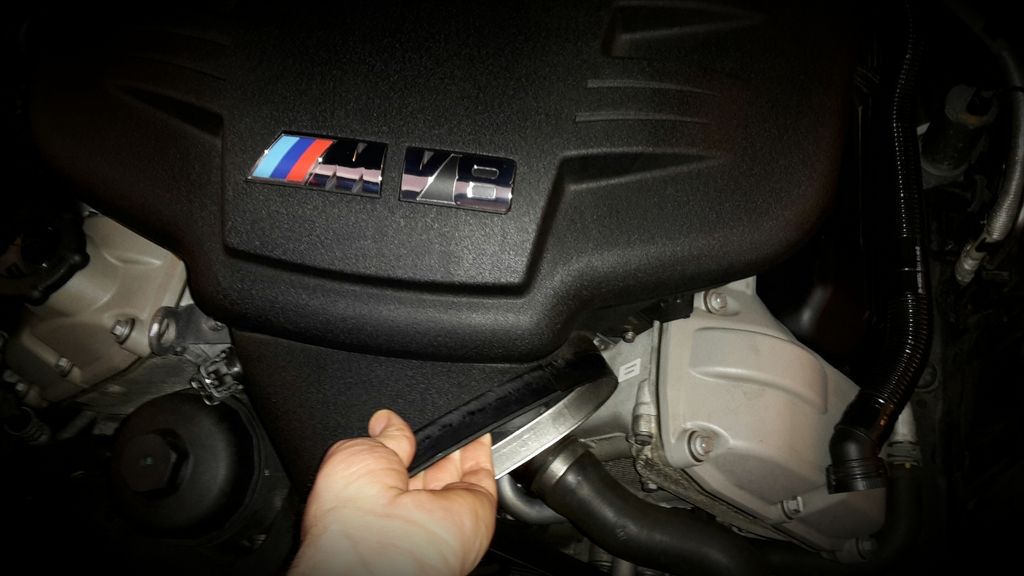
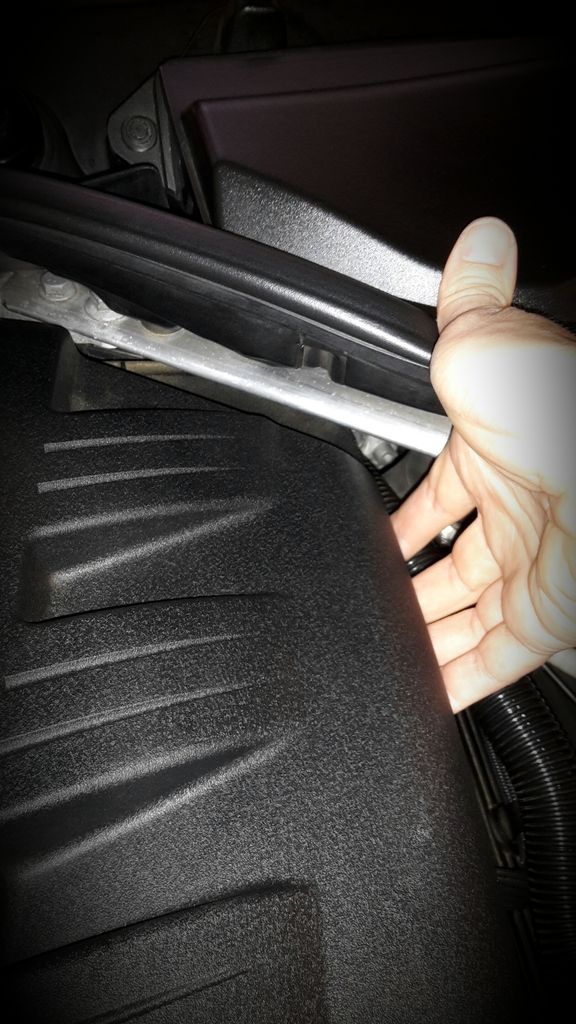
-Remove crankcase ventilation hose from underneath the front inlet of the plenum by squeezing with thumb and forefinger and pulling off of nipple.
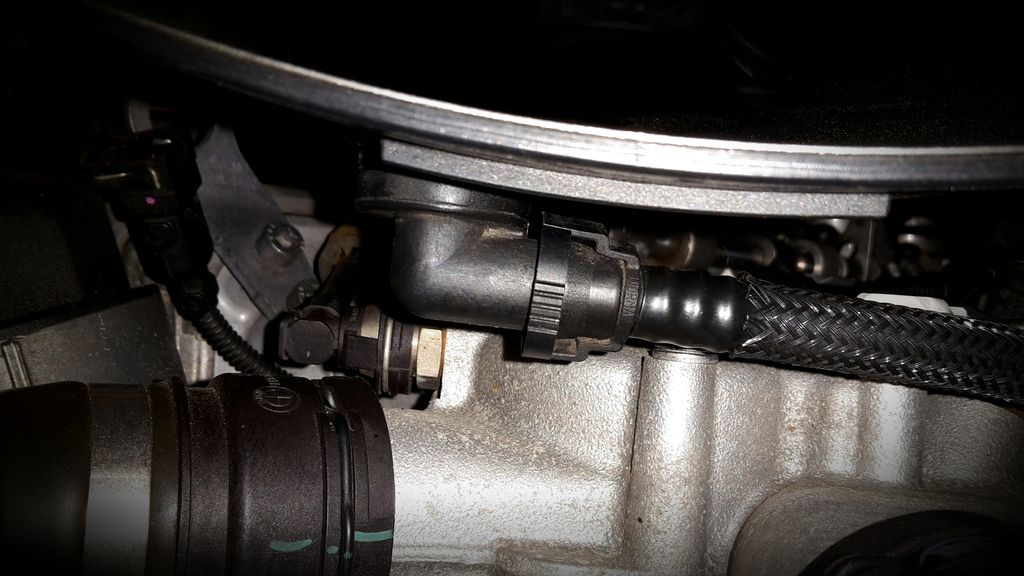
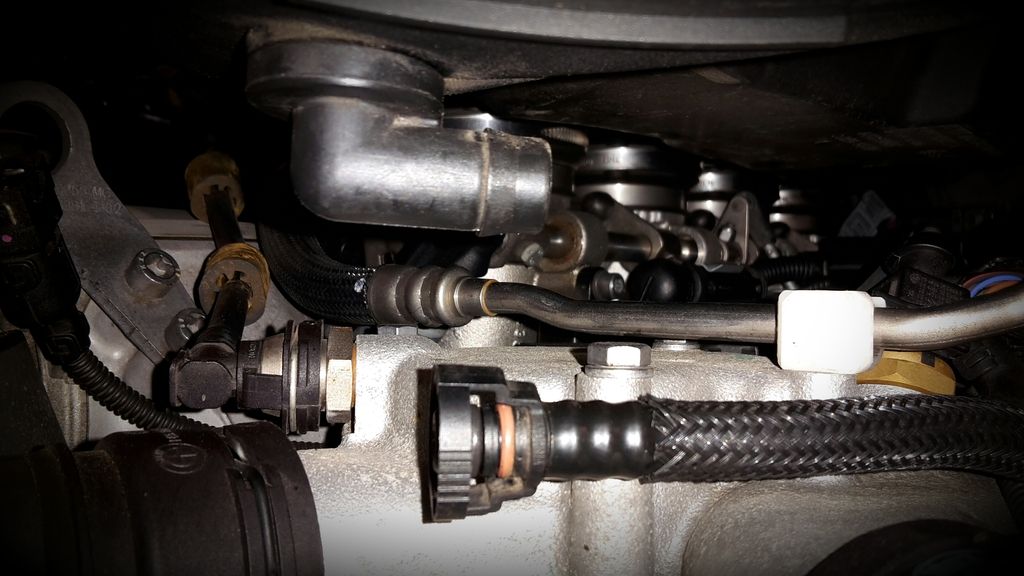
-Remove Idle Control Valve hose from underneath the rear driver corner of the plenum by squeezing with thumb and forefinger and pulling downward.
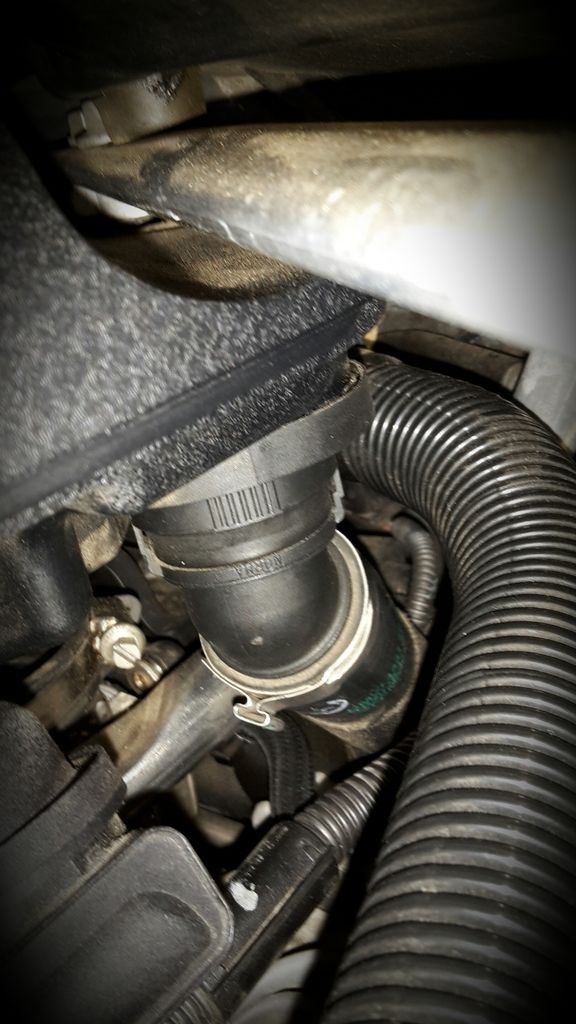
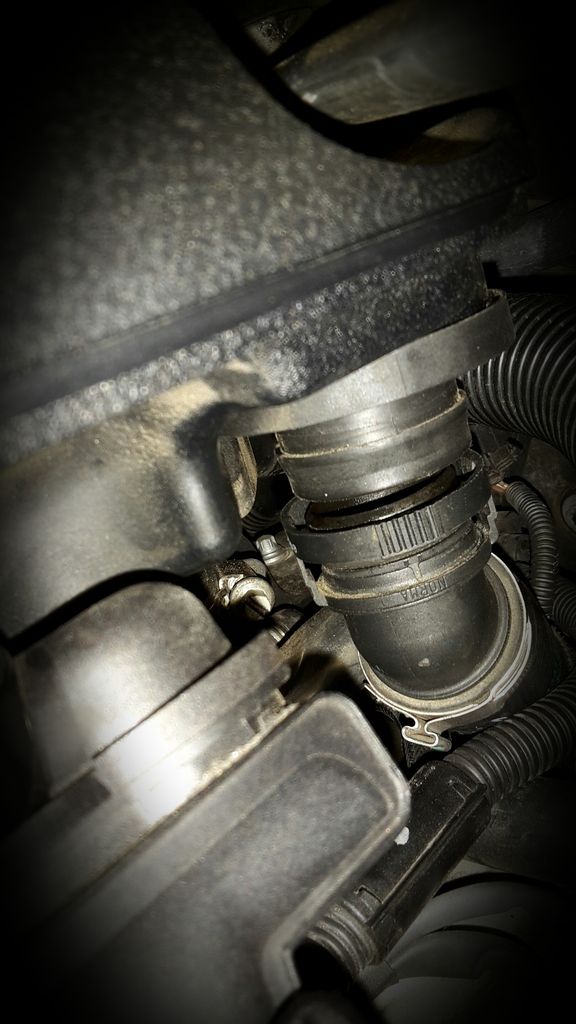
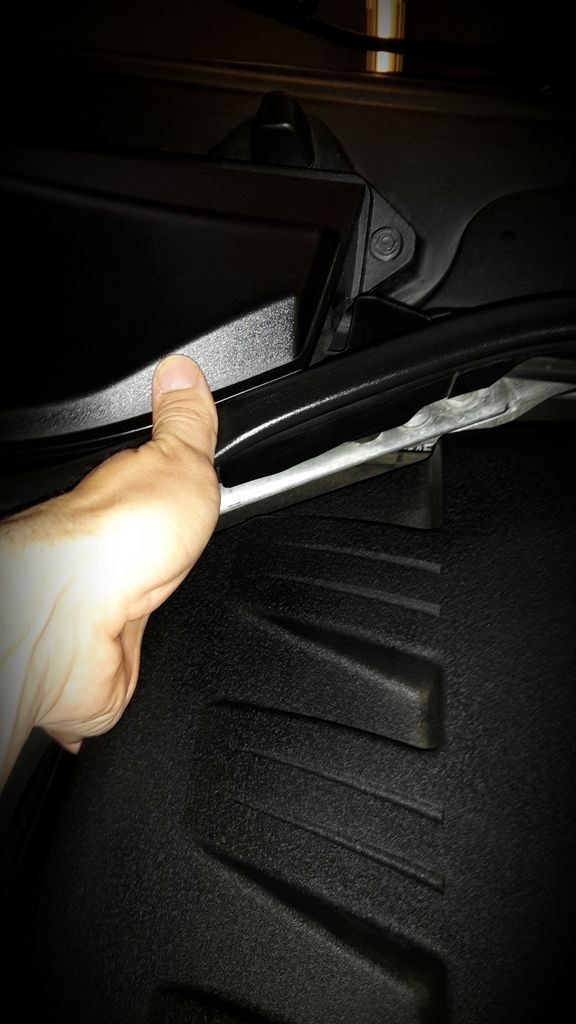
-The plenum can now be removed from the vehicle. Pull straight up and set aside (photo below for reference of what the underside of the plenum looks like if you have never seen it)
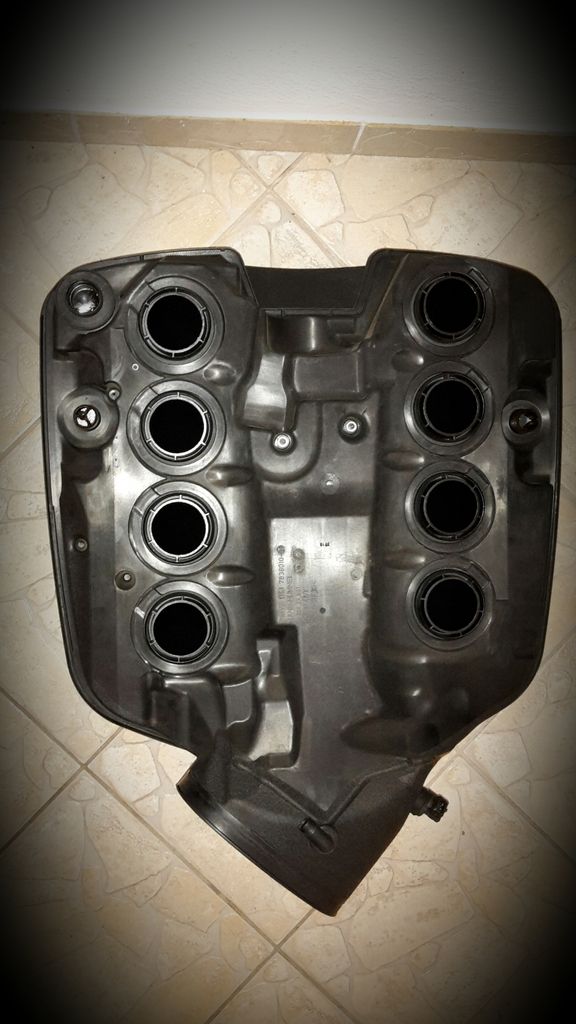
Step three: Remove Fuel Tank Breather Valve
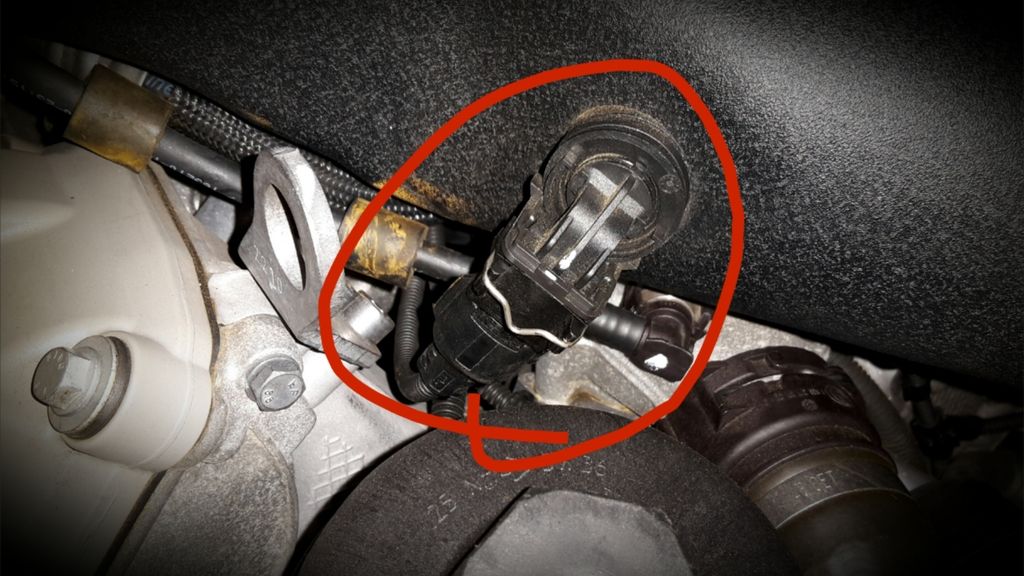
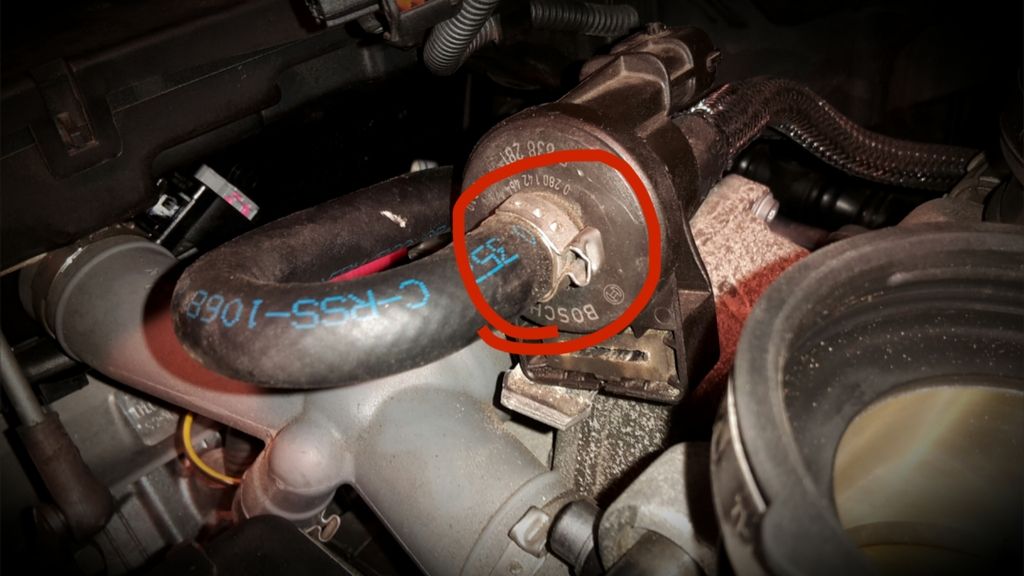
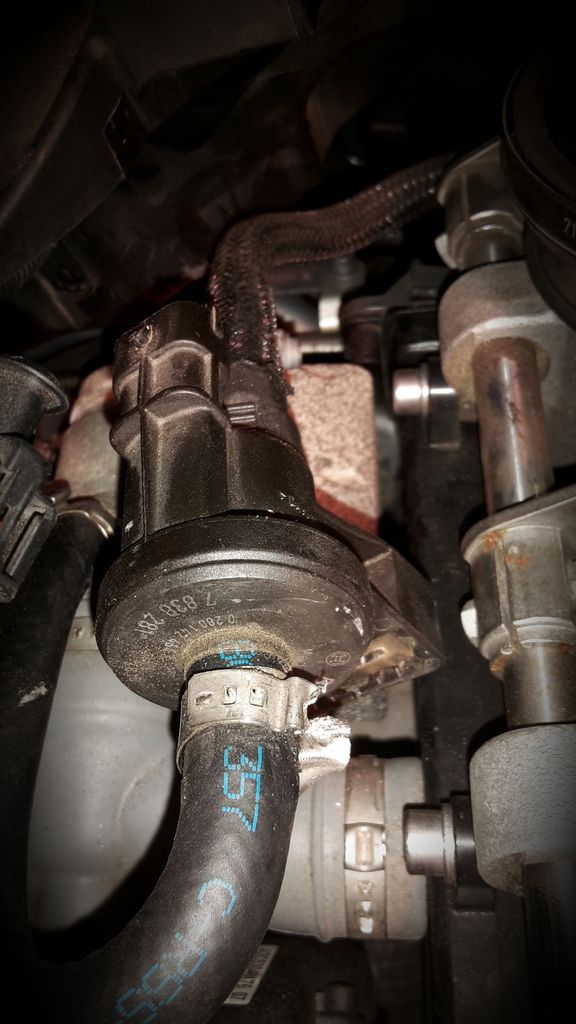
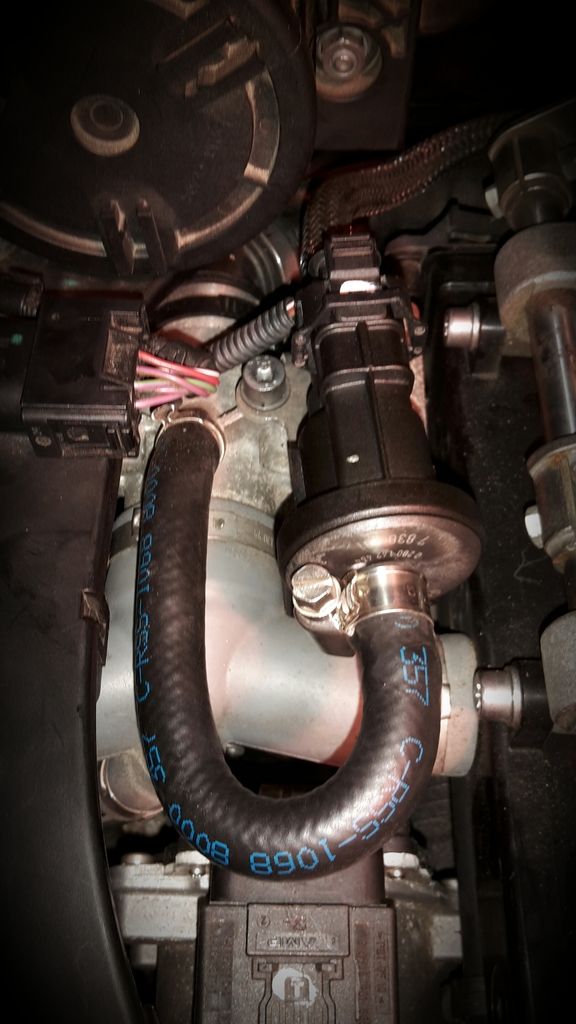
-At this point you should be able to reach the valve. You can see it in the below photos (just to the left of the #7 throttle body in front of the Secondary Air Pump)
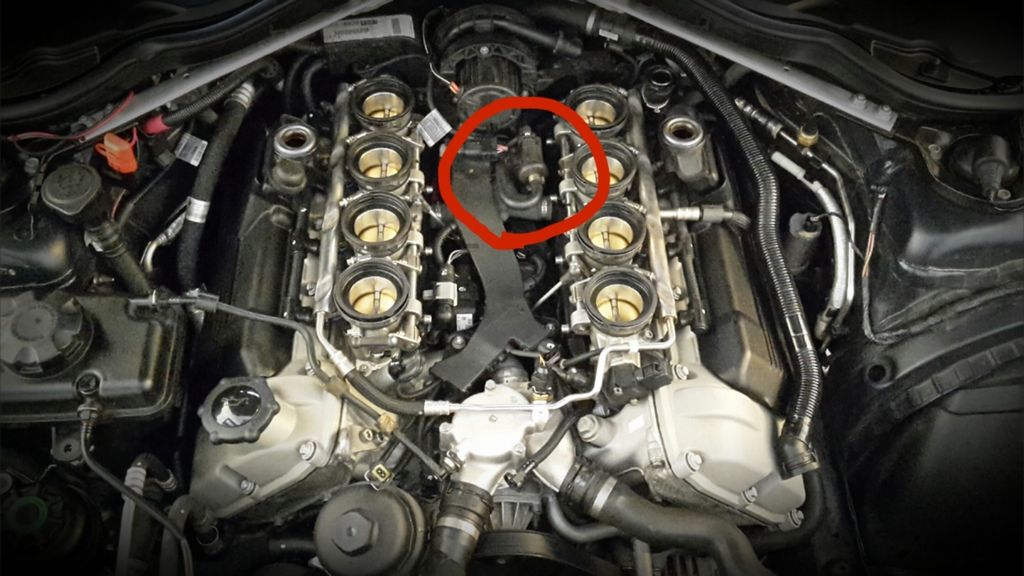
-The valve is held in place by a bracket, and is connected to the engine via a rubber hose with a stepless clamp at the front, and an electrical connector and another hose with a quick connect fitting on the back.
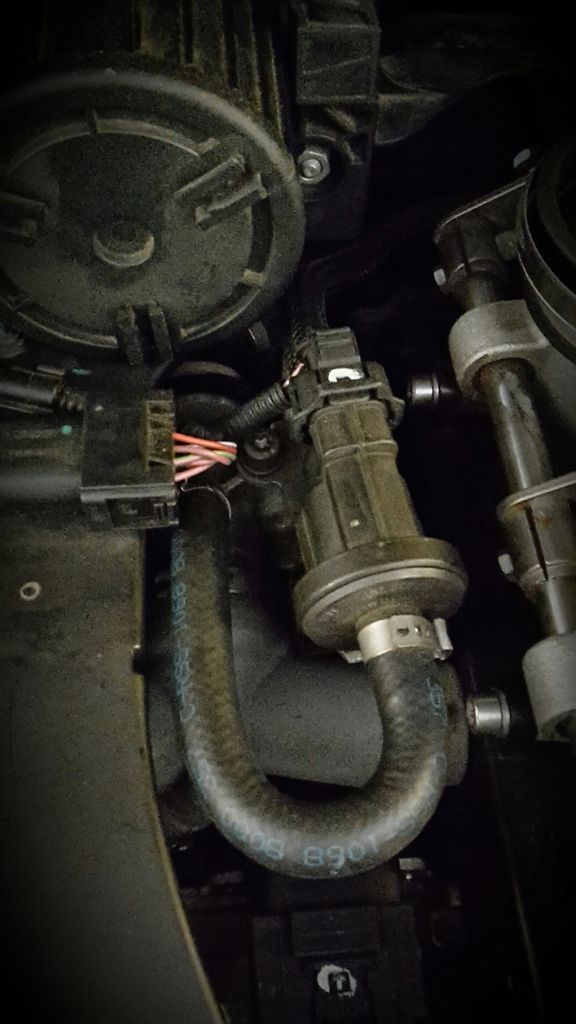
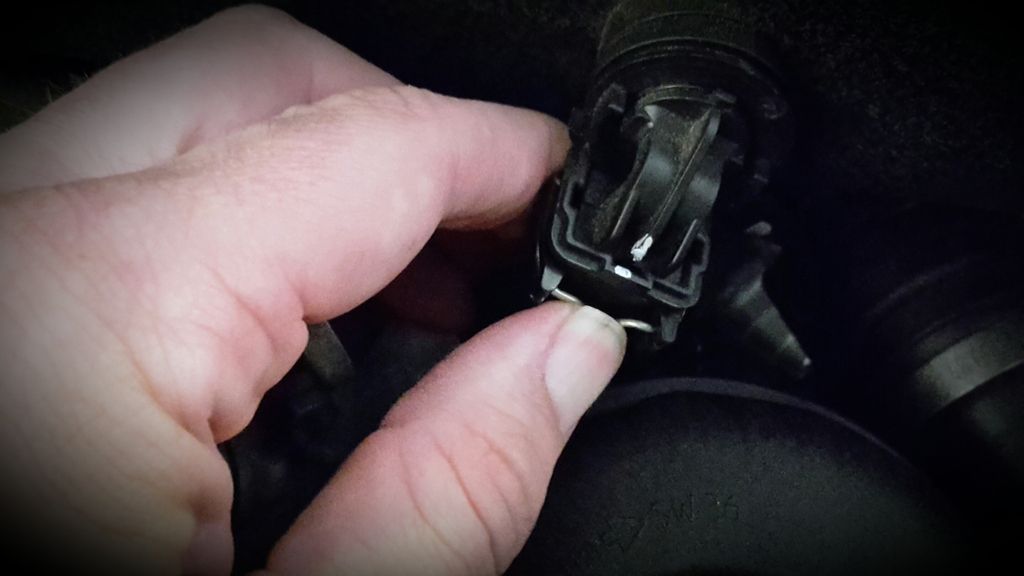
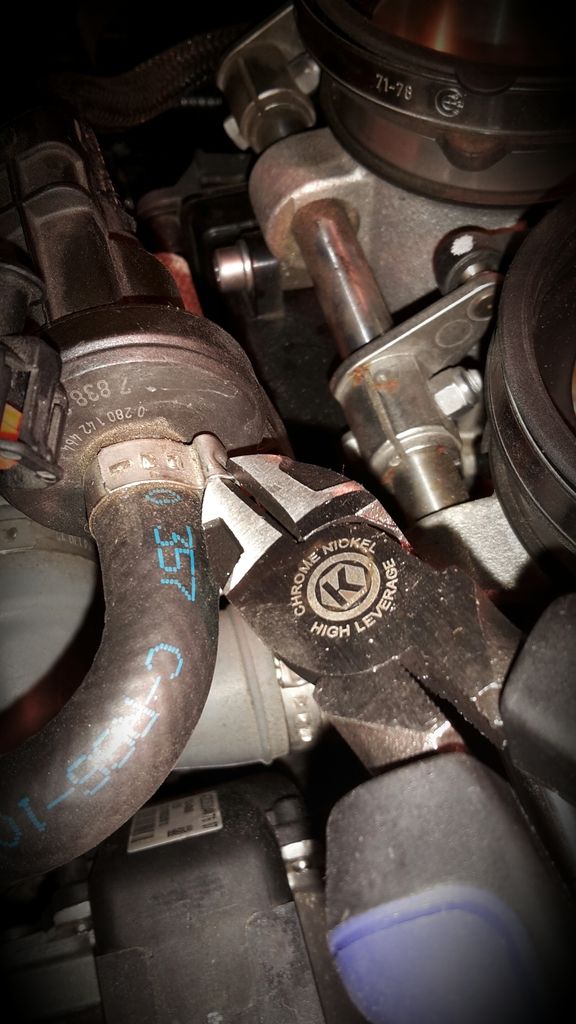
-The first thing you need to do is remove the stepless clamp from the front of the valve. These clamps are one time use, and must be removed by cutting it in half at the "ear". Grab a pair of tin shears or pliers with a cutting ability (like in the photo) and cut the clamp in half as shown. Do not attempt to remove the hose from the valve yet
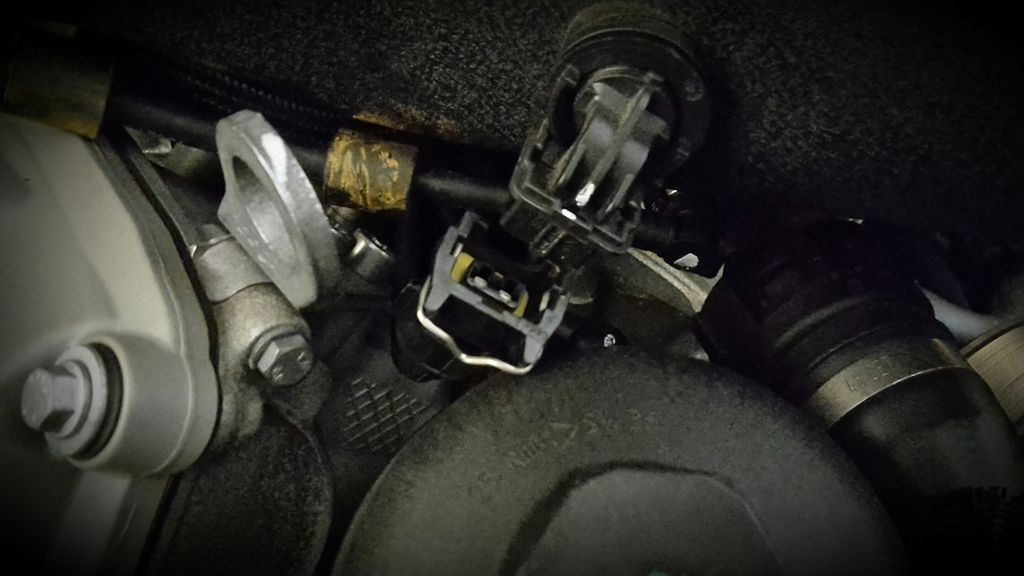
-Unplug the electrical connector from the rear by pressing down gently on the clip and pulling back toward the rear of the car.
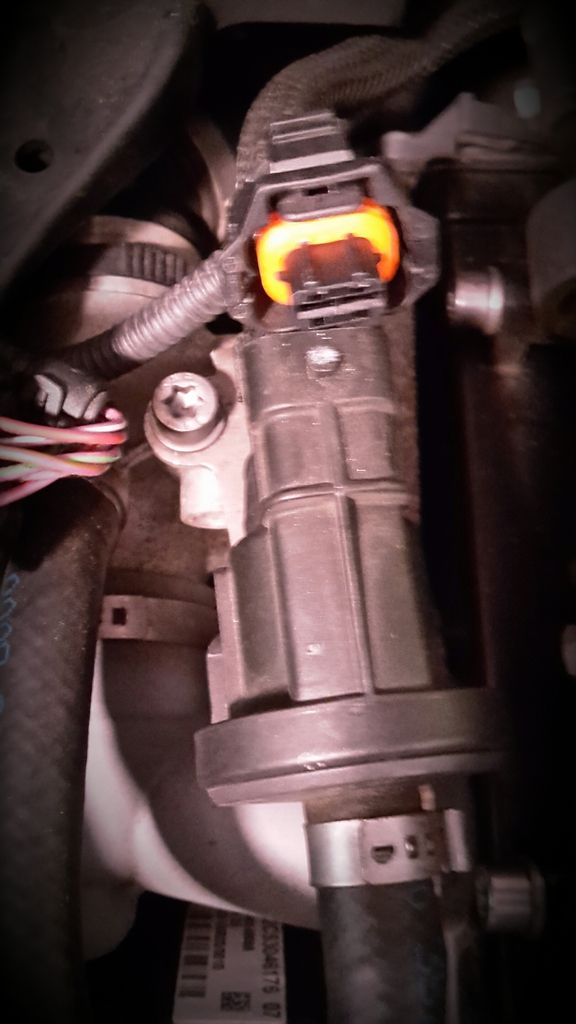
-Unplug the rear hose by pressing in on both sides of the quick connector and pulling back toward the rear of the car. This hose is difficult to remove, but pushing in toward the valve before you press the two sides and pull it off may help in the removal.
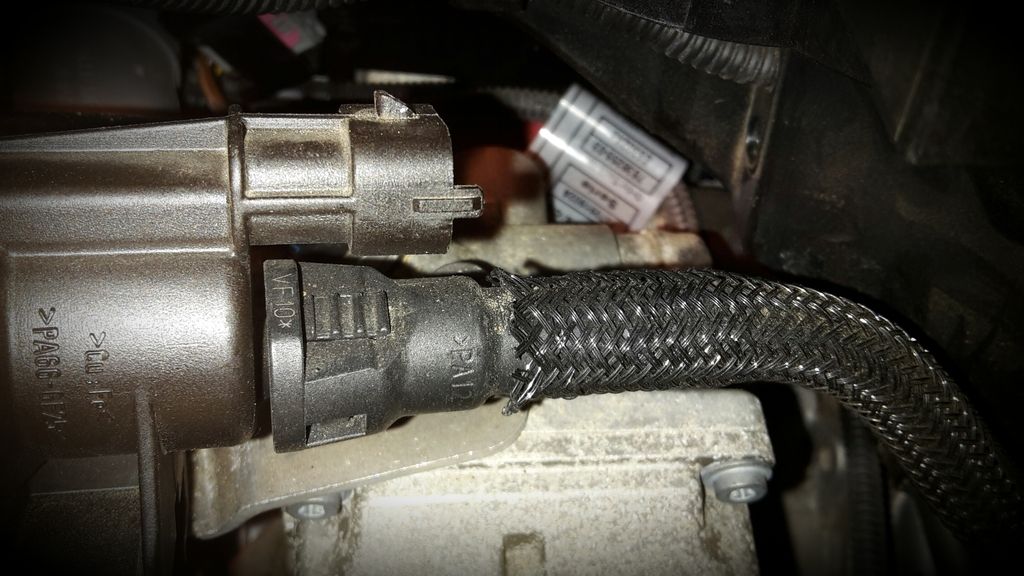
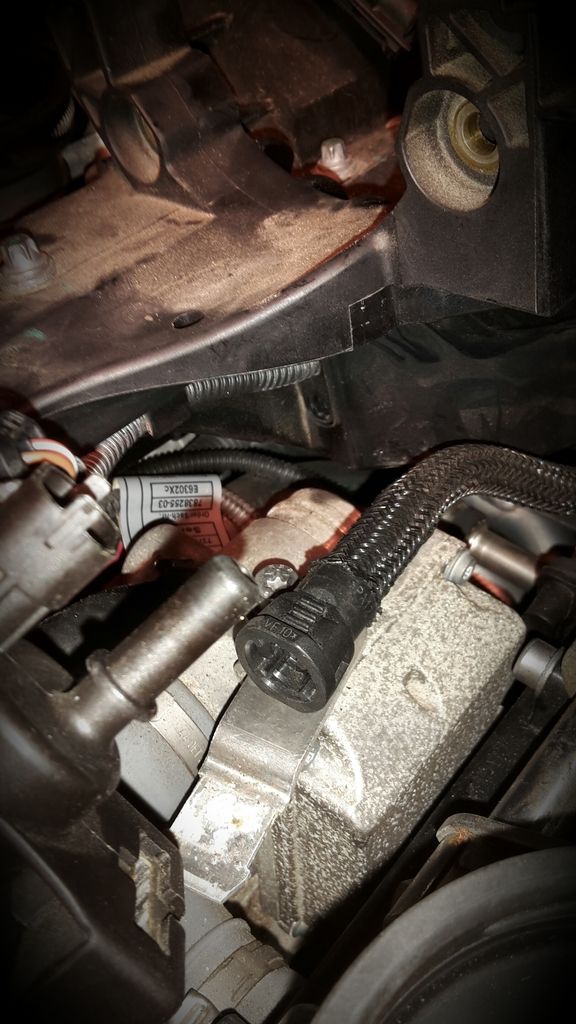
-Once the above is done, you can pull the valve off the bracket by wiggling it toward the front of the car. Next, grab a pair of pliers and with one hand use the pliers to hold the end of the hose where it connects to the valve as shown in the photo. With the other hand, gently turn the valve back and forth and pull the nipple out of the hose to remove it from the car. It will be on there tight, but can easily be removed. Just be patient and don't force it or the nipple could break off the hose and become lodged in the end
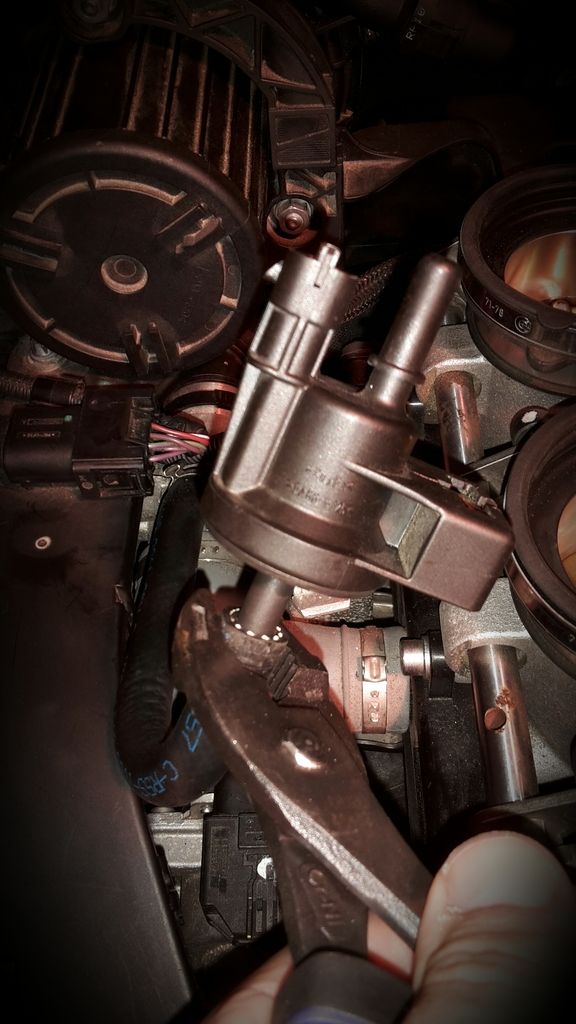
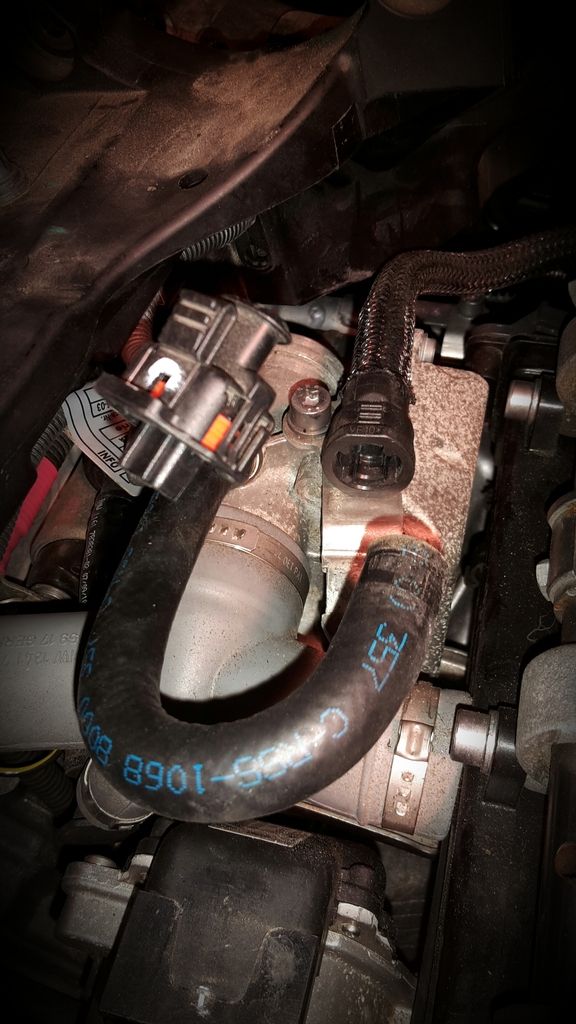
Step four: Install Fuel Tank Breather Valve and put car back together
Congratulations! You're halfway there. Installation is 100% reverse of the removal, so I won't go in depth with it. All that is left is to install the new valve and put the car back together. Once completed, you will have saved yourself roughly $700.
A few notes to help you with the install from this point on:
1. The front hose is held on the original valve with a stepless clamp. These are one time use clamps that require a special tool to install. A regular 6-10mm hose clamp works exactly the same which is what I chose to use for ease of availability and lack of having the right tool for the stepless clamp. However, if you want a 100% OEM install, the clamp can be purchased at your dealership (#16121180240) and the tool should be available at any hardware store.
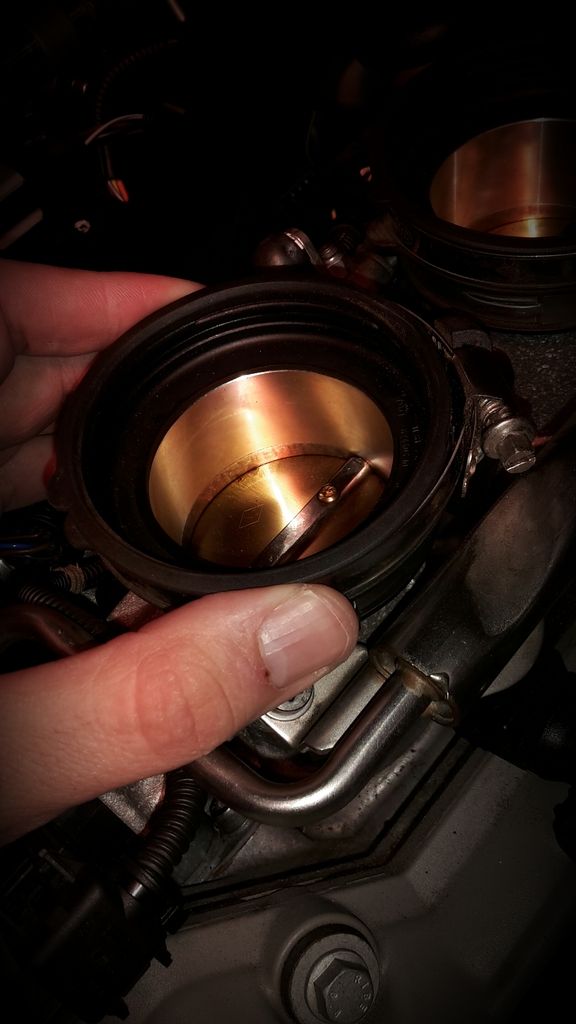
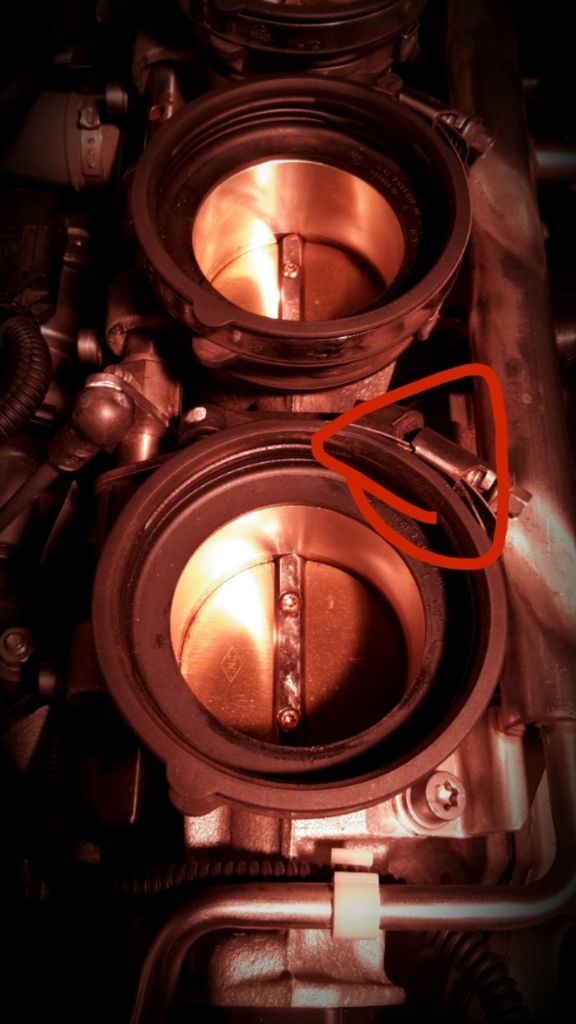
2. Before putting the intake plenum back on, do yourself a favor by pre-tightening and lining up the throttle body clamps. There is a rubber block on the boot that keeps the clamp from moving around when tightening, so ensure that the back of the clamp screw is against this rubber block and oriented as shown in the photo. When pre-tightening the clamps, it is important not to have them so tight that you cannot slide the risers into the boot, but you don't want them so loose that they slide around when you try to tighten them.
3. Don't forget to connect the Idle Control Valve Hose, the Intake Air Temperature sensor connector and the crankcase vent hose to the plenum before tightening the throttle body clamps down. They are much easier to put back on when the plenum is loose so you can move it around if needs be.
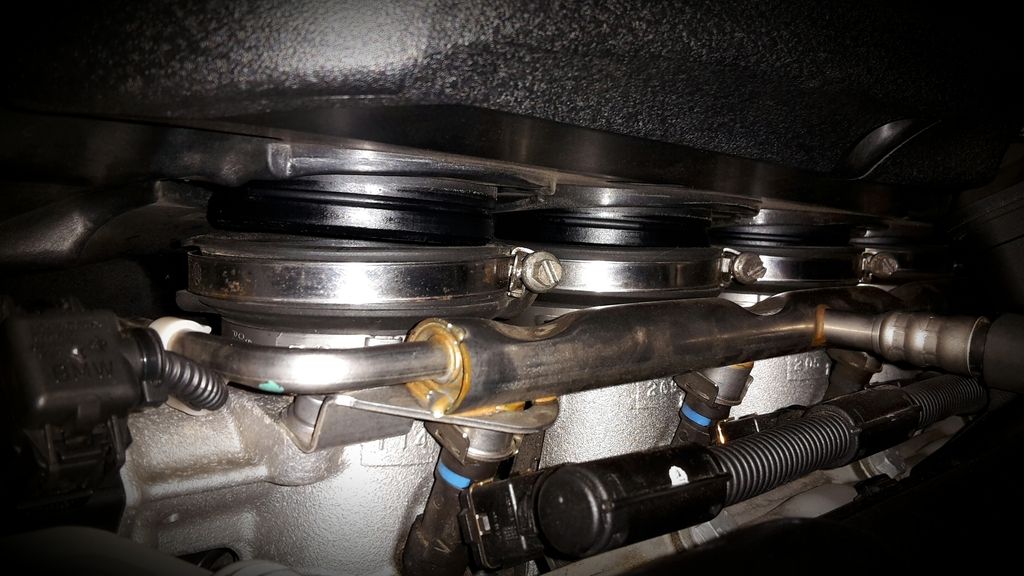
4. When you get the hoses and electrical connector connected and the plenum is sitting on top of the throttle body boots, press down firmly on top of the plenum over each of the throttle bodies. You should feel the risers slide into the boots. Make sure you press down hard on the back as the rear two risers are difficult to get seated properly. You can check if they are inserted or not by looking under the plenum from the side. If they will not slide in, your clamps may be too tight. Loosen them a little and try again.
If any clarification or further explanation is needed feel free to PM me and i will help where I can.
Symptoms: Upon filling your gas tank, when you start the car you may notice a bouncing, loping, or otherwise erratic idle. Many owners have reported the car starting just fine when leaving the gas pumps, and then when stopping at a stop light just outside the gas station, the idle will bounce up and down from 300 RPM's to 1500 RPM's or so, and will sometimes drop so much that the car stalls. I was personally experiencing this once every month. This is a fairly common, yet minor, and therefore often overlooked issue with these cars.
See the below video for a visual of what this issue looks like (this is not my video)
Diagnosis: If you have ever experienced the above after getting gas, there is a high chance the culprit is your fuel tank breather valve, OEM part # 13907838281. This can be purchased from ECSTuning for around $80.00 (link below).
https://www.ecstuning.com/ES35640/
DIY Difficulty: 3.5 (1 = Oil Change, 10 = Motor Swap)
Similar jobs: Throttle actuators, Idle Control Valve/Throttle Strips, Secondary Air Pump
Tools required:
-Socket wrench (recommend 3/8" drive)
-10mm socket
-T20 driver
-Long flat blade screwdriver or 6mm socket on long extension (recommend 1/4" drive)
-Tin snips or pliers with cutting ability
-Pliers
Parts required:
-Fuel Tank Breather Valve (OEM part # 13907838281)
-Hose Clamp (OEM part # 16121180240) Alternately you can use a regular 6-10mm hose clamp
Before we get started, let's go ahead and familiarize ourselves with the engine bay and what needs to be removed. The fuel tank breather valve is located under the intake plenum in the valley between bank 1 and 2 valve covers, and is attached to the Idle Control Valve. The following need to be removed to accomplish this job:
1. Rear suction hood
2. Front suction hood (does not need to be completely removed)
3. Air box
4. Coolant reservoir (does not need to be completely removed)
5. Intake plenum
6. Intake elbow
Step One: Remove factory airbox assembly
-Remove the two bolts marked below from air box with a 10mm socket
-Remove the two torx screws marked below from the front suction hood with a T20 torx driver (do not remove the hood, just the screws)
-Loosen two clamps on either end of intake elbow with a flat head screwdriver and unclip Secondary Air Pump hose by squeezing with thumb and forefinger and pulling away
-Pull intake elbow off of intake plenum by grasping firmly with both hands, and pulling toward you
-Pull intake elbow off of air box by grasping firmly with both hands, and pushing away from you
-Remove rear suction hood by first pulling it toward the intake plenum, then toward the passenger side
-Remove air box by lifting straight up and out of the engine bay
Step two: Remove intake plenum
-Unclip Intake Air Temperature sensor (located on passenger side of intake plenum inlet) by pressing metal bar down and pulling gently downward
-Using a 10mm socket, remove two bolts (circled) from coolant reservoir. The coolant reservoir does not need to be removed, but once loose, it will need to be lifted up and out of the way to reach the passenger side throttle body clamps
-Using a long flat blade screw driver or a 6mm socket on a long extension (1/4" drive recommended) loosen the 8 clamps holding the intake plenum to the individual throttle bodies. The front three on the driver side are easy. The driver side rear is a little more difficult (see photo for best angle of approach). Once the coolant reservoir is loosened and lifted out of the way as in the previous step, the passenger side front 3 clamps can be access fairly easily. The passenger side rear clamp is the most difficult and is done 80% by feel (see photo for best angle of approach). A 6mm socket will work much easier on this step, though a screwdriver can be used.
-Once all clamps are loosened, lift up on the front of the plenum and the front 6 risers will pop out of the throttle body housings. Finally, lift up on each back corner of the plenum to pop the rear risers out. At this point, the plenum is loose from the engine, but cannot be removed just yet.
-Remove crankcase ventilation hose from underneath the front inlet of the plenum by squeezing with thumb and forefinger and pulling off of nipple.
-Remove Idle Control Valve hose from underneath the rear driver corner of the plenum by squeezing with thumb and forefinger and pulling downward.
-The plenum can now be removed from the vehicle. Pull straight up and set aside (photo below for reference of what the underside of the plenum looks like if you have never seen it)
Step three: Remove Fuel Tank Breather Valve
-At this point you should be able to reach the valve. You can see it in the below photos (just to the left of the #7 throttle body in front of the Secondary Air Pump)
-The valve is held in place by a bracket, and is connected to the engine via a rubber hose with a stepless clamp at the front, and an electrical connector and another hose with a quick connect fitting on the back.
-The first thing you need to do is remove the stepless clamp from the front of the valve. These clamps are one time use, and must be removed by cutting it in half at the "ear". Grab a pair of tin shears or pliers with a cutting ability (like in the photo) and cut the clamp in half as shown. Do not attempt to remove the hose from the valve yet
-Unplug the electrical connector from the rear by pressing down gently on the clip and pulling back toward the rear of the car.
-Unplug the rear hose by pressing in on both sides of the quick connector and pulling back toward the rear of the car. This hose is difficult to remove, but pushing in toward the valve before you press the two sides and pull it off may help in the removal.
-Once the above is done, you can pull the valve off the bracket by wiggling it toward the front of the car. Next, grab a pair of pliers and with one hand use the pliers to hold the end of the hose where it connects to the valve as shown in the photo. With the other hand, gently turn the valve back and forth and pull the nipple out of the hose to remove it from the car. It will be on there tight, but can easily be removed. Just be patient and don't force it or the nipple could break off the hose and become lodged in the end
Step four: Install Fuel Tank Breather Valve and put car back together
Congratulations! You're halfway there. Installation is 100% reverse of the removal, so I won't go in depth with it. All that is left is to install the new valve and put the car back together. Once completed, you will have saved yourself roughly $700.
A few notes to help you with the install from this point on:
1. The front hose is held on the original valve with a stepless clamp. These are one time use clamps that require a special tool to install. A regular 6-10mm hose clamp works exactly the same which is what I chose to use for ease of availability and lack of having the right tool for the stepless clamp. However, if you want a 100% OEM install, the clamp can be purchased at your dealership (#16121180240) and the tool should be available at any hardware store.
2. Before putting the intake plenum back on, do yourself a favor by pre-tightening and lining up the throttle body clamps. There is a rubber block on the boot that keeps the clamp from moving around when tightening, so ensure that the back of the clamp screw is against this rubber block and oriented as shown in the photo. When pre-tightening the clamps, it is important not to have them so tight that you cannot slide the risers into the boot, but you don't want them so loose that they slide around when you try to tighten them.
3. Don't forget to connect the Idle Control Valve Hose, the Intake Air Temperature sensor connector and the crankcase vent hose to the plenum before tightening the throttle body clamps down. They are much easier to put back on when the plenum is loose so you can move it around if needs be.
4. When you get the hoses and electrical connector connected and the plenum is sitting on top of the throttle body boots, press down firmly on top of the plenum over each of the throttle bodies. You should feel the risers slide into the boots. Make sure you press down hard on the back as the rear two risers are difficult to get seated properly. You can check if they are inserted or not by looking under the plenum from the side. If they will not slide in, your clamps may be too tight. Loosen them a little and try again.
If any clarification or further explanation is needed feel free to PM me and i will help where I can.

